Learn how to configure MSIX app attach (via the Azure Portal) packages containers on Windows 10 Enterprise multi and single-session for Azure Virtual Desktop


4.13.2021 update – MSIX app attach is now available in GA – ready for production workloads. Read more about the announcement here.
“It’s a game-changer”, that’s how most people react after they learned about Microsoft’s new application delivery solution; MSIX app attach. It’s different and disruptive from how we do application delivery today on traditional VDI/RDS infrastructures.
With the newly released Windows 10 Enterprise single and-multi-session build 2004 version, we added the MSIX APIs into the OS that makes it possible to use MSIX app attach (App Attach via the Azure Portal is now available in preview!) – steps are explained in this article). It’s now easier than ever before to test this new revolutionary app delivery service. Read more below.
Windows applications, or also known as win32 apps are what the vast majority is using on a virtual desktop environment. The update and management process of an image is mostly happening because of either updating the OS or the installation or update request from the application vendor.
Think in a new direction of doing application updates on—without creating new images—or updating existing images while removing all the users—reboot the session hosts and log the sessions back on. Sound disruptive and cool, right? Please read the rest because MSIX app attach makes this possible 🙂
In this article, I’ll learn you what the benefits of MSIX app attach are and how you can virtualize applications with MSIX app attach to use them in your Azure Virtual Desktop environment
Table of Contents
Click on the title to jump to that spot in this article:
- What is MSIX app attach
- What are your most important Workspace/EUC initiatives for 2020/2021?
- Windows 10 Enterprise single and multi-session build 2004 has been released
- Convert App-V packages to MSIX format
- MSIX app attach via the Azure Portal
- RD Agent process – no more PowerShell needed!
- PowerShell modules to automate the process in the Azure Portal
- MSIX app attach performance
- Free Community e-book on MSIX Fundamentals
- E2EVC session recording – Microsoft MSIX app attach – Get To Know everything about It
- How does the process work
- Prepare your custom image
- New! Configure MSIX app attach via the Azure Portal – the process
- Use Citrix or VMware? Create – and assign the app attach container (VHD) – via AppVentiX (community tool)
- Desktops in the Cloud Episode episode 5: Experience MSIX app attach integration in the Azure Portal with Stefan Georgiev, AVD PM
- Questions? Please visit the official MSIX app attach FAQ
What is MSIX app attach
MSIX (without app attaches) is a Windows app package format that provides a modern packaging experience to all Win32, UWP, and Windows apps. It’s a new way of doing application virtualization compared to technologies such as App-V.
Adding the app to attach technology makes MSIX more compliant for virtualized desktop environments such as Azure Virtual Desktop. The main challenge within DaaS/VDI around application delivery is around the images and how the apps come into the image. Separating the applications from the image to update and assign applications without doing an image update sounds like the solutions, right? Well, that’s exactly what MSIX app attach can accomplish…
See below the most important benefits:
- Less re-imaging
- Same package format across your entire organization
- No repackaging needed, most likely ISVs will provide packages to customers
- Applications are indistinguishable from app in the OS image
How does the process works?
- AVD Administrator configures and assigns MSIX packages via the new Azure Portal integration
- First, the user authenticates and obtains AVD feed
- Broker connection to VM in host pool happens on the AVD service level
- Load FSLogix user-profiles containers
- Read apps assigned to the user
- Registers applications to the session host e.g. Windows 10 Enterprise

What are your most important Workspace/EUC initiatives for 2020/2021?
When we asked the community the question in 2020 what their upcoming EUC/Workspace initiative is. The vast majority responded with Desktop-as-a-Service, followed by MSIX app attach!
“Question: What are your most important Workspace/EUC initiatives for 2020/2021+?”

Windows 10 Enterprise single and multi-session build 2004 has been released
This week, we released the long-awaited build 2004 – or officially known as the Windows 10 May 2020. It’s now possible to update your existing session hosts to this new version. One very important improvement in this OS – as I shared earlier is the addition of the MSIX components to use MSIX app attach for Windows 10 single and multi-session as part of Azure Virtual Desktop. With previous versions of Windows 10, enabling the sideloading policy either through Group Policy or Settings was required to install an MSIX package. With Windows 10, version 2004, you can deploy a signed MSIX package onto a device with no special configuration setting.
Learn more about other new features in the new build here.
Note: Office 365 ProPlus has been renamed to Microsoft 365 Apps for Enterprise.
Convert App-V packages to MSIX format
As said on multiple events, App-V is no longer under active development. Therefore it’s important to know that there are conversion tools available to merge from .appv to .msix packages in a seamless way. Conversion via MSIX Packaging Tool is possible today for App-V 5.x is available now.
Learn in this blog article about how you can convert existing App-V packages into MSIX format. After you’re done with the conversion, you can expand them into VHDs -packages via this procedure here about Expanding package to app attach to VHDx package.
What if I haven’t deployed App-V, what should I do? Start with MSIX for your packaging and deployment!

Now available! MSIX app attach via the Azure Portal
Previously, you had to use PowerShell scripts to enable MSIX app attach. We will be integrating the app attach capability in the Azure portal and Azure Resource Manager. This will eliminate the need for custom scripts and makes it possible to publish your packaged applications to application groups with a few clicks. Learn about all the steps later on in the article.
RD Agent process – no more PowerShell needed!
Since the Public Preview release of MSIX app attach is available in the Azure Portal, it’s also the moment to say goodbye to the manual staging and registration PowerShell scripts that you had to use in the earlier preview. Everything interacts from the Azure Portal against the RDAgent as part of your session host now. See below the process.

PowerShell modules to automate the process in the Azure Portal
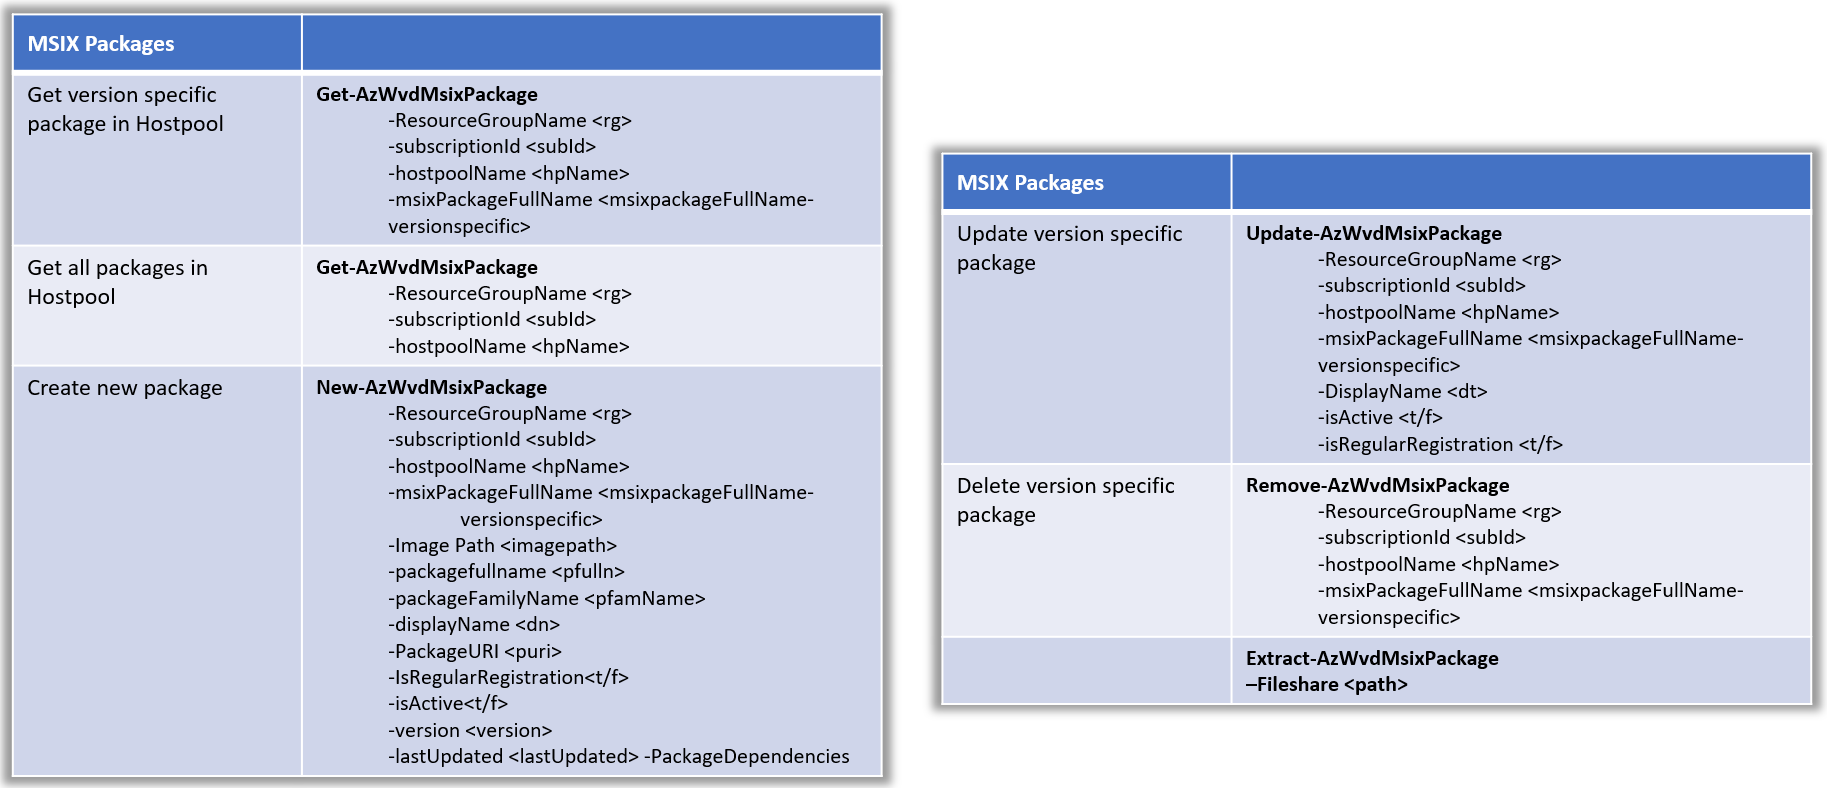
While I just explained that you won’t need PowerShell scripts anymore to do the actual MSIX app publishing/injections, that doesn’t mean you cannot automate the application management process via PowerShell in the Azure Portal – host pool configuration steps. Learn more about the different cmdlets and parameters we support here on Docs.
Download the latest PowerShell module that supports MSIX app attach here: Remove-AzWvdMsixPackage (Az.DesktopVirtualization) | Microsoft Docs and PowerShell Gallery | Az.DesktopVirtualization 2.0.1.
MSIX app attach performance
CimFS performance
.CIM is a new file extension associated with Composite Image Files System (CimFS). Mounting and unmounting CIM files is faster that VHD files. CIM also consumes less CPU and memory than VHD. The expected storage consumption for MSIX app attach is around 1 IOPs per application in an idle state and 10 IOPs during the initial load of the application itself. Off course, the load varies on the type of application, too. Most of the profile relates storage IO will flow (seperate) into the FSLogix Profile Container. Read more about it here on Microsoft Docs.


Free Community e-book on MSIX Fundamentals
Most of the people within the EUC communities know Tim Managan as one well-respected Microsoft MVP in the AppVirt industry, with his background in App-V as one of their Engineering leads. Tim recently released together with Bogdan and Kevin a free ebook on MSIX fundamentals that I really encourage you to read in extension to this article. Grab it below.
Download link: MSIX-Packaging-Fundamentals-free-ebook.pdf (advancedinstaller.com)

How does the process work?
Your images consists of 3 main components that are key for implementing a desktop virtualization environment, the operating system, applications, and user-defined data (windows profile). The logon process works via the Microsoft FSLogix Profile Container process – block-based via a filter driver, separate from the OS.
The MSIX app attach process works similar, however, it uses symbolic links instead for the folder mounting process.
All the steps are happening in just milliseconds.

E2EVC session recording – Microsoft MSIX app attach – Get To Know everything about It
Learn more about the basics of Application Delivery within Azure Virtual Desktop as well as all the fundamentals around MSIX and MSIX app attach here in one of my latest session at the Experts 2 Experts (E2E) Virtualization Conference in late 2020.
Requirements
- Azure Virtual Desktop deployment
- Windows 10 single or multi-session (at least build 2004 or the past 19041 Insiders preview release.
- Network share (e.g. Azure Files or Azure NetApp Files)
- Before you get started, make sure to fill out and submit this form to whitelist MSIX app attach in your Azure subscription.
- Your host pool – session host(s) – should be active in the validation environment
- The session host VMs that are part of the AVD host pool must have (at least) NTFS read permissions to the share
- MSIX packaging tool
- MSIX Mgr tool
- An internal or external certificate with CN=orgname as required for the MSIX package
Note: Make sure to disable Auto-update as the MSIX app attach containers will be read-only.
Prepare your custom image
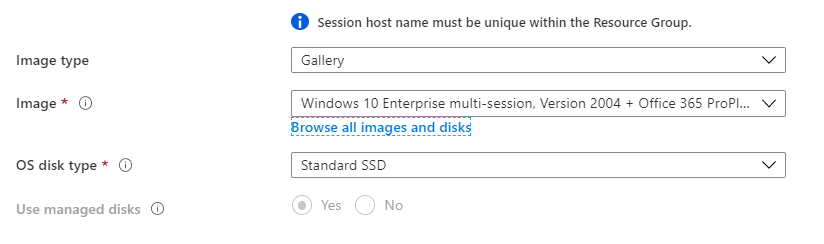
Run the following commands on the custom (Windows 10 Enterprise single or multi-session) image.
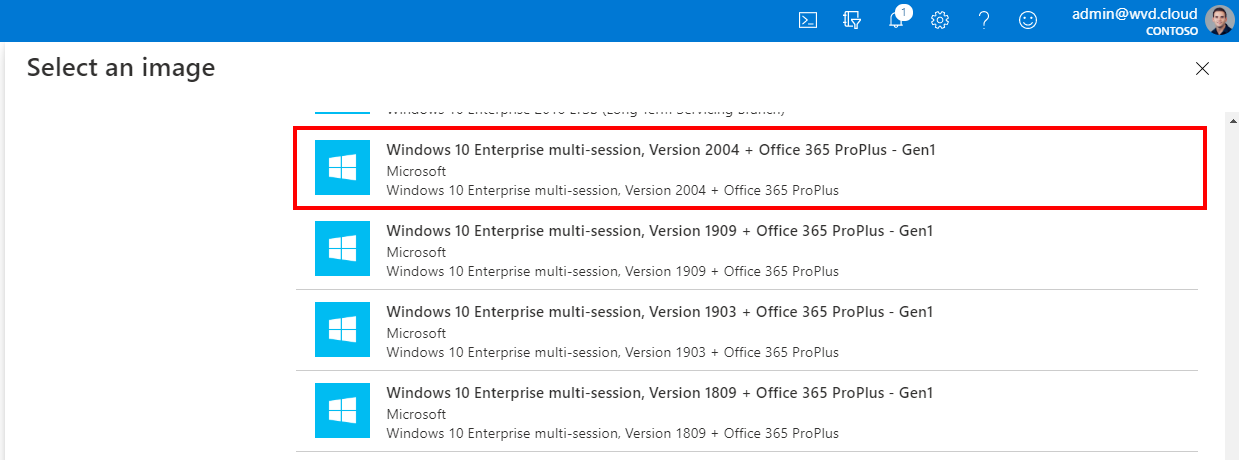
Make sure to use at least the new released build 2004 or the past 19041 Insiders preview release. It’s now available in the Azure portal!
Looking for other information on Azure custom images with Azure Virtual Desktop, please use one of my previous articles to follow up. You can also use this customer image in conjunction with the Azure shared image gallery (SIG) and make it easy to enrol this image to multiple session hosts (as part of your host pool) at the same time – the same for advanced image management capabilities.
Note: Office 365 ProPlus has been renamed to Microsoft 365 Apps for Enterprise.
Perform the following command on the image
reg add HKLM\Software\Policies\Microsoft\WindowsStore /v AutoDownload /t REG_DWORD /d 0 /f

Schtasks /Change /Tn "\Microsoft\Windows\WindowsUpdate\Scheduled Start" /Disable

reg add HKCU\Software\Microsoft\Windows\CurrentVersion\ContentDeliveryManager /v PreInstalledAppsEnabled /t REG_DWORD /d 0 /f

reg add HKLM\SOFTWARE\Microsoft\Windows\CurrentVersion\ContentDeliveryManager\Debug /v ContentDeliveryAllowedOverride /t REG_DWORD /d 0x2 /f
Package an MSIX application – (e.g. Notepad++)
You can run the following steps from inside the custom image or on a separate machine for the sake of packaging with the same Windows 10 Enterprise build installed…
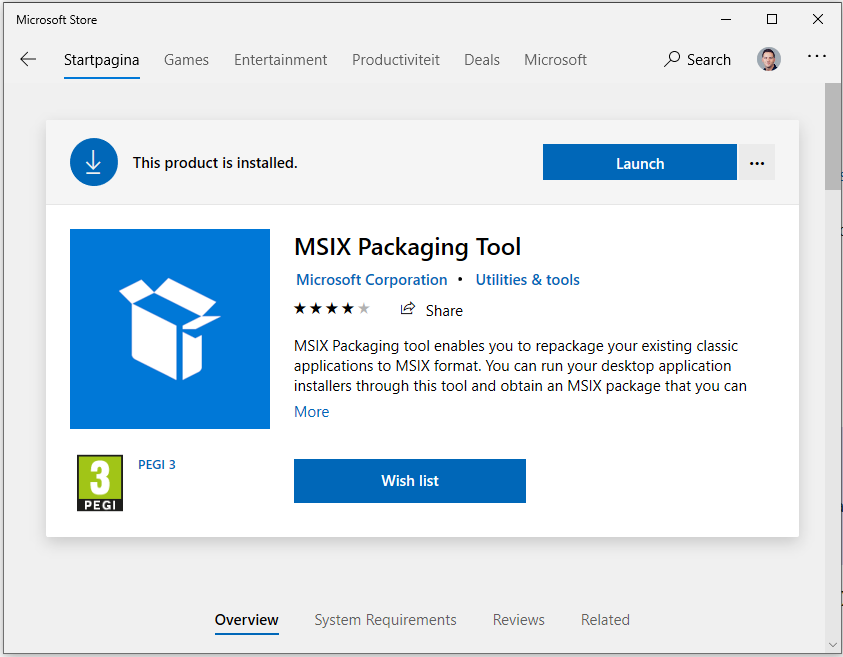
Search for the MSIX Packaging Tool in the Microsoft Store and install it to your Windows 10 virtual machine.
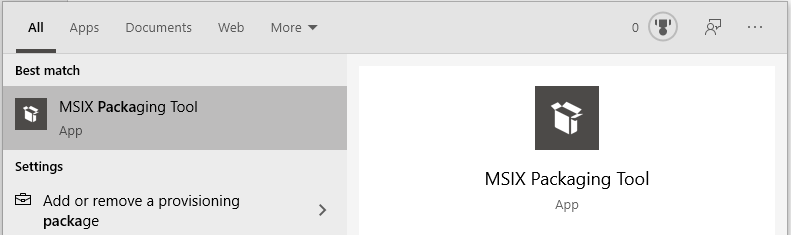
Start the Packing tool
Click on Create your app package

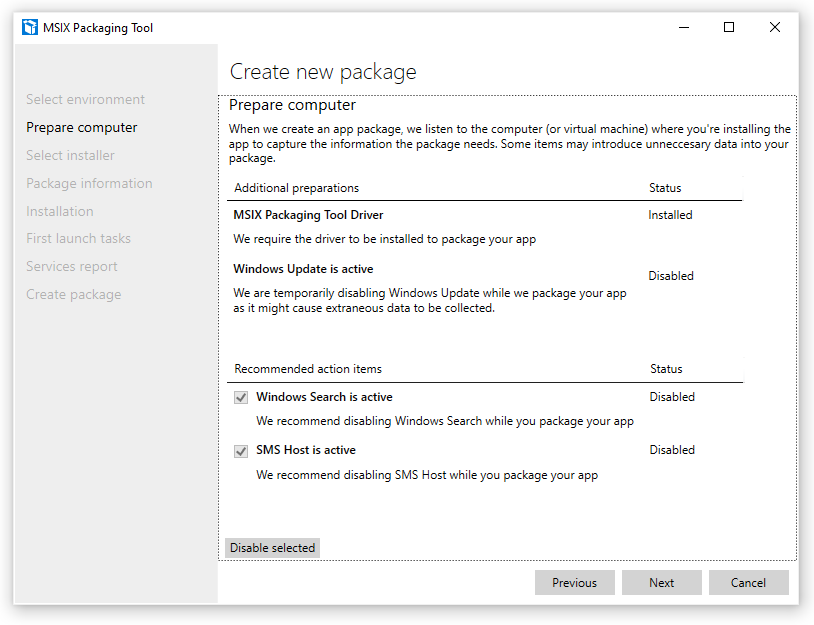
Click Create package on this computer

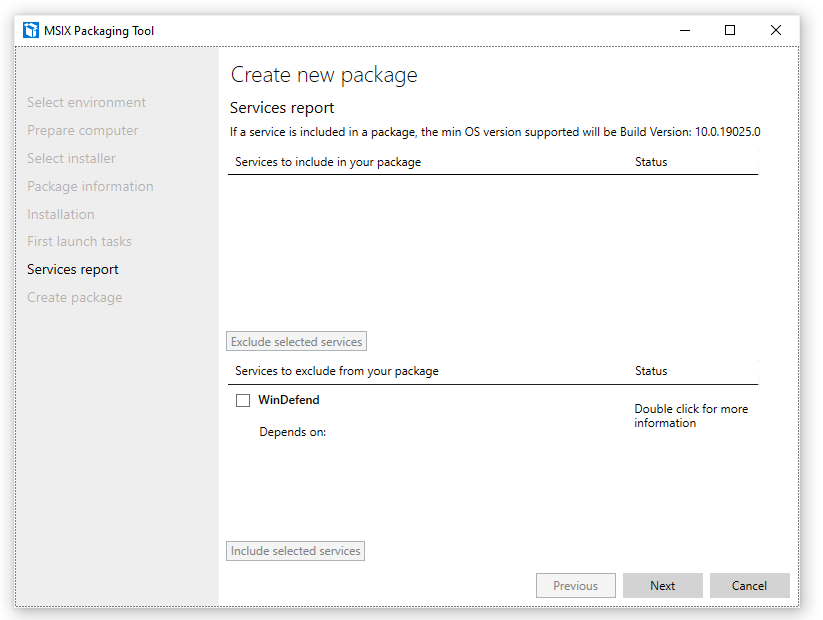
Make sure the status is the same on your image/session host as in the screenshot for the different action items.
Click on Next
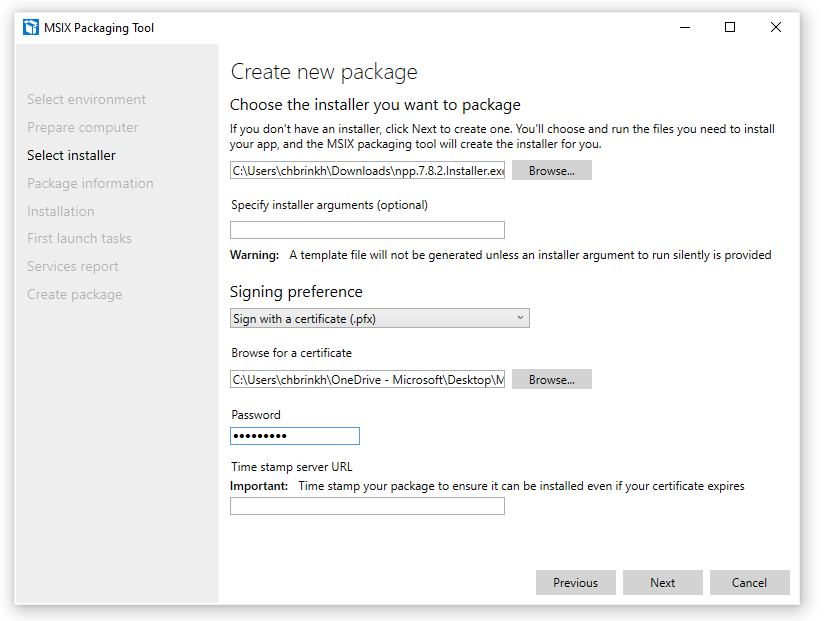
Browse for the application installer. This could be any of your win32 applications. I’ll use Notepad++ for the exercise.
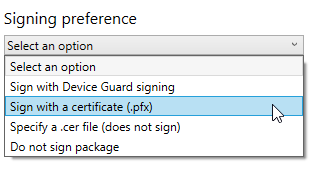
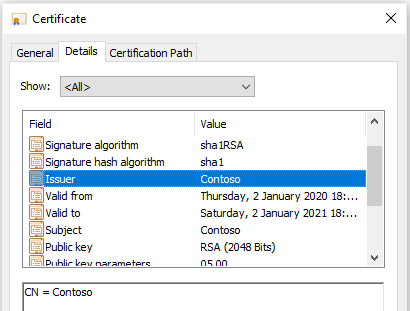
Assign your certificate with the right CN (common name – e.g. Contoso) that we need later. This could be a self-signed certificate as well (for PoC – testing purposes).
Note: Make sure the CN=Contoso (organization name) is correct on the certificate as well as in the package configuration.
Self-signed certificate (optional)
See below how you can create a self-signed certificate for your demo/lab environment instead.
New-SelfSignedCertificate -Type Custom -Subject "CN=Contoso" -KeyUsage DigitalSignature -KeyAlgorithm RSA -KeyLength 2048 -CertStoreLocation "cert:\LocalMachine\My"

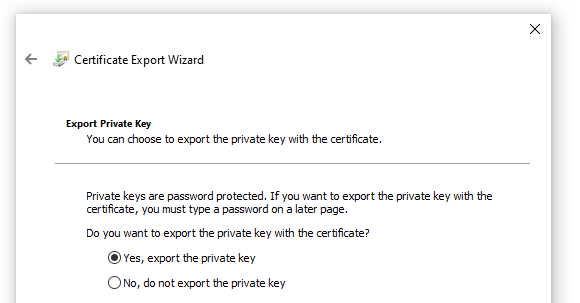
Export the self-signed certificate into a .pfx file with privatekey and use it in the “Signing preference” menu.
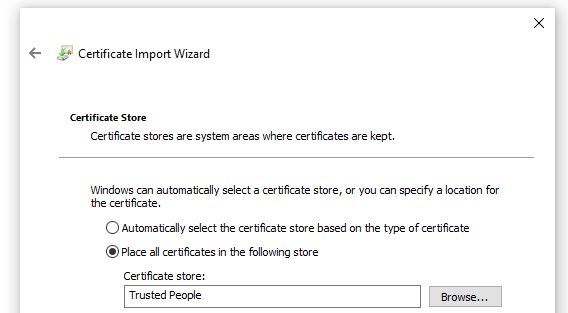
Export the self-signed into the Trusted People LocalMachine store.
The CN must look like this…
Click on Next
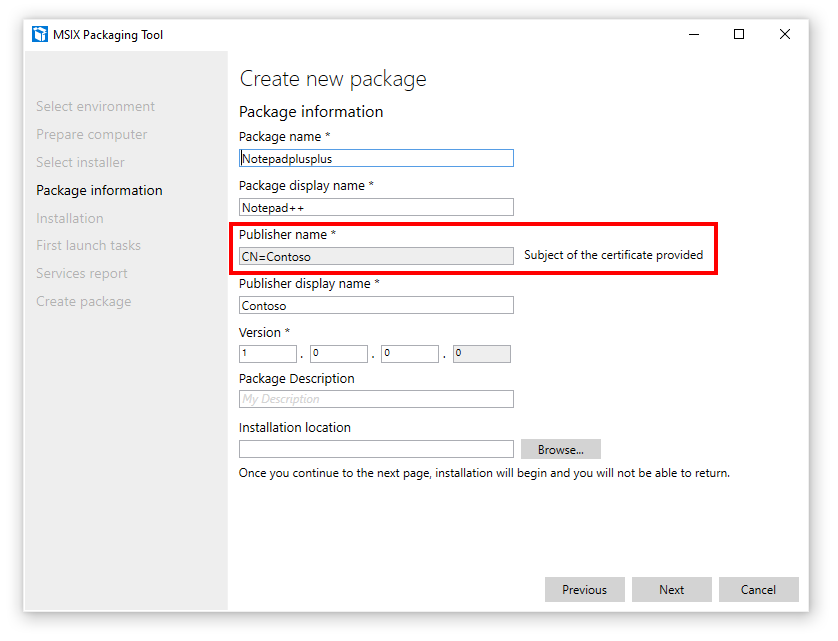
Enter in the application-specific requirements. The Publisher’s name is the certificate CN (common name – e.g. Contoso) name of the organization. Make sure the certificate is injected in your image, otherwise the application cannot register and will fail.
Note: If the CN is detected correctly, you’ll see the “subject of the certificate provided” notification. The certificate could be self-signed, public or internally created via a RootCA. It’s important that the private key and CN are matching later in the
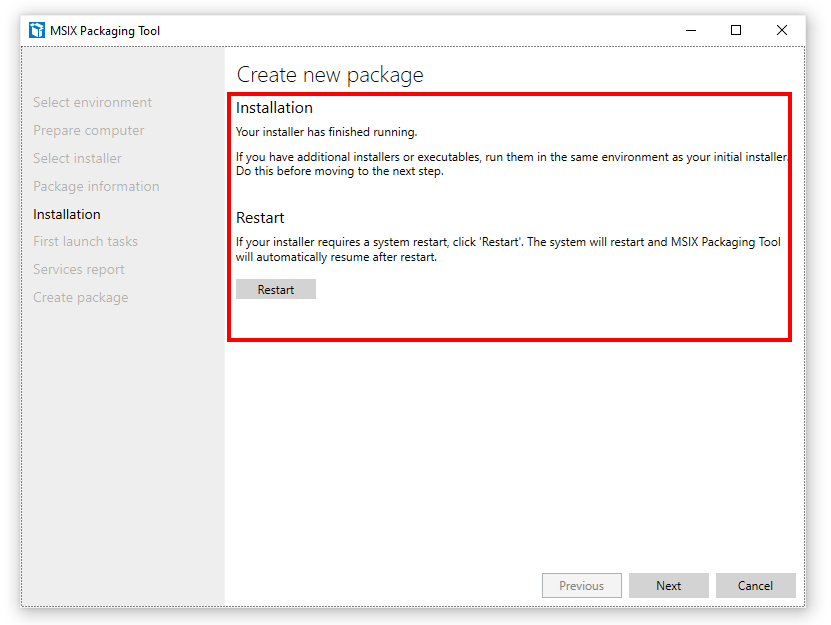
Click on Next
Run through the installation process of your application
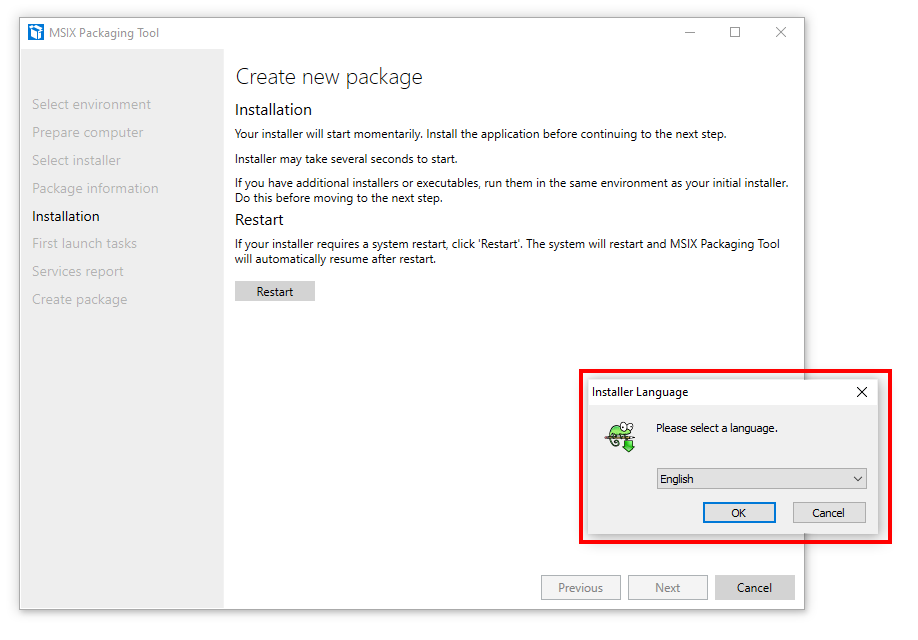
For me, that will be Notepad++
Make sure to disable Auto-update as the MSIX app attach containers will be read-only.
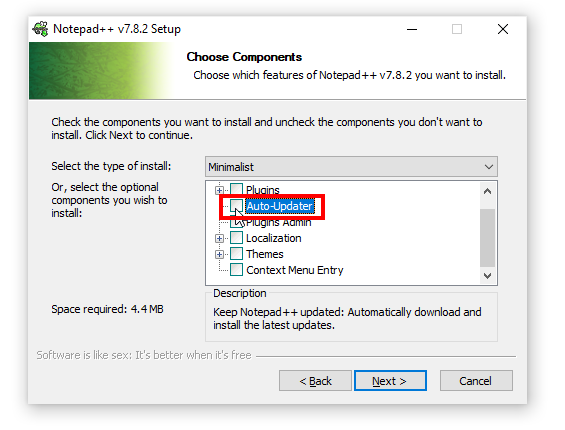
Start the application to make sure everything installed correctly.
If the application installed correctly, you see the screen below. Make sure to reboot your machine if required before I move to the next step.
Create the MSIX package
We are almost ready.
Click on Next
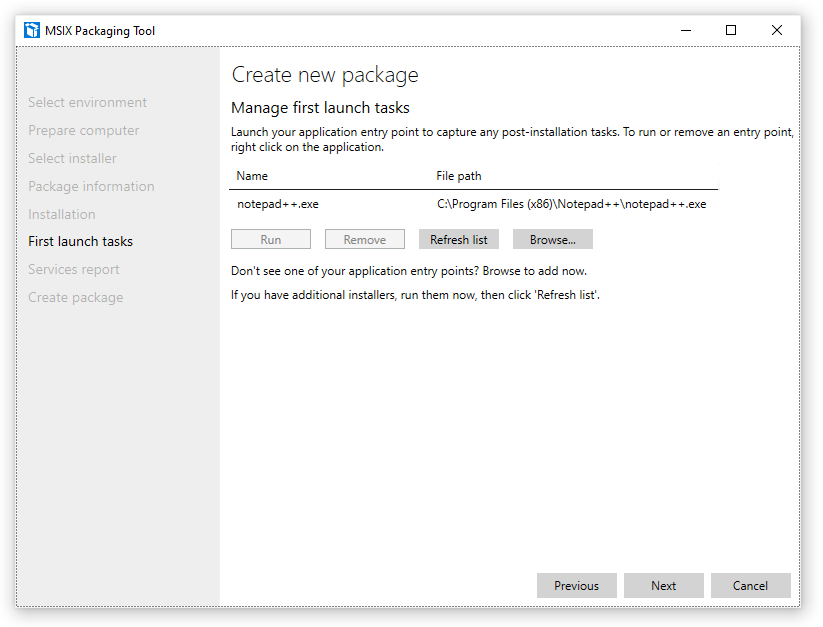
Note: When you want to package extra plugins or extra other applications in the same MSIX package, please click on “No, I’m not done”.
I’m done, so I click on Yes, move on

Click on Next
Save the .MSIX package file somewhere on your computer or network.
Click on Create
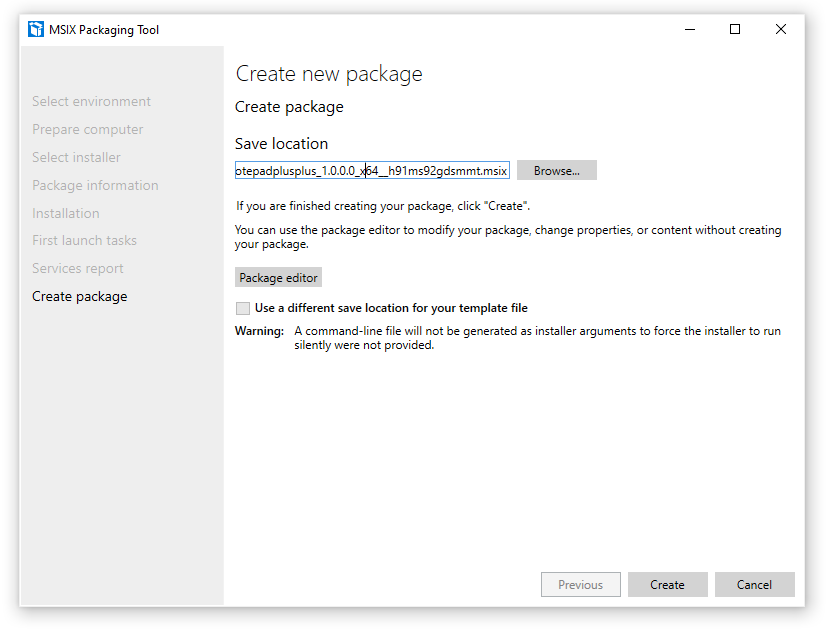
The package is ready for the next step.
Note: When you want to edit things in the package, please click on Package editor.

Expanding package to app attach package – manual
We must expand the .MSIX package file to a VHD(x) to make it ready for mounting/staging. Perform the following steps to do that. You can run those steps from the master image.
Download and install the MSIX mgr tool – this will import the MSIX commands to perform the next steps
Unpack the .zip file to e.g. C:\MSIXappattach

Copy/move the .MSIX package file also in that location

Create the app attach container (VHD) – manual
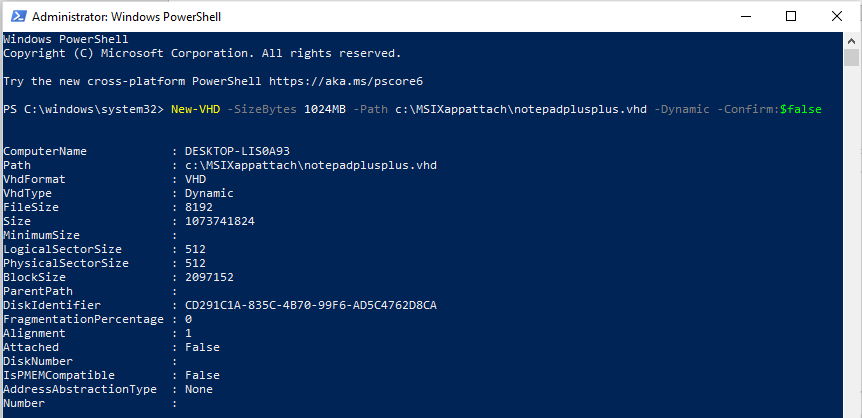
Create the app attach container by running the command below
New-VHD -SizeBytes 1024MB -Path c:\MSIXappattach\notepadplusplus.vhd -Dynamic -Confirm:$false
Note: Make sure to align the size of the VHD with the requirements of the application.
Mount the app attach container – virtual disk to your session host with the command below
$vhdObject = Mount-VHD c:\MSIXappattach\notepadplusplus.vhd -Passthru
Make sure to initialize the disk via the $disk variable to make it easier for the bulk of doing more in the future.
$disk = Initialize-Disk -Passthru -Number $vhdObject.Number
Create a partition table within the app attach container – virtual disk
$partition = New-Partition -AssignDriveLetter -UseMaximumSize -DiskNumber $disk.Number
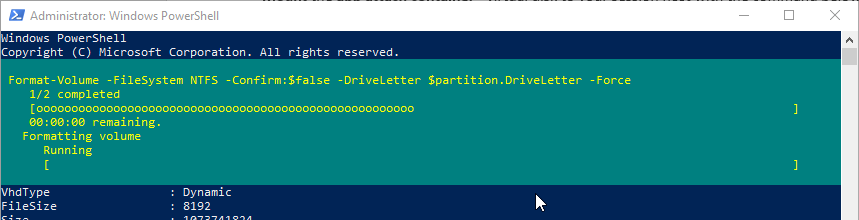
Format the app attach container – virtual disk
Format-Volume -FileSystem NTFS -Confirm:$false -DriveLetter $partition.DriveLetter -Force
Open the app attach container – virtual disk in Windows Explorer
Create a application folder in the app attach container – virtual disk root
Note: When putting the package in the VHD it is best practice to have an \\apps\<package name> folder
Perform the following command in cmd.exe (as administrator) to expand the .MSIX package into a app attach package container (VHD) – with the e.g. c:\MSIXappattach folder as source.
Note: Make sure to change the drive letter, this could be a random assigned letter.
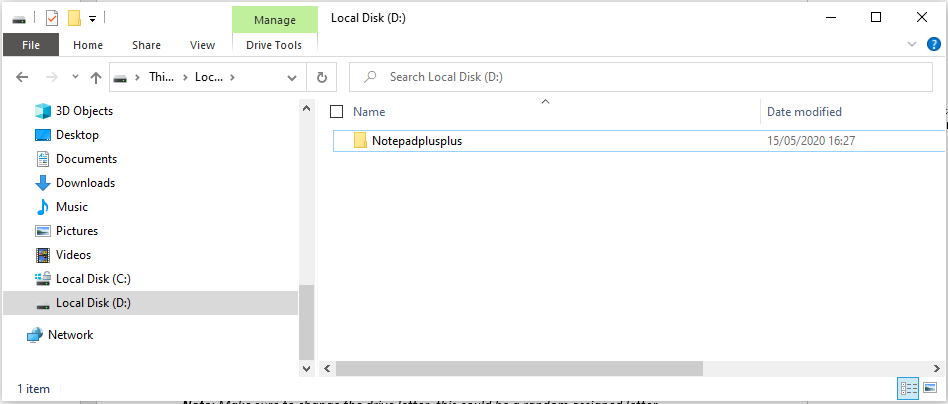
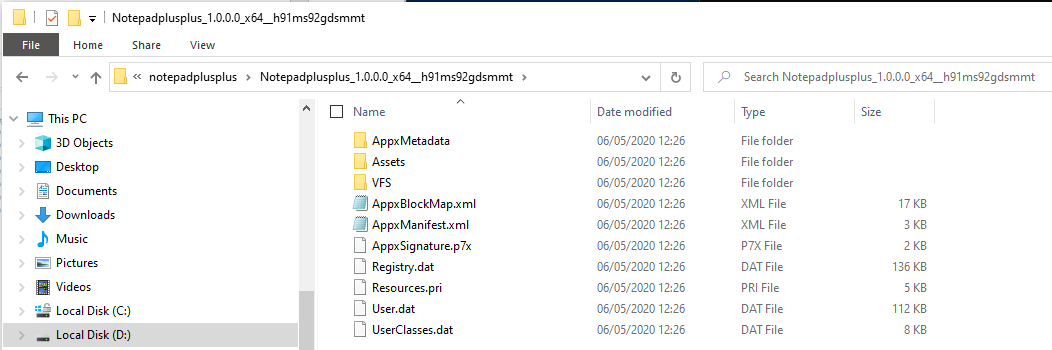
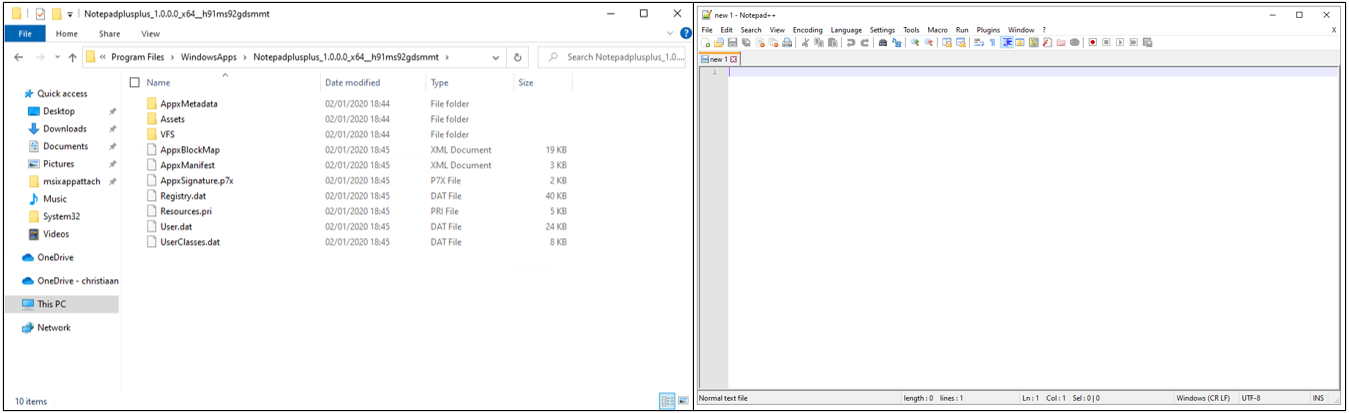
msixmgr.exe -Unpack -packagePath Notepadplusplus_1.0.0.0_x64__h91ms92gdsmmt.msix -destination "d:\notepadplusplus" -applyacls

The folder look like this after a successful expansion to the app attach container…
When you are done – make sure to dismount the app attach (VHD) container and copy them to your Azure Files or Azure NetApp Files share – just like the example below.
Before moving forward, make sure your session hosts can read to the Azure Files share! See below.
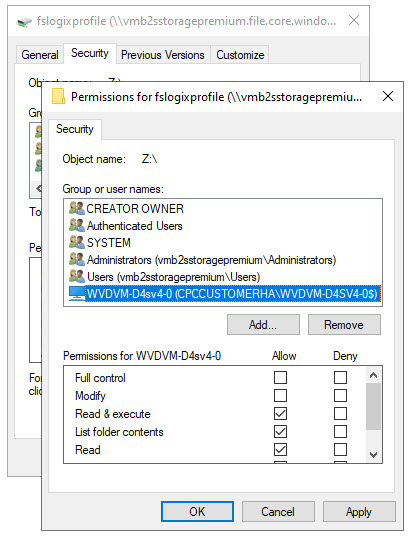
Make sure that the NTFS rights are set up correctly on the share, which means that the session hosts – computer account must be added to access (read-only) the Azure Files share where the VHDs are stored on! See also – Set NTFS ACLs for Azure Files here.
Note: Put all your session hosts, personal desktops in one Active Directory Group to make it easier and more dynamic to assign.
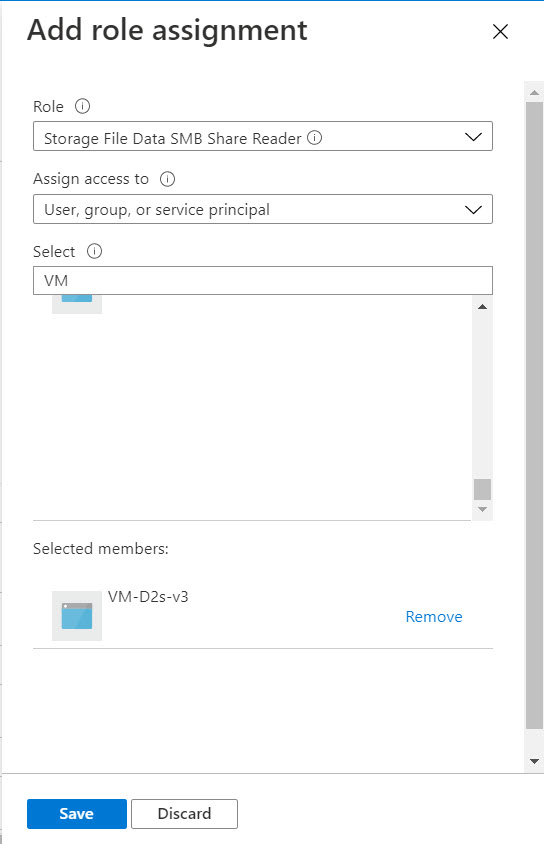
Also, make sure to add the computer account/AAD synced Group with (at least) read permissions on the Azure Files share as IAM/RBAC permissions to set the share level permissions correct with one of the two roles below – learn more here.
- Storage File Data SMB Share Reader
- Storage File Data SMB Share Contributor (optional)

Additional: Pre-build packages you can test
Here is a list of prepared MSIX applications out of the gate, which leaves you into a position to skip the MSIX package creation steps and jump directly into the publishing process.
Source: MSIX app attach Azure portal integration public preview – Microsoft Tech Community
- Chrome as MSIX image https://1drv.ms/u/s!Amut9BnVnw7mkOVMWy-sU8aiaStuxQ?e=AqwZ0D
- Chrome in an MSIX package https://1drv.ms/u/s!Amut9BnVnw7mkOVLPExhghP4iM8LRQ?e=wJHd9P
- Microsoft Edge Dev v89 as MSIX package https://1drv.ms/u/s!Amut9BnVnw7mkOVczWWmEiUhv2IC3A?e=eBGL8B
- Microsoft Edge Dev v87 as MSIX image https://1drv.ms/u/s!Amut9BnVnw7mkOVbdz4gmTb7rqHoeg?e=6dEhj5
- Microsoft Edge Dev v87 as MSIX image https://1drv.ms/u/s!Amut9BnVnw7mkOVaArIPkiAg5XzusQ?e=ZthNbz
New! Configure MSIX app attach via the Azure Portal
Whitelisting pre-step: Before you get started, make sure to fill out and submit this form to whitelist MSIX app attach in your Azure subscription.
Note: If you don’t have an approved request, MSIX app attach won’t work. Approval of requests can take up to 24 hours during business days.
Open a new browser session e.g. via Edge Chromium as Guest (or private mode).
Open the following page that whitelists the MSIX app attach application from within the URL.
https://preview.portal.azure.com/?feature.msixapplications=true#home
If you get a warning saying something like “Untrusted Extensions” you must click on allow.
Go to the Azure Virtual Desktop Service

Open the hostpool – that belongs to the Windows 10 Enterprise build 2004 or higher – session hosts (either personal or pooled). This is where we going to inject the MSIX apps in.
Your session hosts need to be active in the validation environment
Note: I am using an existing host pool, if you do not have one, please create one first with active session hosts added too. Learn more here.
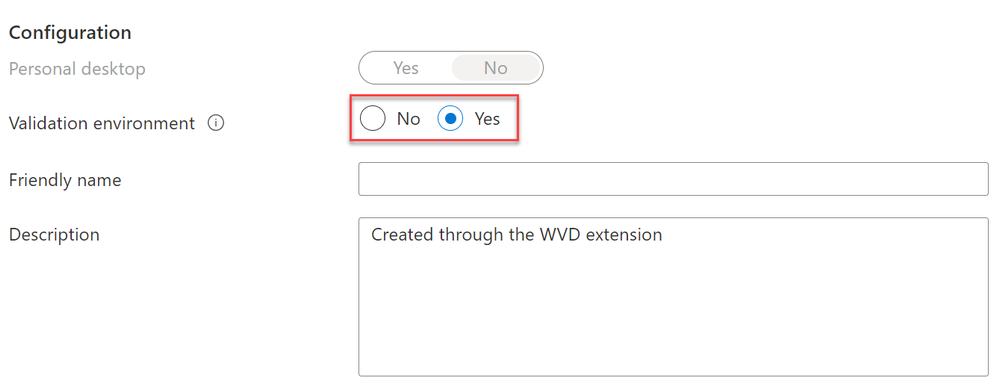
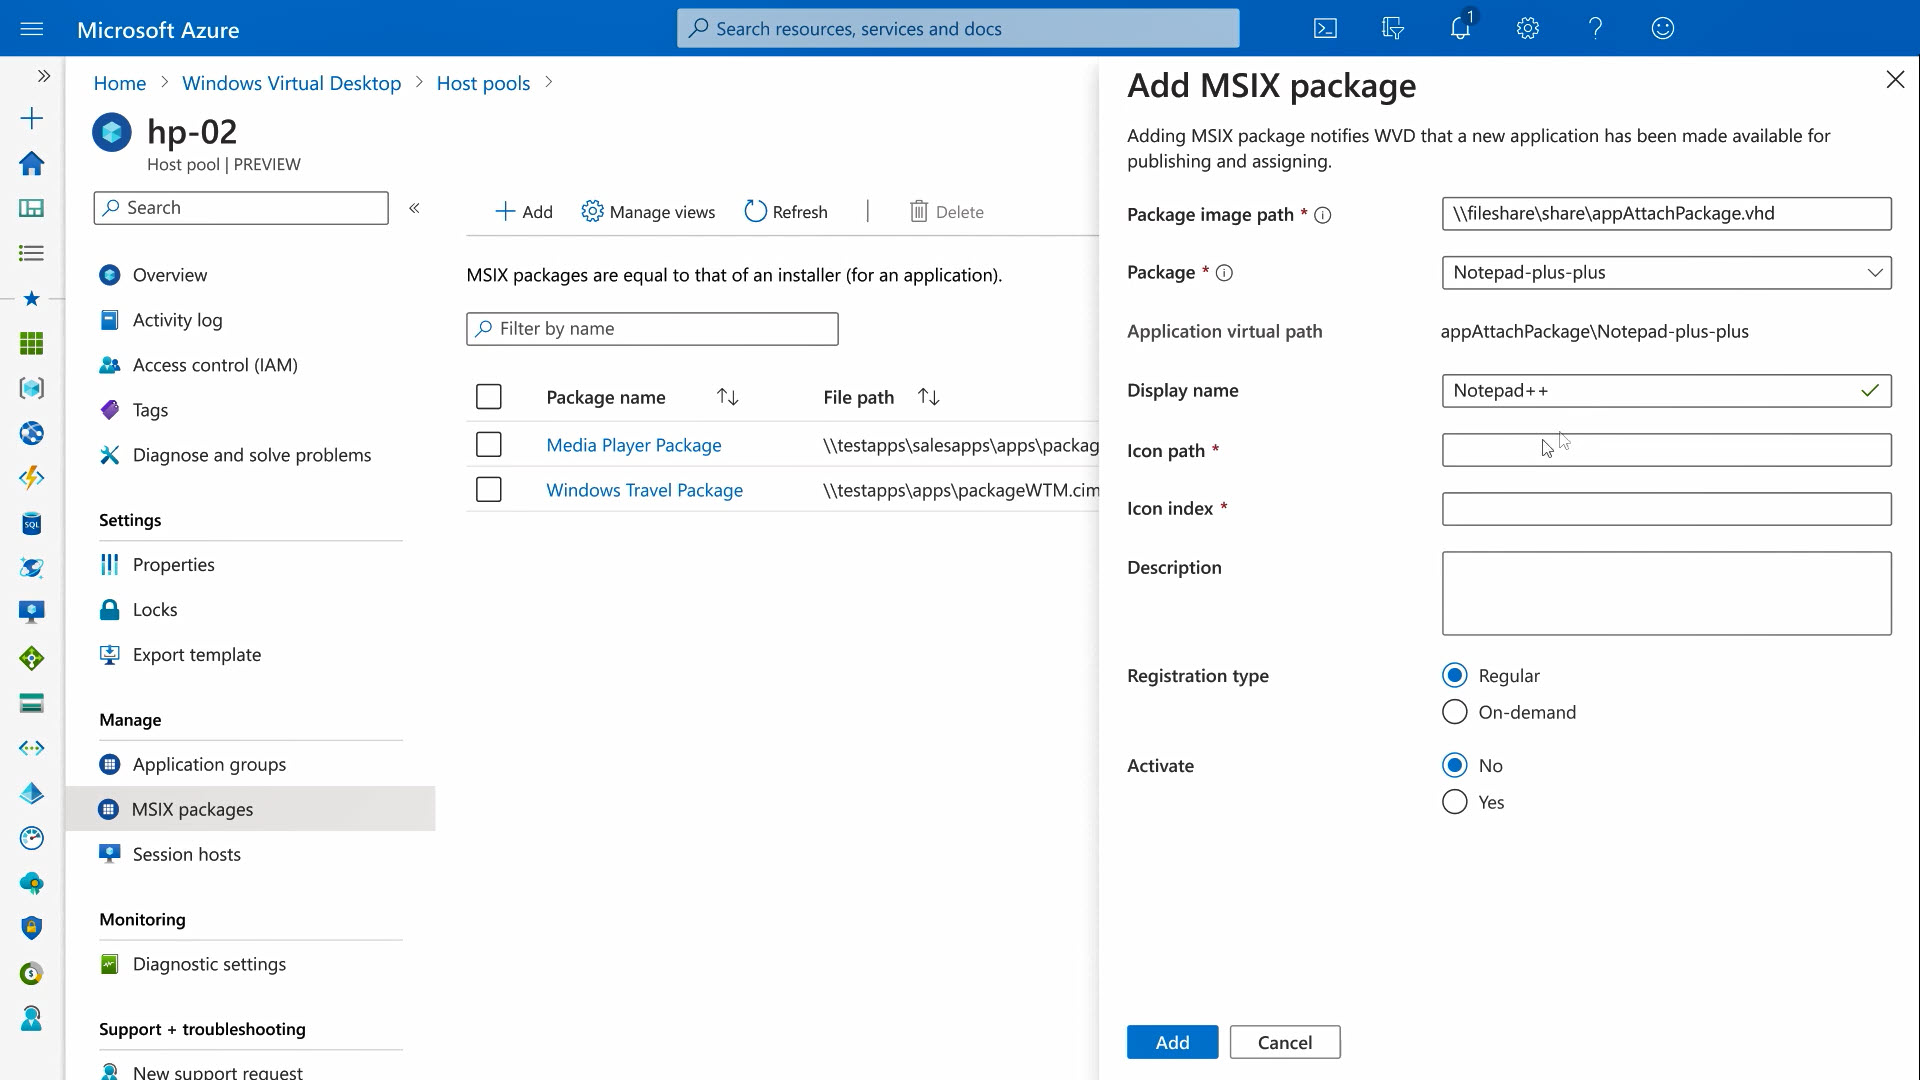
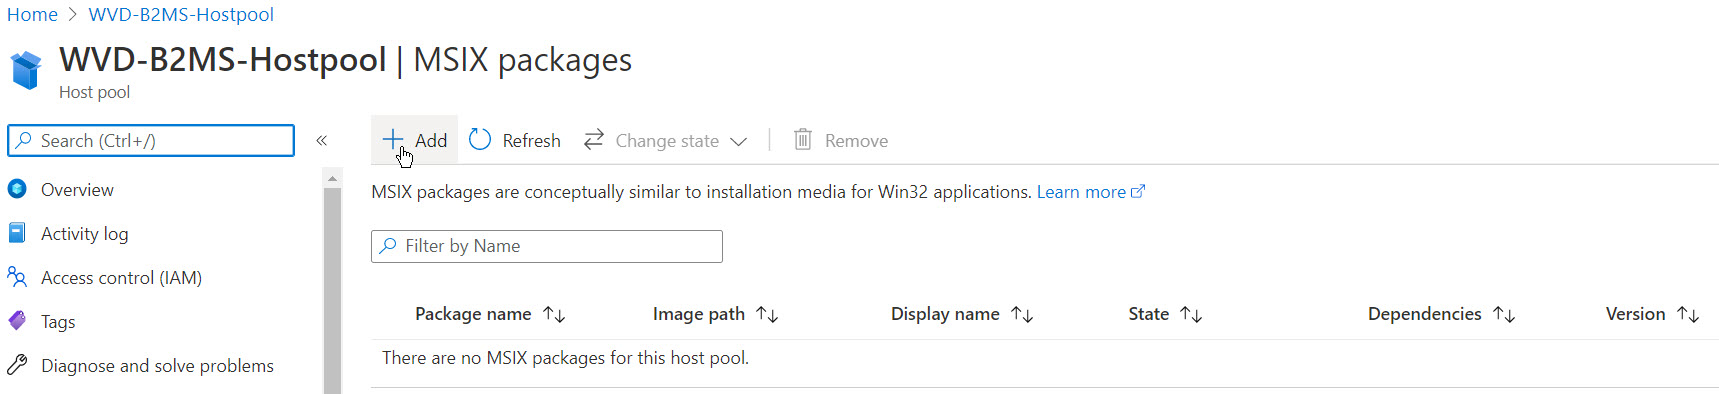
Click on MSIX packages

Click on Add

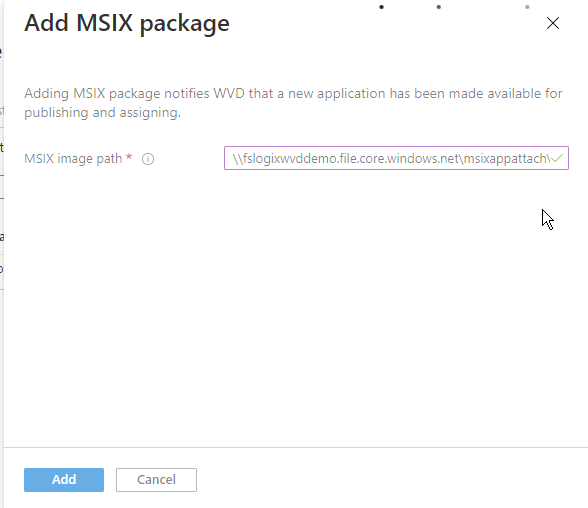
Create the Azure Files share for MSIX app attach you can learn that in another article here.
Add the required location to the MSIX app attach – VHD(x).
Copy / move the MSIX package on to the Azure FIles share
Before moving forward, make sure your session hosts can read to the Azure Files share! See below.
Make sure that the NTFS rights are set up correctly on the share, which means that the session hosts – computer account must be added to access (read-only) the Azure Files share where the VHDs are stored on! See also – Set NTFS ACLs for Azure Files here.
Note: Put all your session hosts, personal desktops in one Active Directory Group to make it easier and more dynamic to assign.
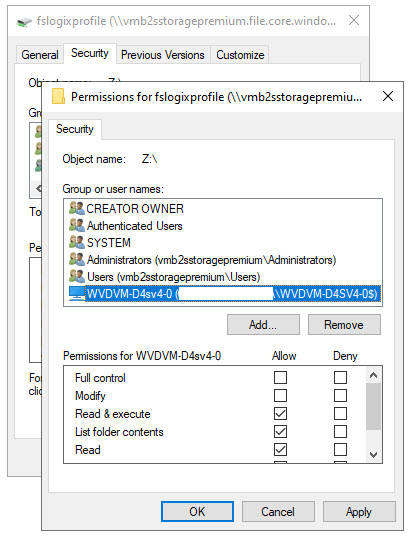
Also, make sure to add the computer account/AAD synced Group with (at least) read permissions on the Azure Files share as IAM/RBAC permissions to set the share level permissions correct with one of the two roles below – learn more here.
- Storage File Data SMB Share Reader
- Storage File Data SMB Share Contributor (optional)
Continue the steps
Rights are being checked…
You can proceed when the rights are setup correct.
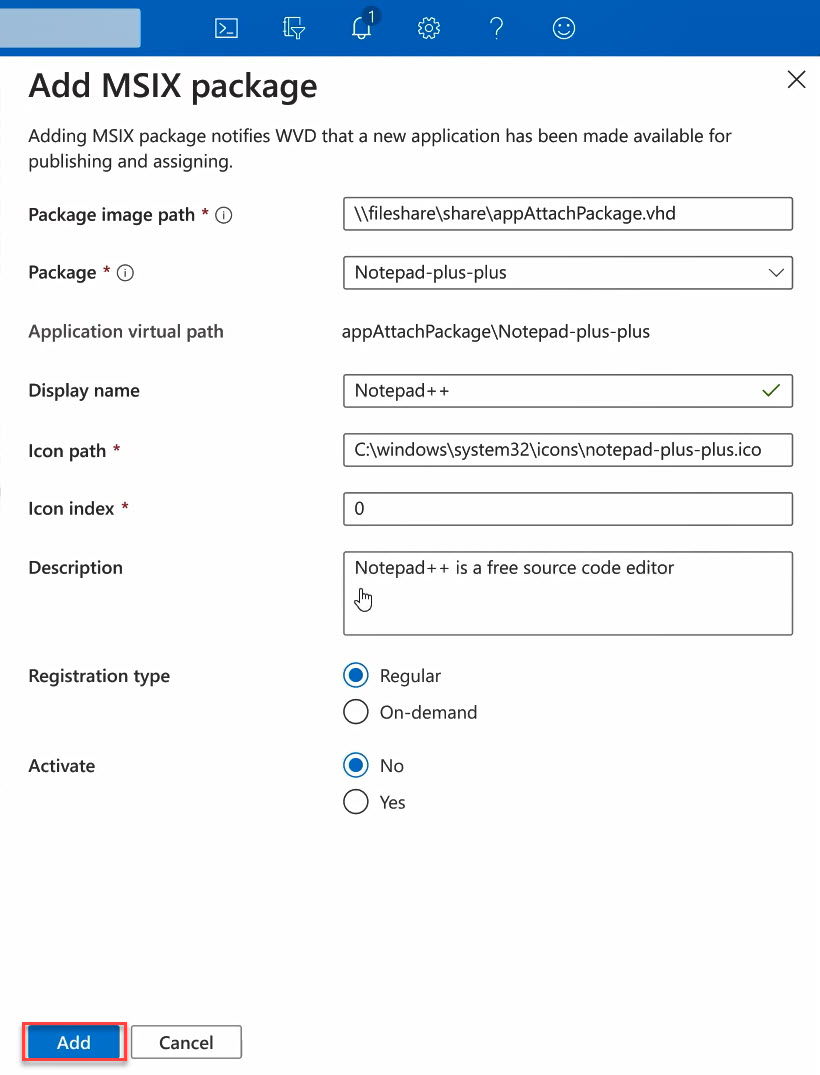
Choose the package and display name. If the Application is detected, you should see it the application listed in the MSIX package field.
Set the Registration type to on-demand and state to Activate: Yes
Click on Add
Assign the MSIX app attach Application – via App Groups
Go to the Application Group menu

Click on Applications
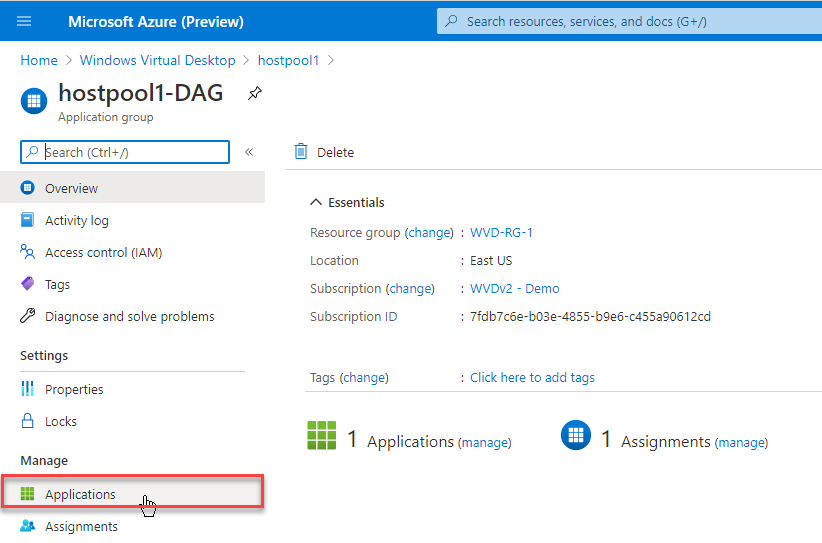
Click on Add
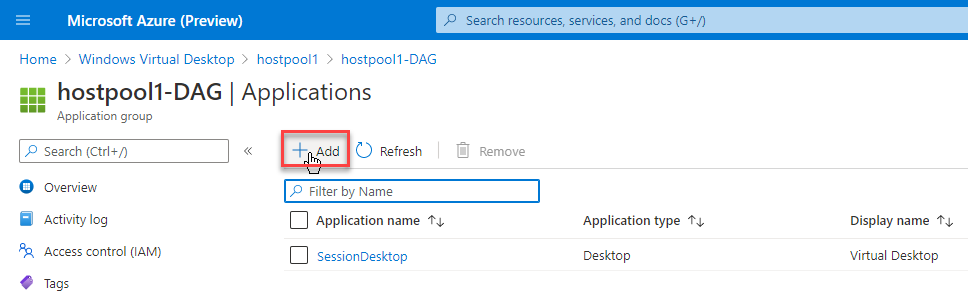
Select your MSIX app attach package, the name and Displayname and
Click on save.
Repeat the steps for other applications.

As a final step, we need to assign the App Group to the right Azure AD group / or users to make them available in the session (without installing anything! 😊) via the RD Agent process explained in the beginning.
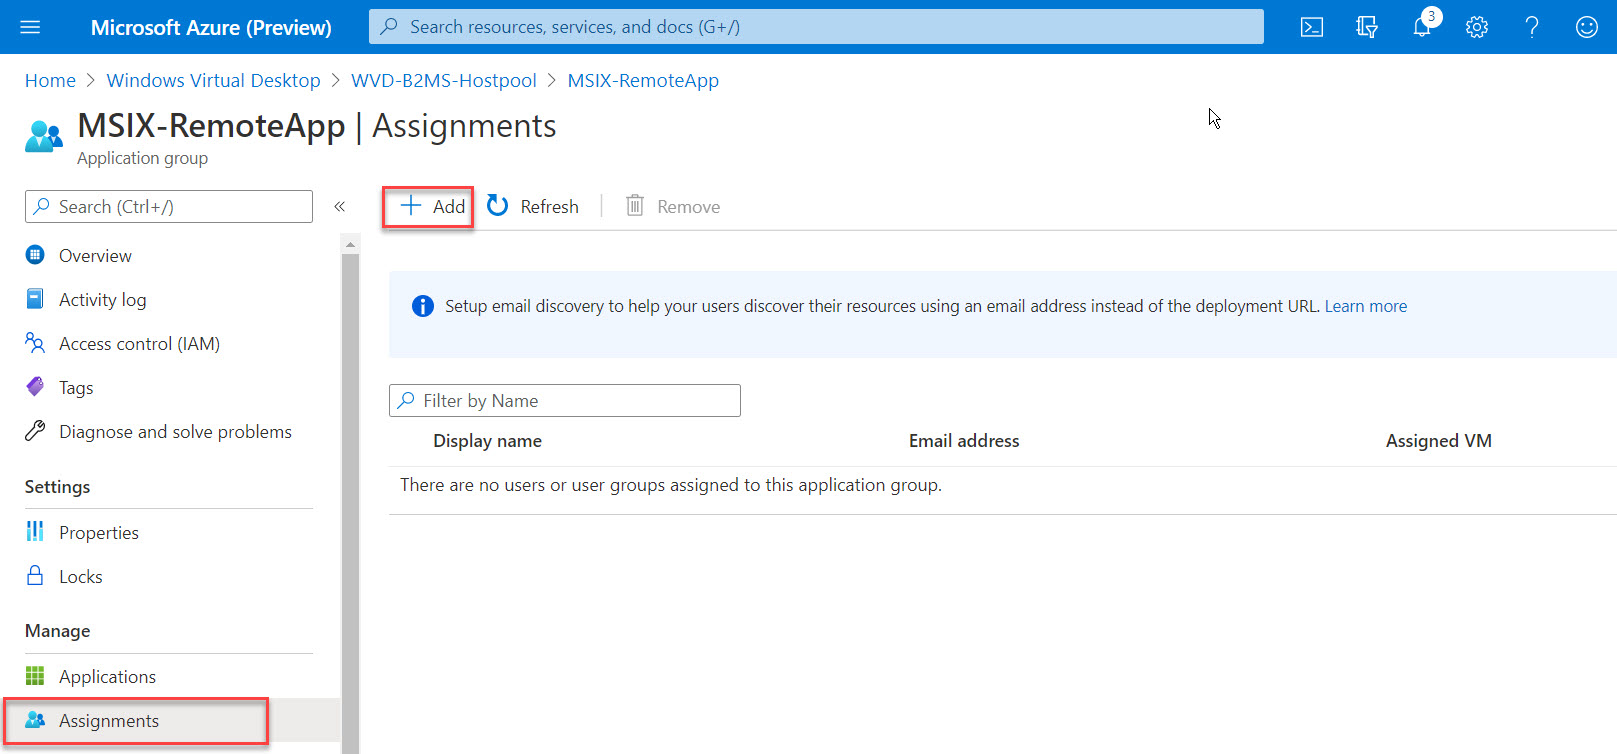
Go to Assignments
Click on Add
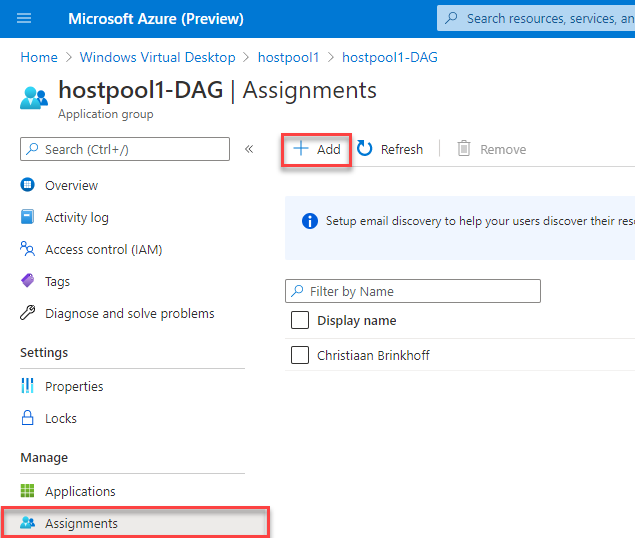
Add your Azure AD e.g. department group to the list

Because the MSIX app attach configuration process now works directly from within the Azure Portal as part of your host pool configuration settings, you can now easily add applications to your App Group settings.
Note: A user can be assigned to both a desktop app group and a RemoteApp app group in the same host pool. However, users can only launch one type of app group per session. Users can’t launch both types of app groups at the same time in a single session. More info.
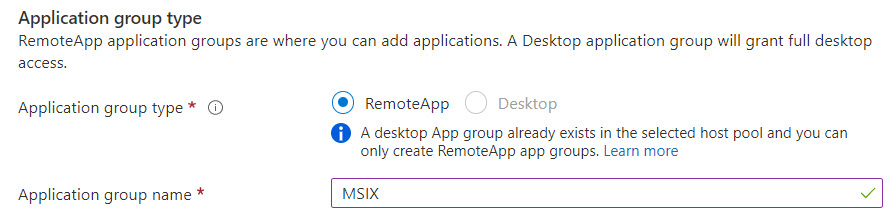
First, add your MSIX Package(s) to the Host Pool – or you can skip this step if you have already done this.
After that, you can add the application e.g. Notepad++ as Remote App – Application Group to assign as Published Application (RemoteApp) to your users.
Note: Are you getting this error “There are no active MSIX packages in the host pool”? Make sure to add the MSIX app attach – VHDs first in the host pool (see the previous step).

Assign them to your Users or Groups and you are ready to test them.
Change the MSIX Package Check internal on the session host
It could be useful to delay or speed up the interval of checking for new packages available on the session host. This registry key below can change this for you in order of minutes.
[HKEY_LOCAL_MACHINE\SOFTWARE\Microsoft\RDInfraAgent\MSIXAppAttach]
"PackageListCheckIntervalMinutes"=dword:00000001
Verify and test the Notepad++ application – logon as the assigned user
Login with one of the users that is part of the App Group assignments to one of your session hosts. If everything runs as expected, you will see the application e.g. Notepad++ in the Start Menu. Here’s a video of the user + admin process.
From an admin perspective, Disk Management should look similar like the screenshot below. Both MSIX app attach applications are loaded from Azure Files.
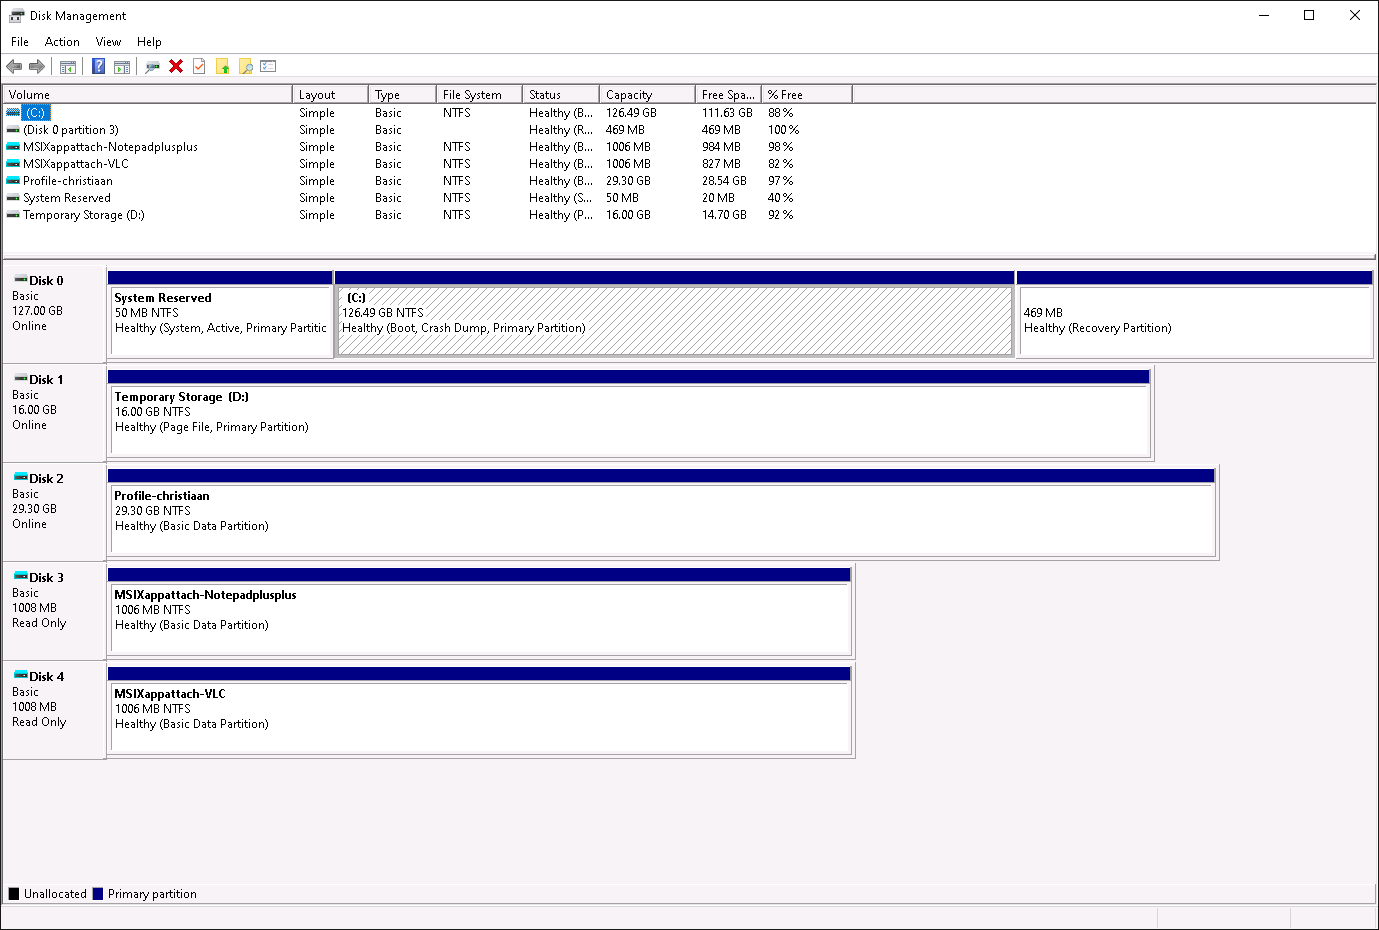
The applications run perfectly – for the end-user shown as a locally installed application. 🙂
Or directly as Remote Application – via your RemoteApp Application Group as MSIX app attach package!

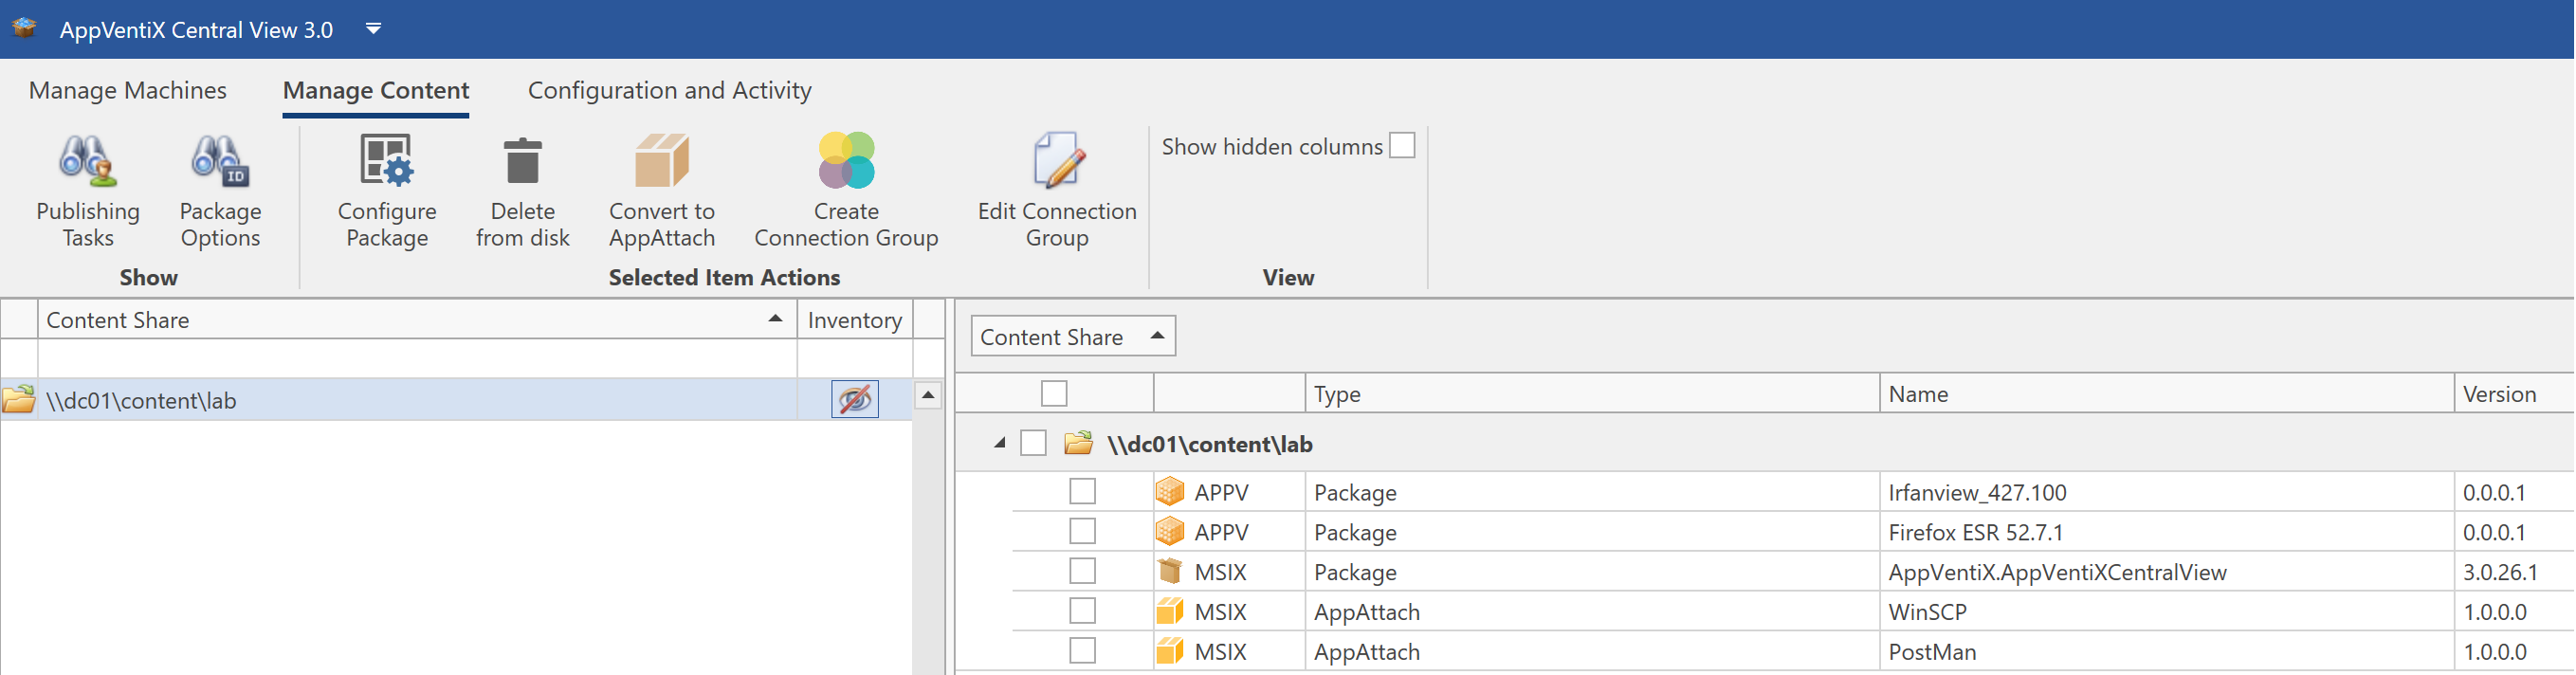
Use Citrix or VMware? Create – and assign the app attach container (VHD) – via AppVentiX (community tool)
You can use this solution if you are running Citrix or VMware.
AppVentix is a solution (previously known as App-V scheduler) that can create MSIX app attach containers for you without following any PowerShell (manual) steps. It also supports the direct assignment of app attach containers during the logon phase of a Azure Virtual Desktop session. Based on e.g. Active Directory groups or Organizational Units in Active Directory.
Learn here more about it and request the free community version – or watch this demo how it works in conjunction with Azure Virtual Desktop.
Desktops in the Cloud – episode on MSIX app attach
You can also learn more about it here at Episode 5 of Desktops in the Cloud with Stefan Georgiev from the AVD Engineering team, leading MSIX app attach. Learn about game-changing application delivery technology MSIX from the horse’s mouth. Stefan Georgiev from the AVD Engineering team is explaining the architecture, performance limits and will show you cool exclusive demo’s that have never been shown before!
1:59 #1 Intro
2:57 #2 What is MSIX app attach
9:49 #3 How does the architecture work
12:50 #4 MSIX app attach via the RD Agent (no PowerShell!)
13:27 #5 Demo 1: Configure MSIX via the Azure Portal
20:16 #6 Demo 2: Load 25+ applications via MSIX app attach
24:40 #7 Episode closing
Questions? Please visit the official MSIX app attach FAQ
Do you receive any errors related to access to the MSIX app attach service? Make sure your Azure subscription is whitelisted via this form, your host pools are active in the validation environment and you are using the right access URL.
More questions? Please visit the Microsoft Tech Community forum here to give feedback or check the page below here for follow up questions.