
How to use Azure Infrastructure-As-a-Service (IaaS) in the most cost effective way – top 10 – survival guide


A couple of months ago, I presented on – The Different Ways to Migrate Workloads to Azure – at the E2E conference in Amsterdam. During this presentation, I gave people tips and tricks on how they can lift-and-shift workloads to Azure in the most cost-effective way. I’m now writing this information down in an article and share it with the Community!
The Azure Cloud (or every other Public Cloud out there) is not cheap when you compare an on-premises scenario directly to Microsoft Azure. You need to translate – transform applications, services, and servers to a Cloud scenario – although in a Lift-and-Shift situation – costs will be the hardest part to convince your IT manager. The usage of power management tools or Azure Reserved Instances can help to lower the Azure subscription OpEx bill, but a broader approach is preferred to take full advantage of the simplicity of the Azure Cloud.
I also would like to mention one of the two most significant misunderstandings about the Public Cloud – which sounds pretty obvious for most of us IT professionals, although not for every business…
“The Biggest Benefit of Cloud Computing is Lower Costs”
Not so fast… The cloud can quickly adjust the amount of computing power you’re using, giving a lot of flexibility to your budget. Focusing on cost – though – and not investigating how you might achieve significant efficiencies with new cloud technologies after you could diminish your return on the cloud investment, which is pretty bad thinking if you ask me…
Replacing on-premises workloads to Azure is not the key to success. I see it as a step – or better say bridge – between modern applications and “legacy” application (or Windows wrote apps) within the Digital Transformation. Success in the cloud relies on the automated management infrastructure around the server working well – it has to save management and maintaining effort as well as eventually benefit in costs.
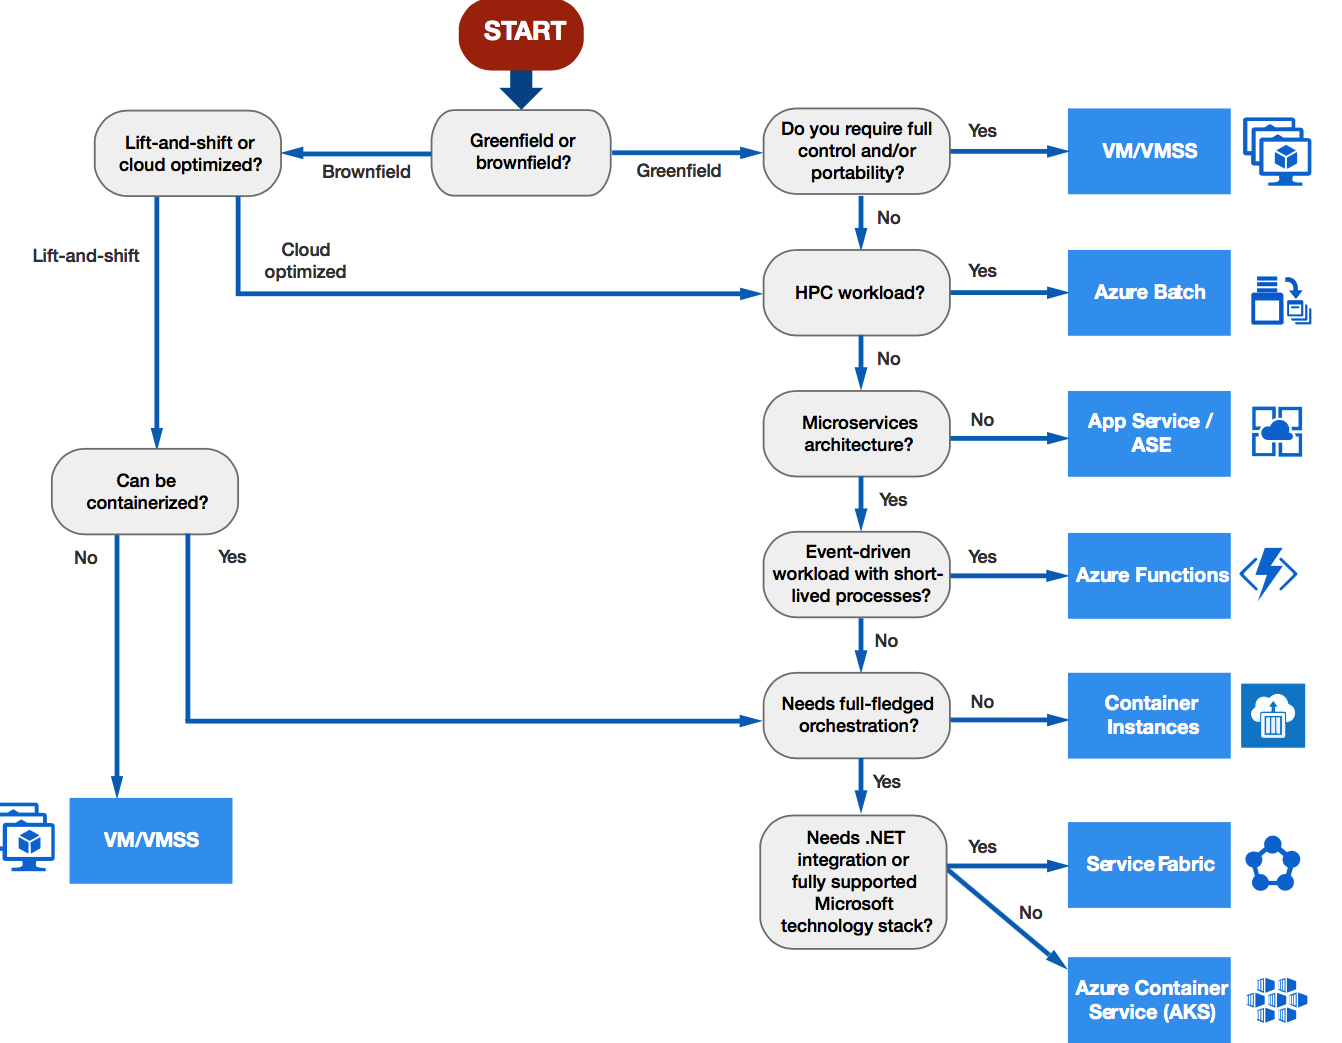
The following diagram shows a very detailed path which must be followed when performing the digital transformation. Following the brownfield and Greenfield paths directs you to Infrastructure-As-a-Service, but it will advise you to go for other Cloud Services as well. I’m using this diagram most of the times to explain to my customers in a high-overview method what the roadmap could be for their organization.
In this blog – I would like to share my top 10 savings when migrating on-premises workloads to Microsoft Azure. Do whatever you want with the tips, and hopefully, it will help you to save some money!
And as always > Enjoy reading!
Table of Contents
Click on the title to forward in the article:
- Migration path(s) to follow for your organization?
- Top 10 savings in Microsoft Azure
- Saving 1: Use Azure Reserved Instances
- Saving 2: Use the Azure Hybrid Use Benefit (HUB) program
- Saving 3: Virtual Machine status de-allocated
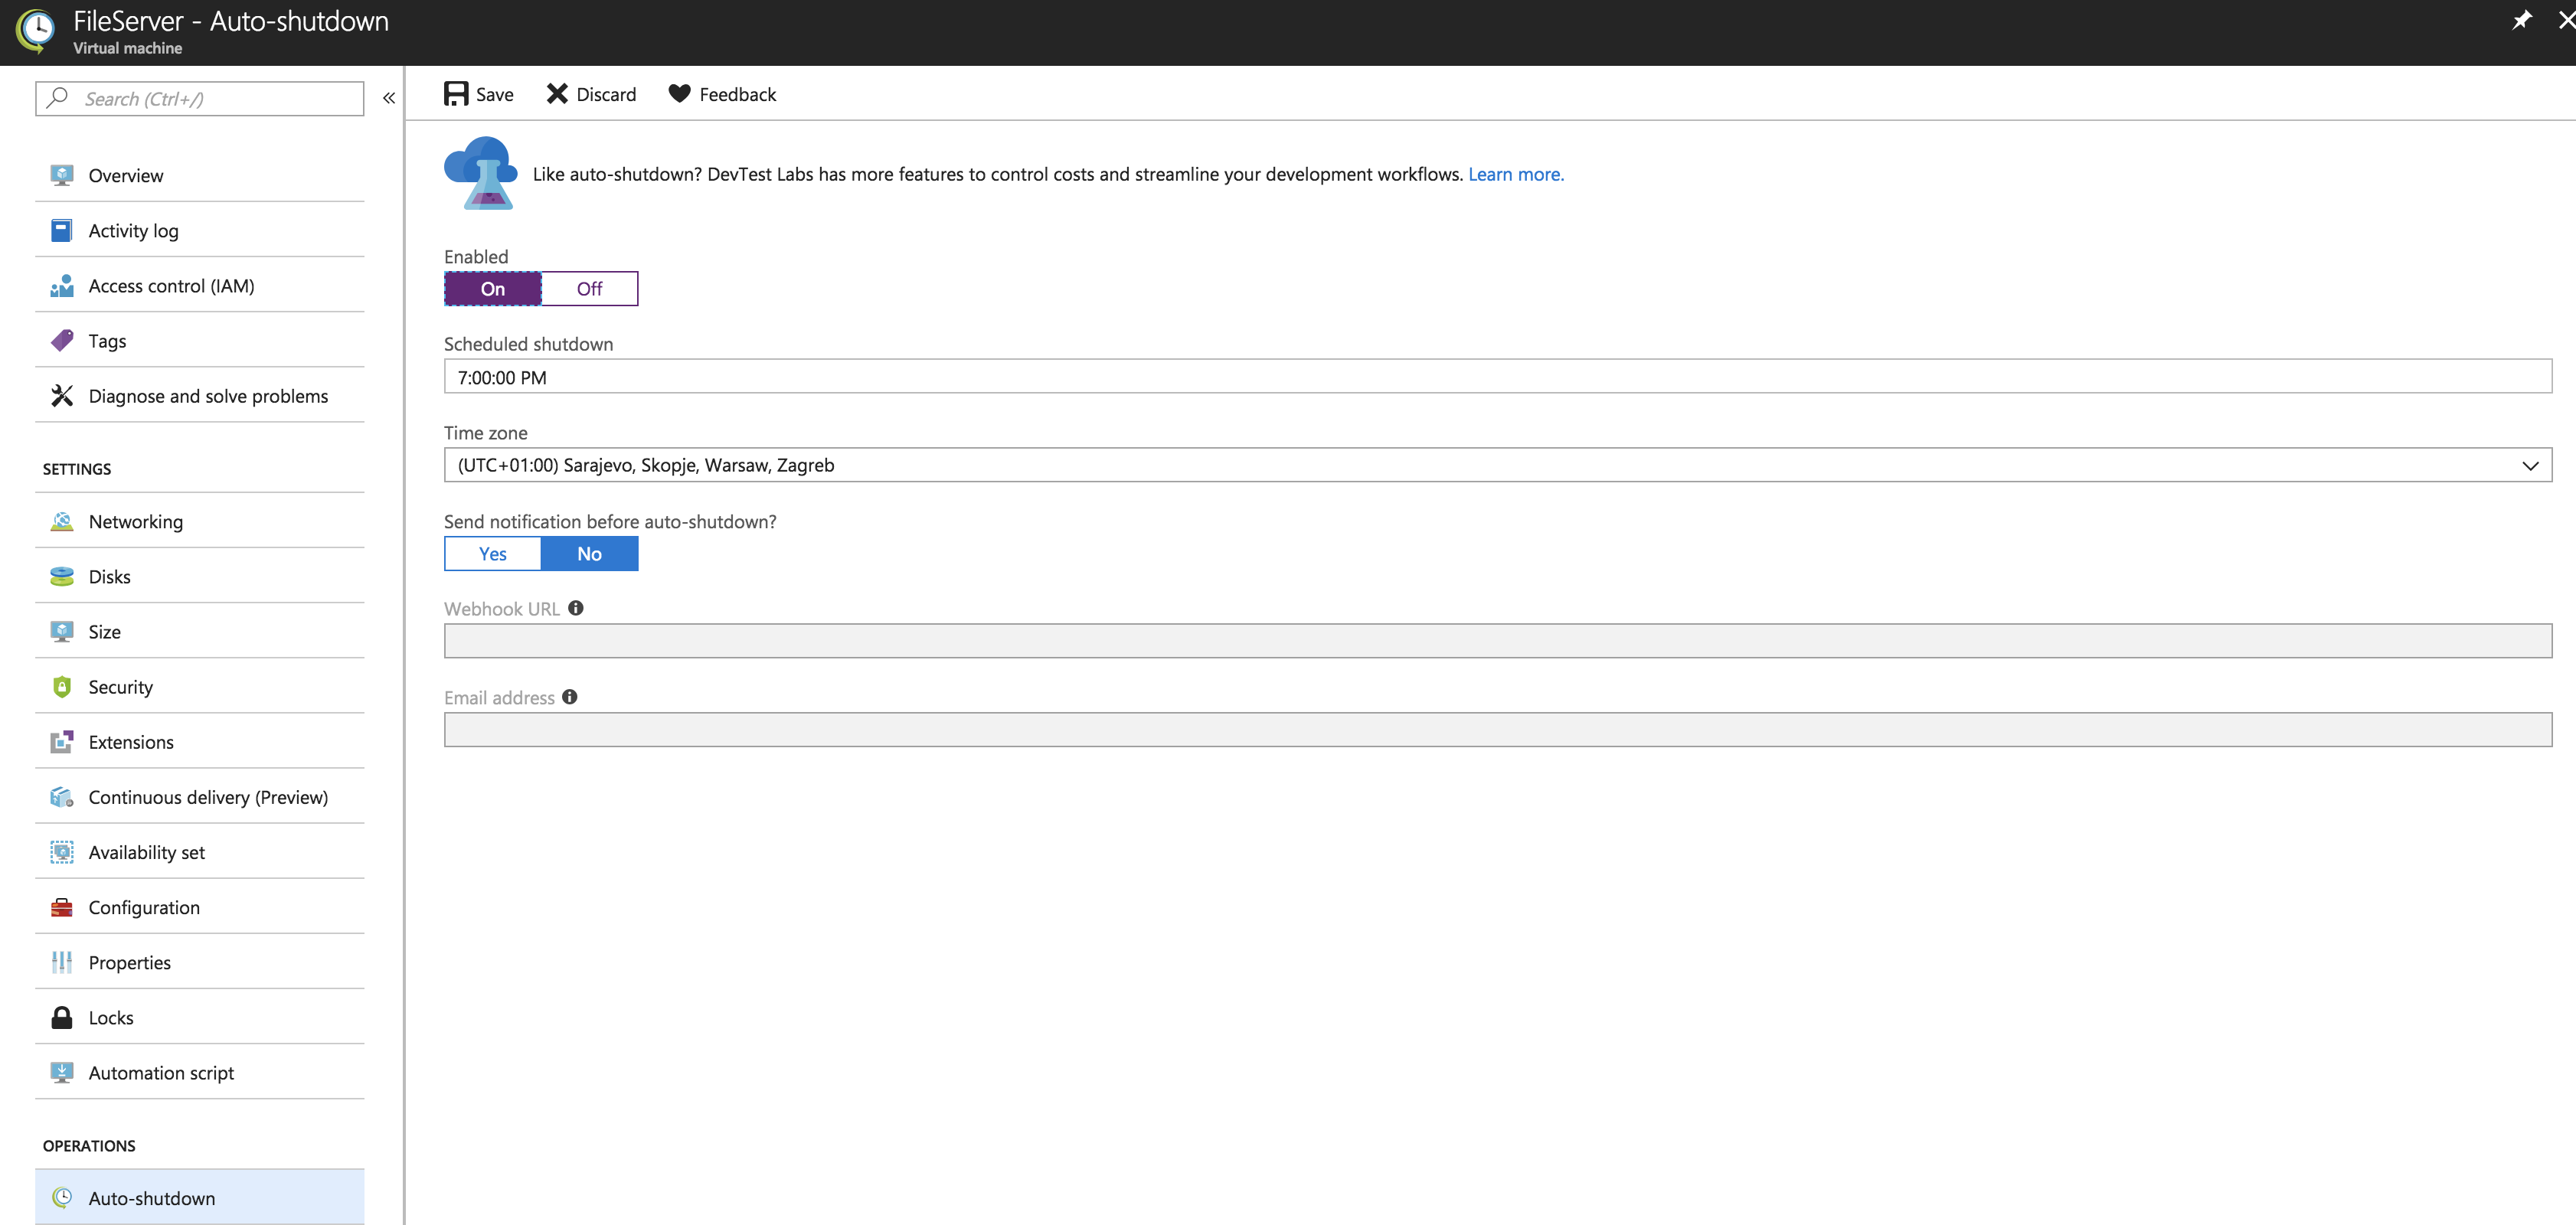
- Saving 4: Use auto-shutdown
- Saving 5: Use Azure Automation
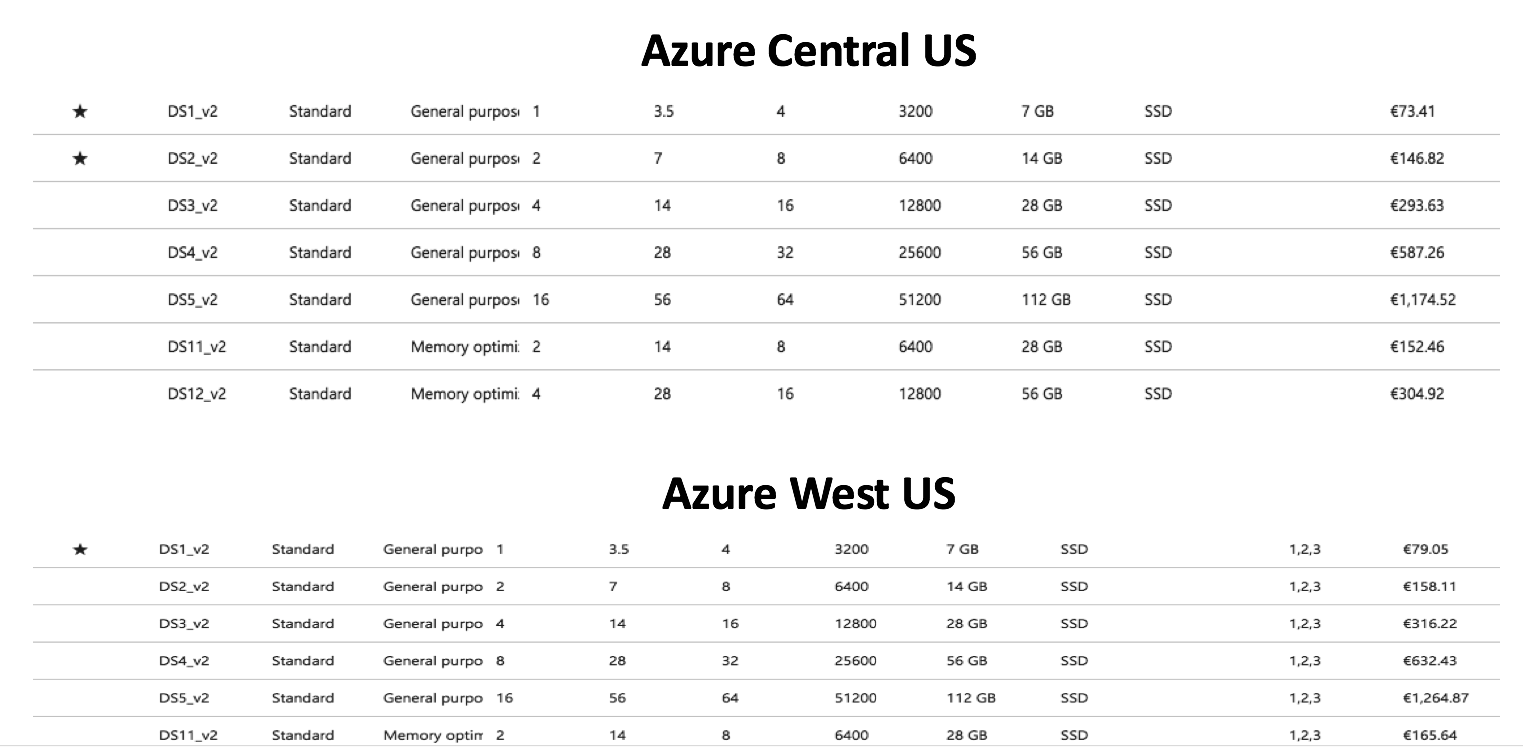
- Saving 6: Use regions wisely
- Saving 7: Use Azure storage accounts as SMB shares
- Saving 8: Use Azure marketplace VM images
- Saving 9: Migrate apps to Azure App Services or containers
- Saving 10: Use Azure DevTest for testings
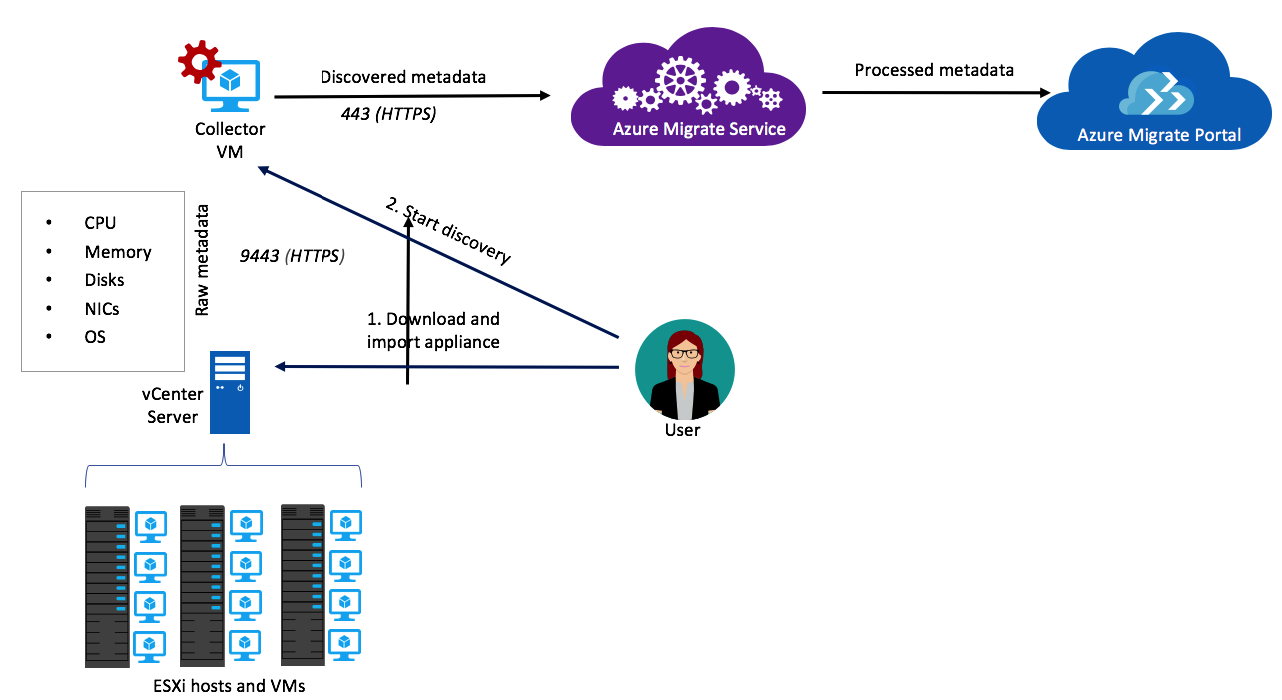
Azure Migrate can help you to get a better understanding of what the costs will be in a Lift-and-Shift scenario for a Brownfield (as seen in the diagram). It gives you insights, such as an indication of – so-called – Azure readiness, Monthly costs estimate and monthly storage cost estimate. The architecture of Azure Migrate is very simple and can currently only perform applied to on-premises VMware Workloads. The support for Hyper-V is currently available in Private Preview and will hopefully follow in GA somewhere in October/November.
The following video shows you all the walkthrough steps of Azure Migrate for VMware on-premises workloads
(When you prefer an article – I wrote something comprehensive and detailed on Azure Migrate some months ago, which you find here.)
Azure Site Recovery – The easiest migration method to Azure Infrastructure-As-a-Service (IaaS)
I’ve created the following How To video to experience how easy it is to migrate on-premises workloads to Microsoft Azure when using Azure Site Recovery.
Top 10 savings in Microsoft Azure
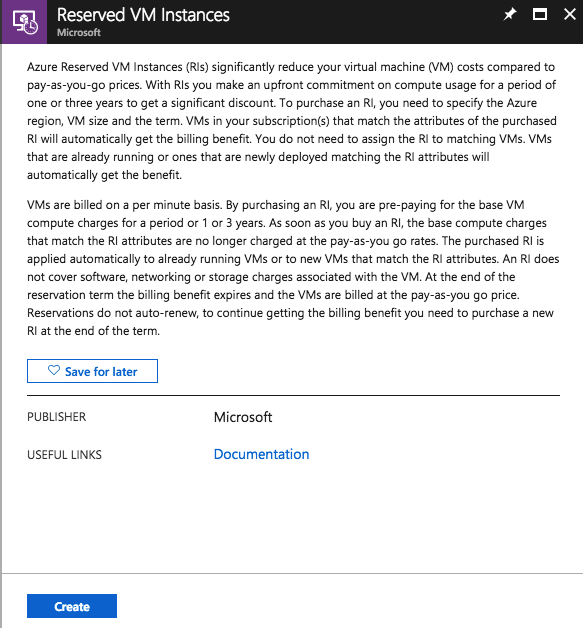
Saving 1: Use Azure Reserved Instances
Azure Reserved instance are making it possible to reserve workloads and allocated (virtual) hardware in a datacenter for a certain amount of time. You take away the “stand-by” costs by committing a longer timeframe for using virtual machines. Plus, Reserved VM Instances provide price predictability, as well as the flexibility to exchange or cancel to get a pro-rated refund, should your needs change.
Azure Reserved Instances are in my opinion a good competitor for every Service Provider who rents their resources to end-customers. Let’s see how the market will move in the next year!
Some interesting things to know about reserved instances:
- Directly available from the Azure Marketplace
- You must be in an Owner role for at least one Enterprise or Pay-As-You-Go subscription.
- For Enterprise subscriptions, reservation purchases must be enabled in the EA portal.
- For Cloud Solution Provider (CSP) program only the admin agents or sales agents can purchase the reservations.
- Windows software costs not included with Reserved Instances
Saving 2: Use the Azure Hybrid Use Benefit (HUB) program (+ Azure Reserved Instances!)
You can activate and use Azure Hybrid Use Benefit when you have an Enterprise Agreement including Software Assurance on the Operating System level. It can save you up to 40% of resources cost of the virtual machine because the Operating System license costs will disappear as snow for the sun.
“Nice if you have it, but not worth to buy…
When you already have an SA for your on-premises workloads, then it’s good to use this feature. Therefore, if you haven’t got SA, it’s not worth it to buy it separately. “
Combining HUB and Reserved Instances can decrease your Virtual Machine costs with more than 80 percent in Microsoft Azure! Microsoft created a calculator, which is pretty easy to check your scenario in prices.

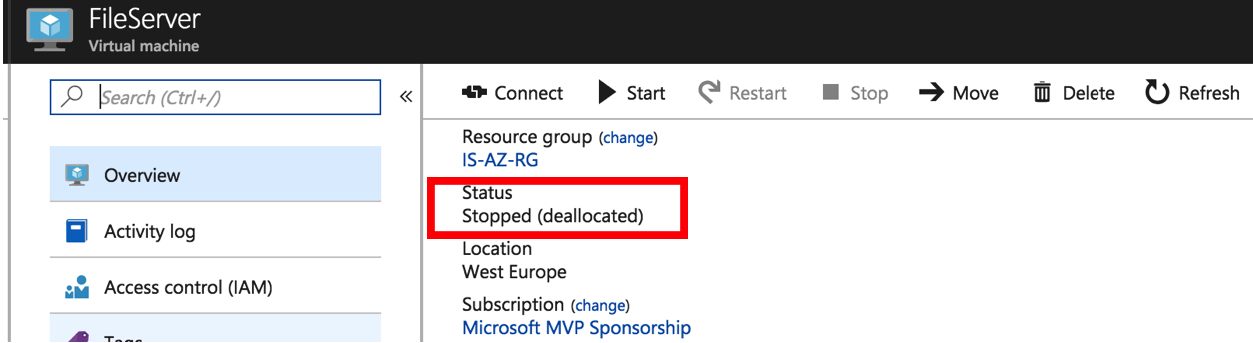
Saving 3: Virtual Machine status de-allocated
“Stopped (Deallocated” status, you will not be paying for the VM resources. The biggest disadvantage of this – is that provisioning VMs the next time you need them is more time-consuming. Expect longer wait times to get your Virtual Machine running state!
Configure Auto-shutdown of resources via Virtual Machine Operations within the Virtual Machines menu. It’s as simple and cost-effective as it looks!
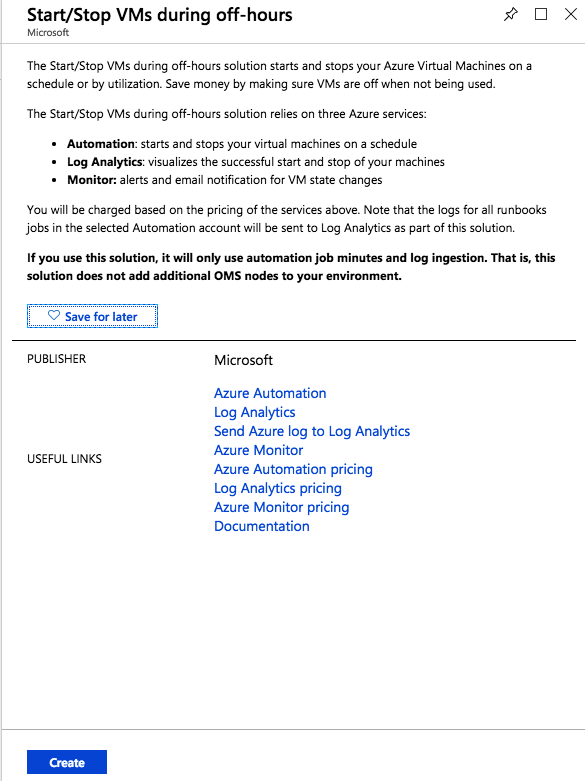
Saving 5: Use Azure Automation
Use Azure automation to starts and stop your virtual machines on a schedule. This can be done through (Remote) PowerShell scripts – or choose the easy way – by purchasing the Start/Stop VMs during off-hours from the Azure Marketplace!
Note: The feature below, which is available from the Azure Marketplace is now in status General Availability!
Research Azure Region Pricing for services Not all Azure Regions will have the same pricing for the same resources.
Saving 7: Use Azure storage accounts as SMB shares
Use Azure Storage for SMB File Shares – If you need storage DO NOT use/spin up a VM!

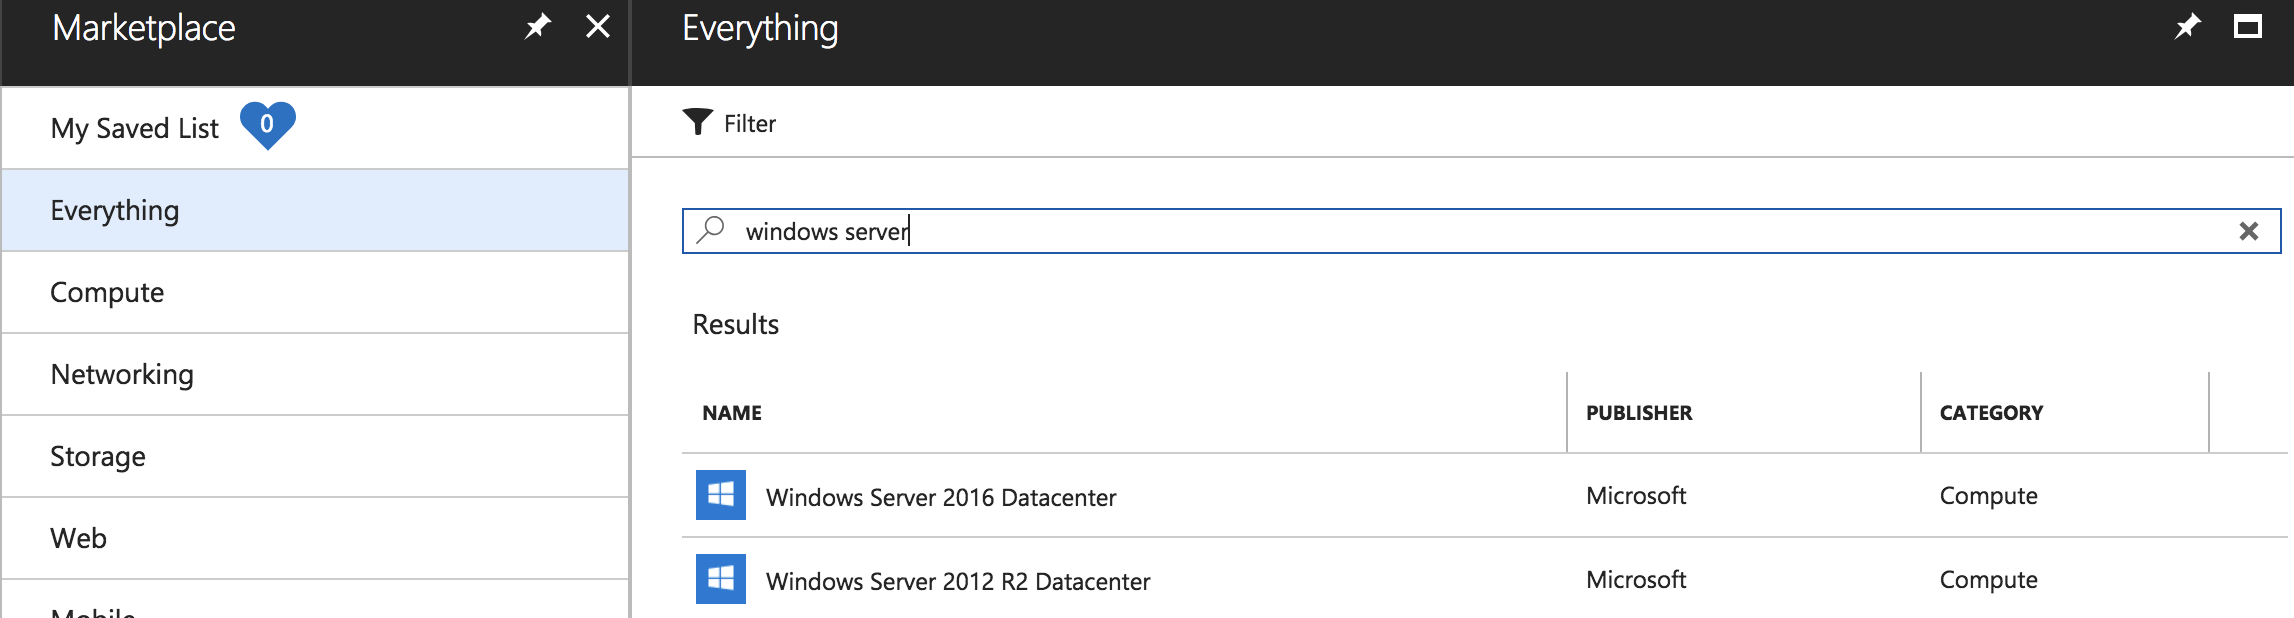
Saving 8: Use Azure marketplace VM images
By using VM images from the Azure Marketplace, you are able to choose from many images that include the licensing to the OS (Operating System).
Saving 9: Migrate apps to Azure App Services or containers
Migrate Apps to Azure App Service – Isolation and higher scaling for lower costs by replacing VMs in IaaS.

Saving 10: Use Azure DevTest for testings
Use Azure DevTest Labs for testing and development purposes. The costs of those instances are much lower than using the traditional Virtual Machines from the Azure marketplace!


Thanks for stopping, and I hope this helps.
Cheers,
Christiaan Brinkhoff