Configure a Bring-your-Own NetScaler VPX in Azure for Citrix Virtual Desktops – XenDesktop Essentials and Virtual Apps and Desktops – XenApp and XenDesktop Service from the Citrix Cloud


In addition to my latest article – How to configure the Citrix Cloud XenApp and XenDesktop Service using Azure Managed Disks and Citrix Optimizer – I’m now sharing my insights on how to use an own NetScaler VPX and StoreFront server inside Azure IaaS (Infrastructure-As-a-Service) to provide access to your Citrix Cloud Digital Workspace environment!
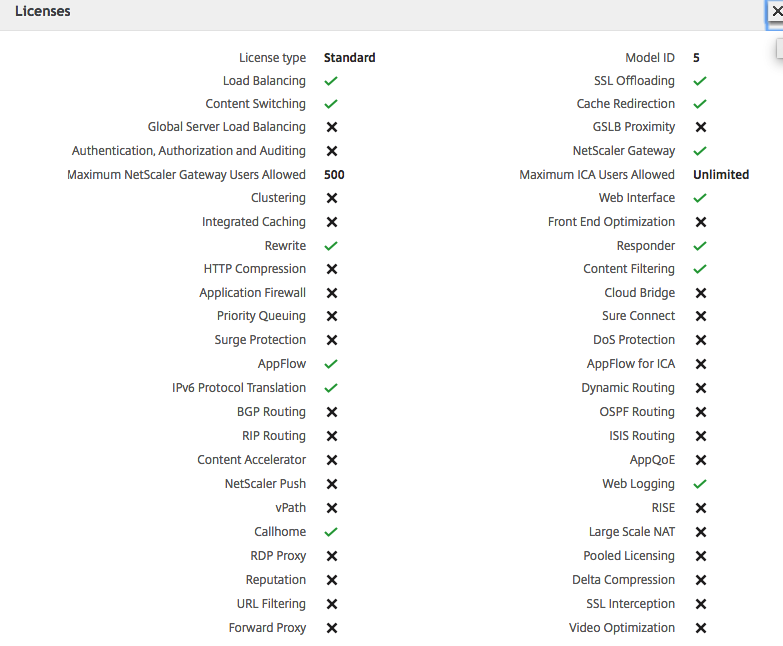
Personally I’ll advise to use the setup of this article, rather than using the limited capabilities version of the NetScaler Gateway Service from the Citrix Cloud. With the NetScaler placed in Azure you’ll can provide more services and features of NetScaler, such as customization to StoreFront, custom themes in NetScaler, secondary (Azure MFA) authentication and more (see the comparison sheet below) !
NetScaler Gateway Service is the simplified Citrix Cloud version of NetScaler Gateway. The main purpose of this Service is to deliver Remote Access to your Citrix environment with low costs. Just because the Service is included in the license, you’ll save money. Therefore on the other hand, I’ll personally think that the larger Enterprise companies won’t use this service a lot (at least for security reasons / no support for sec. auth.).
In this article, I’ll walk-through all the steps that must be taken to configure an own NetScaler VPX in Azureand own StoreFront environment instead of using the default NetScaler Gateway Service. These steps can be applied for XenDesktop Essentials and XenApp and XenDesktop Service from inside the Citrix Cloud.
Note: It’s also possible to use multiple addresses on the virtual machine network interfaces of NetScaler in Azure. I’ll setup those manually in this article, but my fellow CTA, Carsten Bruns created an JSON automation file doing this preparation in Azure all automatically. Interested? Download the JSON file here.
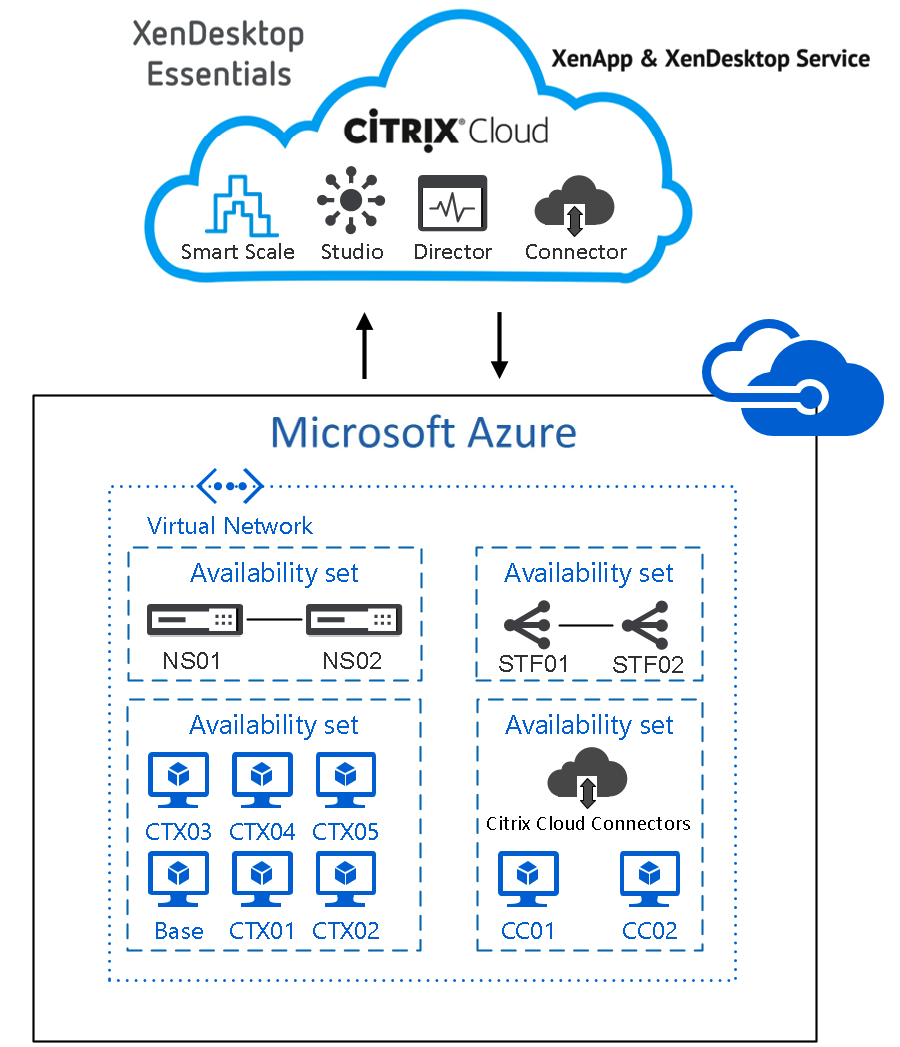
Table of Contents
Click on the title to get forwarded in the article:
- Activate Choose-your-Own NetScaler in Citrix Cloud
- Enrol the NetScaler VPX in Azure IaaS
- Test the internal and external Citrix user session to the Citrix Cloud
This blog is part of a blog series about the different Citrix Cloud Digital Workspaces. Previous articles that I wrote around the Citrix Cloud, that you might found interesting to read…
- How to configure the Citrix Cloud XenApp and XenDesktop Service using Azure Managed Disks and Citrix Optimizer
- How to configure Citrix XenApp Essentials in Microsoft Azure, including Azure Active Directory authentication to Citrix Cloud
- How to use Citrix Smart Tools – Smart Scale to reduce your XenApp and XenDesktop on Azure Cloud resource costs
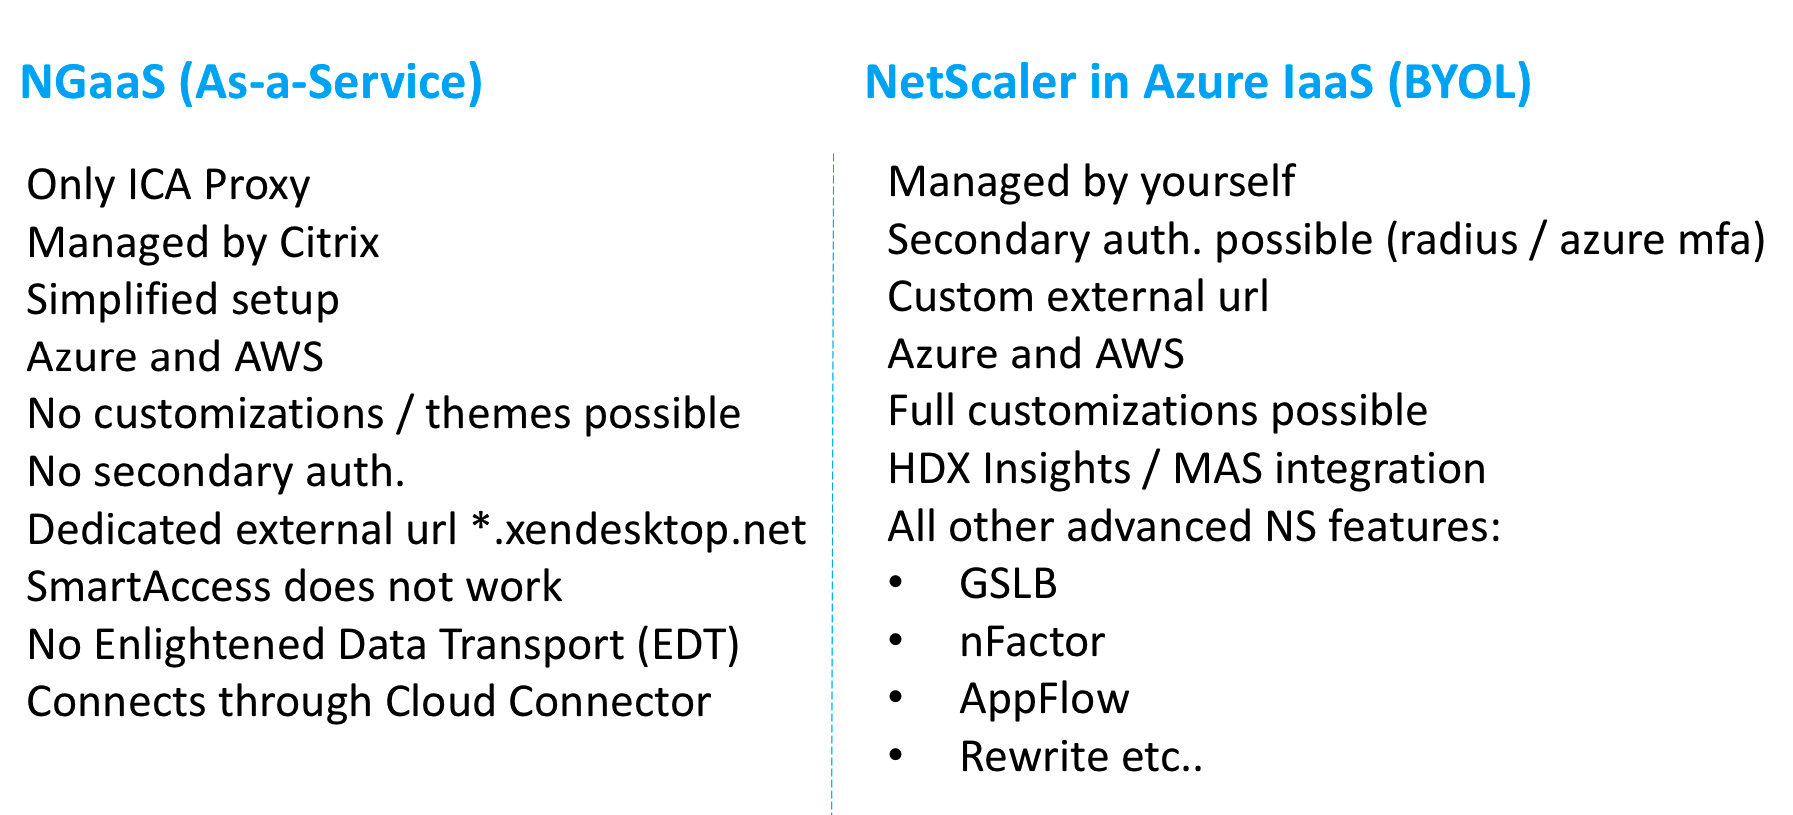
NetScaler Gateway Service vs. Bring-your-Own NetScaler VPX in Azure
Compare the NetScaler Gateway Service (NGaaS) version from inside the Citrix Cloud with the Bring-your-Own-License version in Microsoft Azure IaaS.
Note: The NetScaler Gateway is limited in several important services. Citrix is currently busy on get XenApp Essentials supported for Azure Active Directory, and hopefully later also Azure MFA. I also heard that EDT support is in the making.
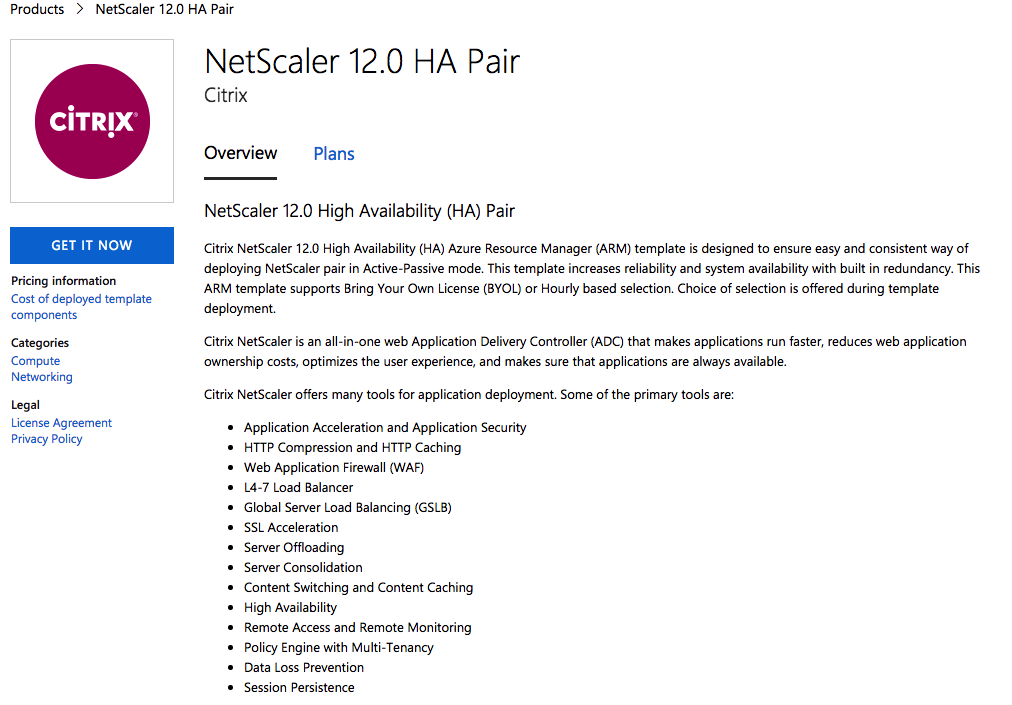
NetScaler HA setup in Azure
It’s now also possible to enroll a HA (High-Availability) NetScaler version 12.0 version in the Azure Marketplace in active-passive setup. The installation will be based on an Azure ARM template and will provide the configuration of a Pair of NetScalers HA-INC mode.
Details of topology can be found at http://docs.citrix.com/en-us/netscaler/12/deploying-vpx/deploy-vpx-on-azure/configure-vpx-pair-ha-inc.html.
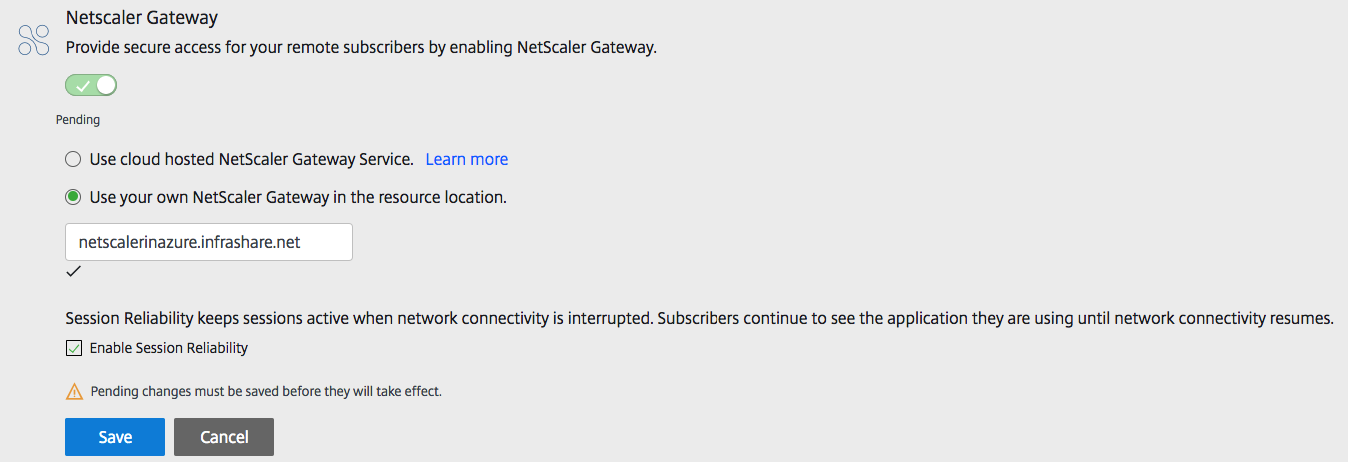
Activate Choose-your-Own NetScaler in the Citrix Cloud
Go to the Citrix Cloud – XenApp and XenDesktop Service and Open Manage -> Service Delivery
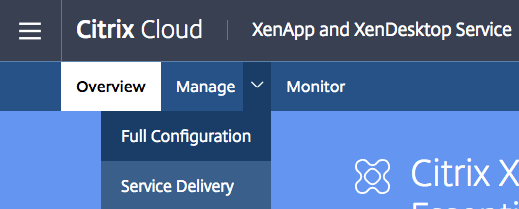
Change the NetScaler Gateway setting to – Use your own NetScaler Gateway in the resource location.
Enter in the external DNS name, enable Session Reliability and click on Save
Install a own StoreFront server
Please perform the initial installation of your StoreFront server(s) in Microsoft Azure IaaS. Use a Windows Server 2012 R2 or 2016 Virtual Machine in Azure
Note: When you have a High Availability configuration for the Citrix Cloud Connectors (2 servers), then add the other FQDN of the second Cloud Connector server too.
The StoreFront servers needs to be available in the same subnet as the Citrix Cloud connector servers. If you place them in another Zone or environment, please make sure that you add another resource location, and install the Citrix Cloud Connector server.
If you aren’t familiar with the installation steps for StoreFront, please use the article below. The steps for the latest StoreFront version are pretty similar.
How to install and configure StoreFront 3.9, including the new NetScaler integration import
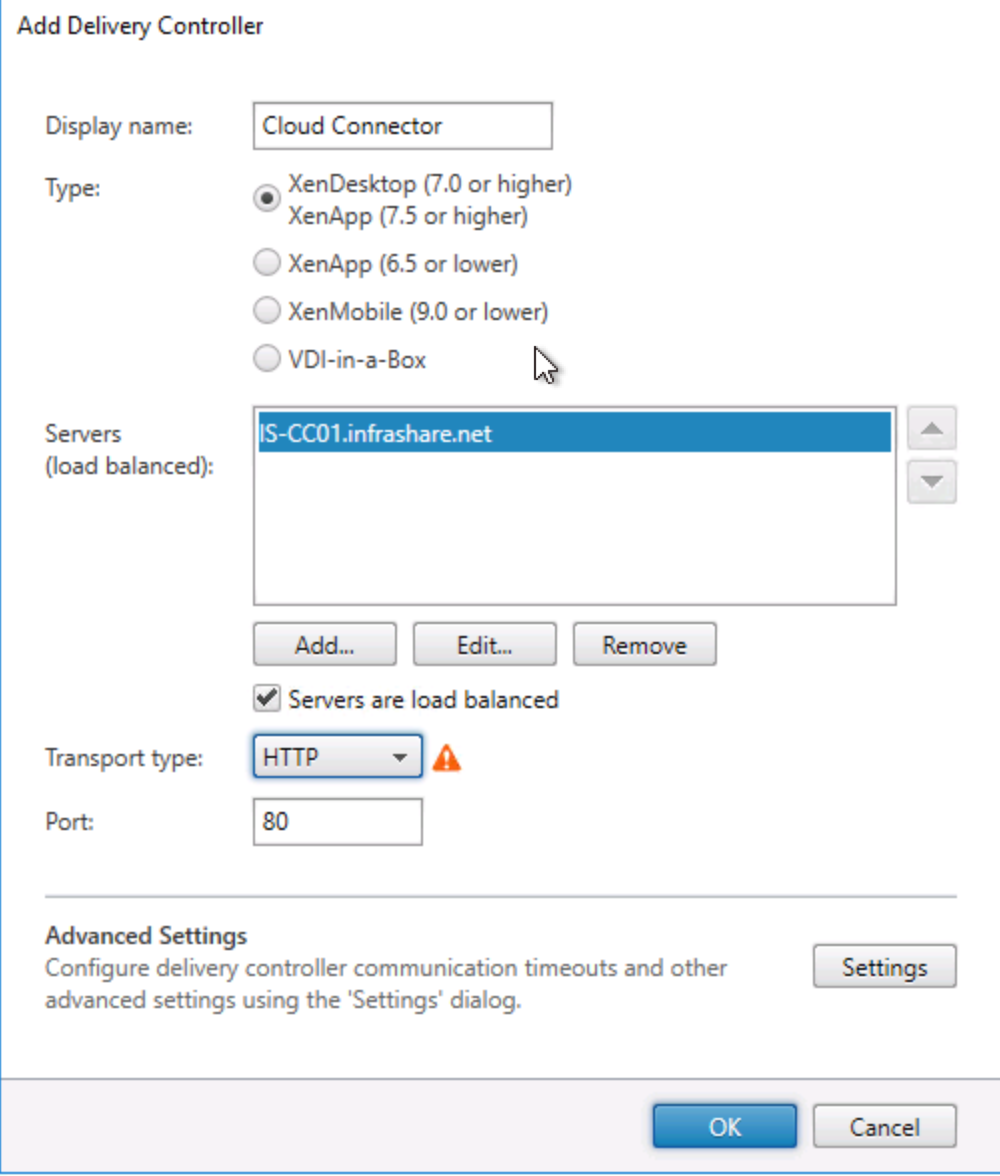
The only thing to remember is to use the Citrix Cloud Connector FQDN and Protocol HTTP with port 80 as Delivery Controller configuration.
When the StoreFront server configuration is done, please proceed the configuration steps for the NetScaler in Azure IaaS!
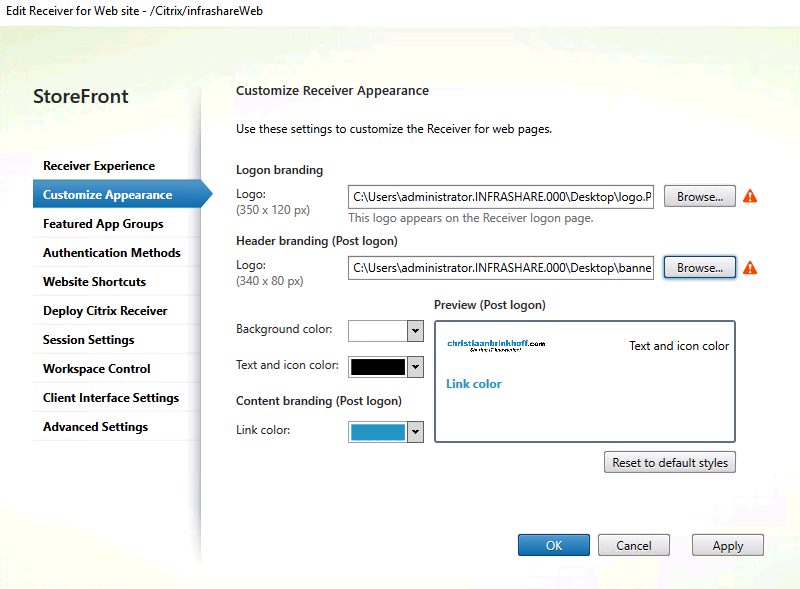
Edit the Company StoreFront default Logo and Header
Open the – Manage Receiver for Web Sites – option
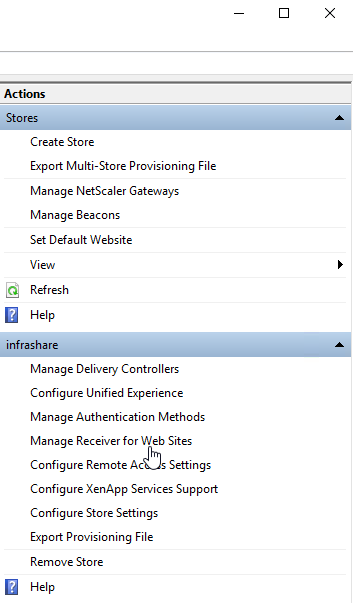
Click on Configure
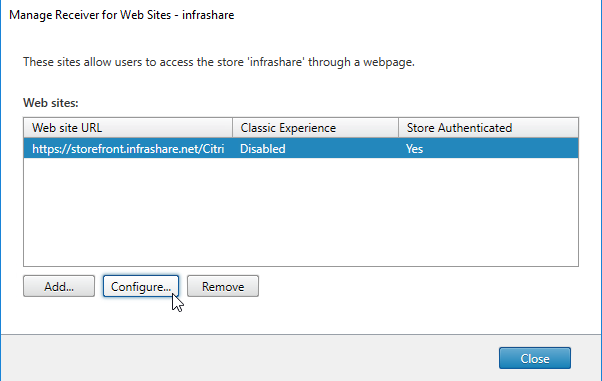
Upload the logo that you want to place at the logon screen – the second logo will be placed in the header when logged on – change the colours that fit your needs. Click on Apply and Ok
Note: Be aware of the logo sizing, if they are bigger then the default you can get problems with your PNagent, receiver client profile setup for the X1 Receiver Experience.
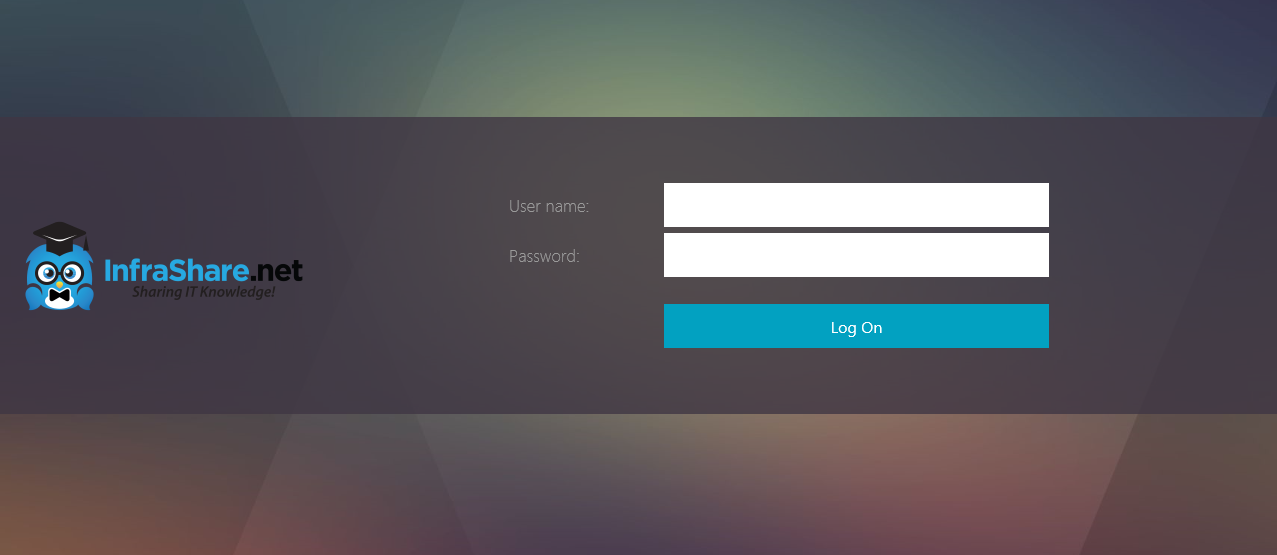
Refresh your StoreFront page and see the results
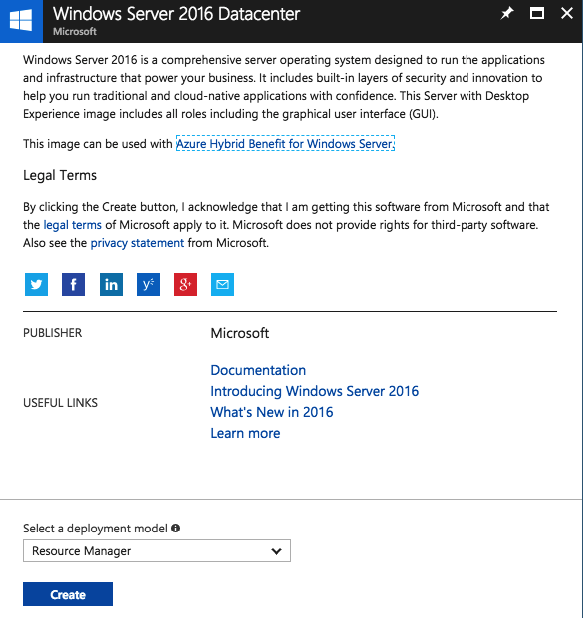
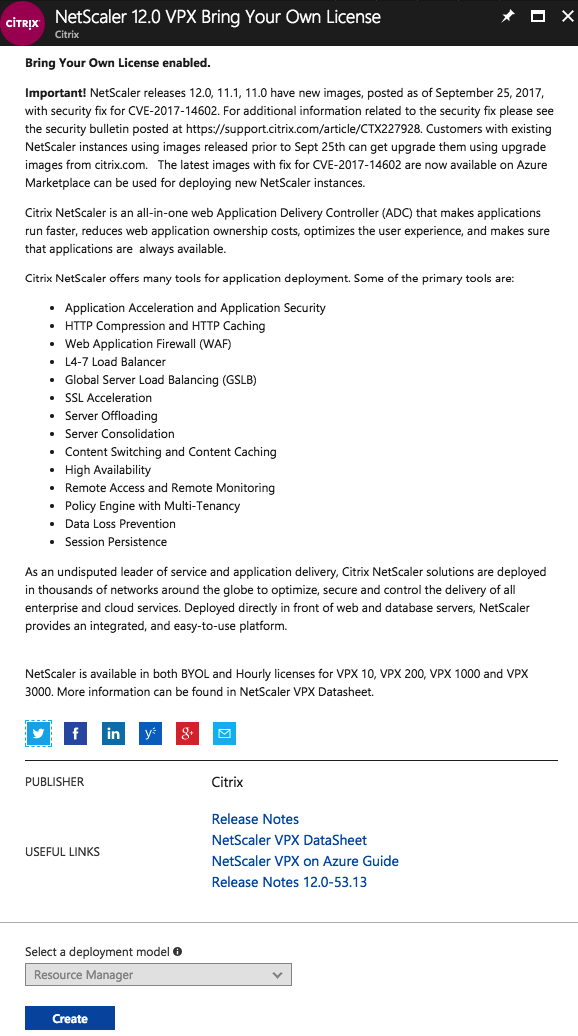
Enroll the NetScaler VPX in Azure IaaS
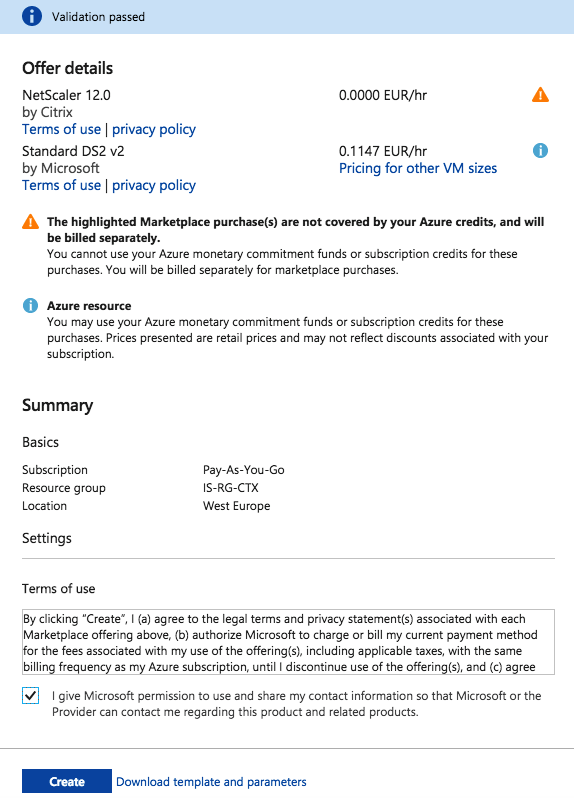
Search for the NetScaler 11.1 or 12.0 VPX Bring Your Own License version in the marketplace, and proceed the creation of the Virtual Machine in Azure Infrastructure as a Service. Click on Create
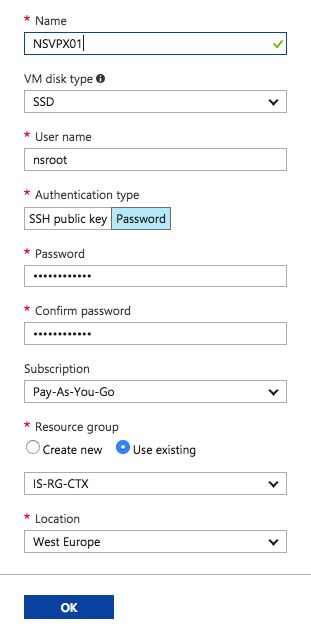
Enter in the requested information, such as Virtual Machine name, storage type, subscription, DC location etc. Click Ok to switch to the sizing screen
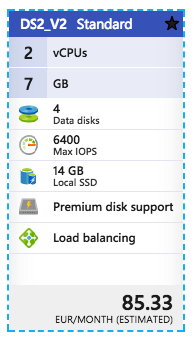
Choose a sizing for the NetScaler Virtual Machine. I’ll use the DS2_V2.
Note: Using NetScaler in HA? Don’t forget to configure an Availability Set to ensure High Availability / Continuity of your NetScaler environment! These steps need to be done before the creation of the machine.
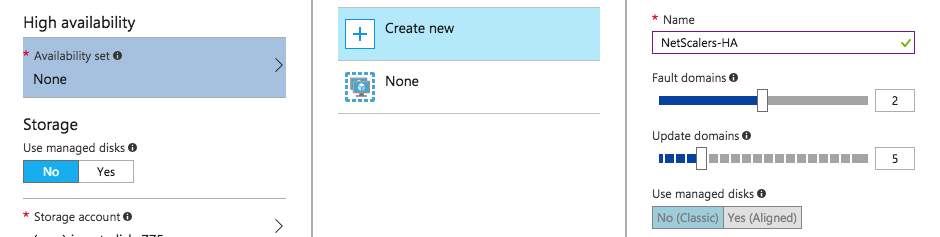
Enter the other requested information, such as Storage Account, Virtual Network and Subnet and
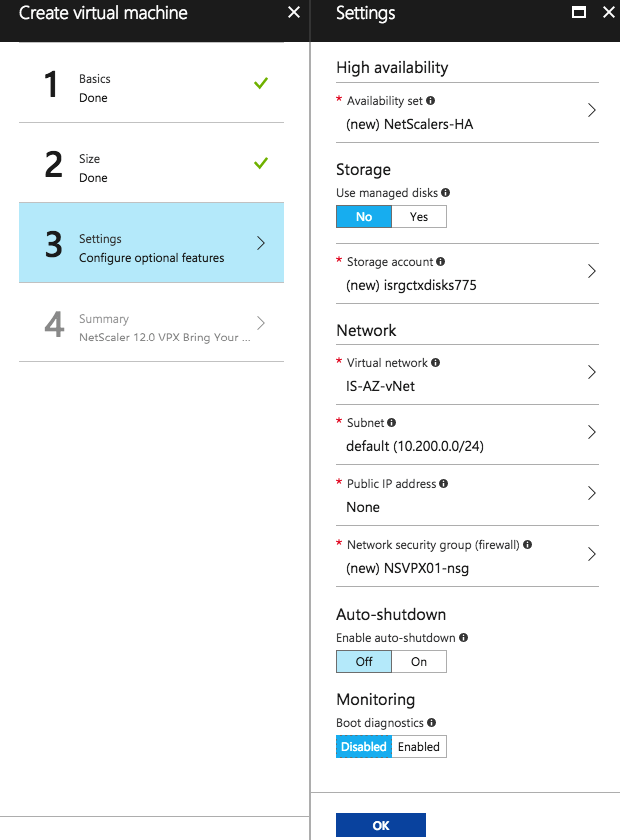
Start the enrollment, click on Create
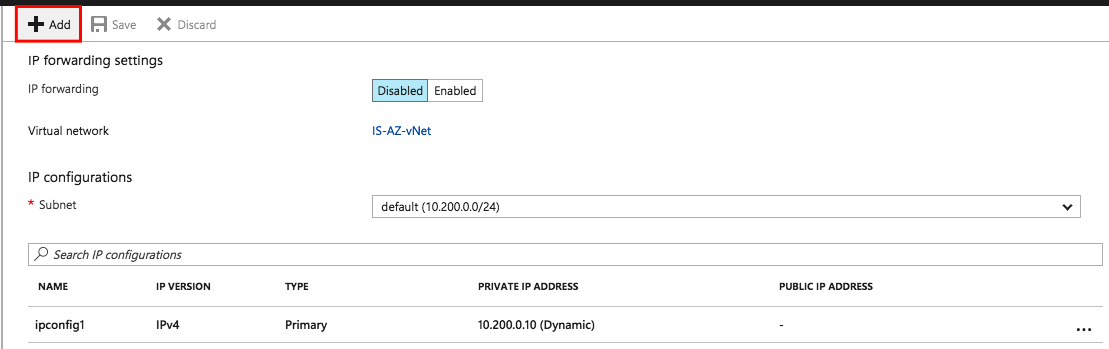
Configure the NetScaler Multiple IP Addresses in Azure
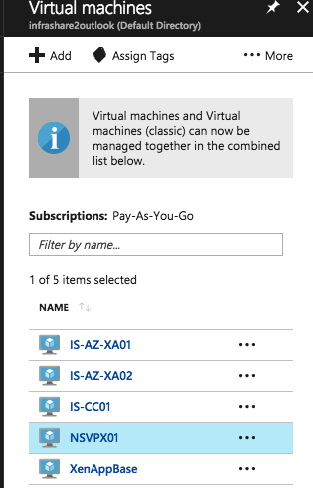
Click Virtual Machines and select the NetScaler device
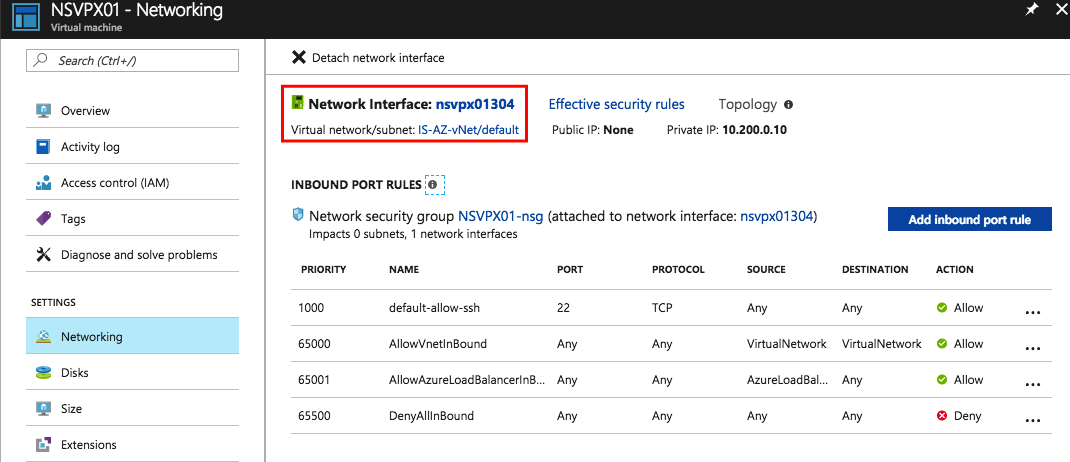
Click Network interfaces and then click the name of the Network Interface.
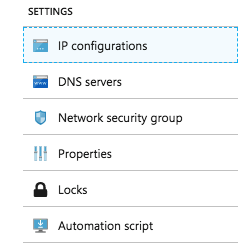
Click IP configurations.
Click Add.
Provide Name: SNIP
Private IP address settings:
Static IP address and Public IP address: Disabled
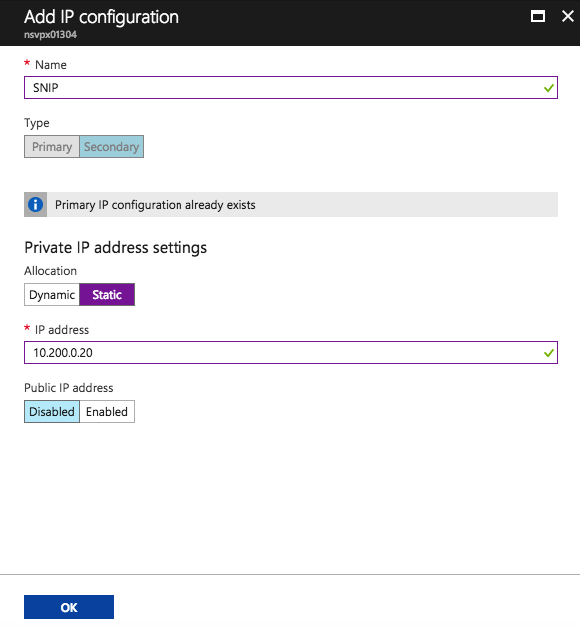
Click Add one more time to add another secondary private IP which will act as a VIP for NetScaler.
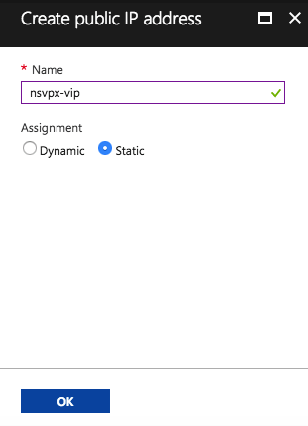
Name: VIP Private IP address settings: Static IP Address Public IP address: Enabled
Click IP address and Create new and enter Name as VIP. Enable the Public IP address option

Choose an existing PIP or add a new Public IP to the VIP configuration. Click Ok
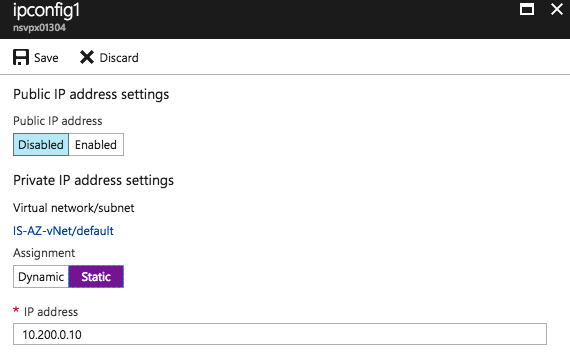
Note: Please change the ipconfig1 address to static before you proceed. Just to determine that the management access stays the same after a reboot.
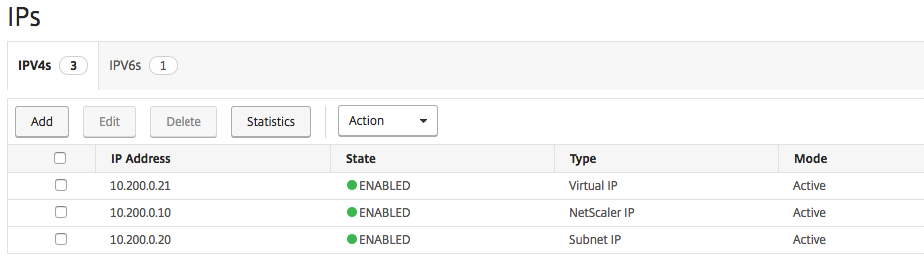
Please confirm, all the addresses must be listed as picture below…
Note: When you haven’t got a hybrid connection to Azure, you should also add a Public IP to the primary IP Configuration (named ipconfig1) to provide access to the management portal.

Perform the initial NetScaler Gateway configuration
Logon to the NetScaler web portal.
Note: Use the same credentials, as you entered during the setup of the NetScaler Virtual Machine.
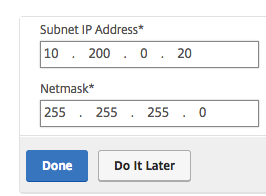
Click on Subnet IP Address

Enter in the internal SNIP address from the previous step. Click Done
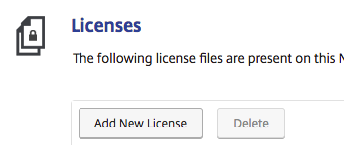
Upload the NetScaler license
Note: Use the following url to request a trial. Please use the Host ID during the allocation in the MyCitrix portal.
https://www.citrix.com/products/netscaler-adc/get-started.html
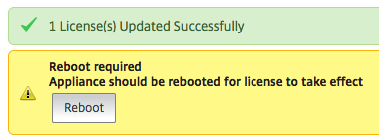
When finished adding, please reboot the NetScaler!
Note: Click on Save the configuration before rebooting.
Seeing all the green checkmarks? Than we can proceed the next steps!
Navigate to System -> Network -> IPs and click Add.
Add the Virtual IP address to the NetScaler

Make sure that all the 2 Network Addresses are listed !
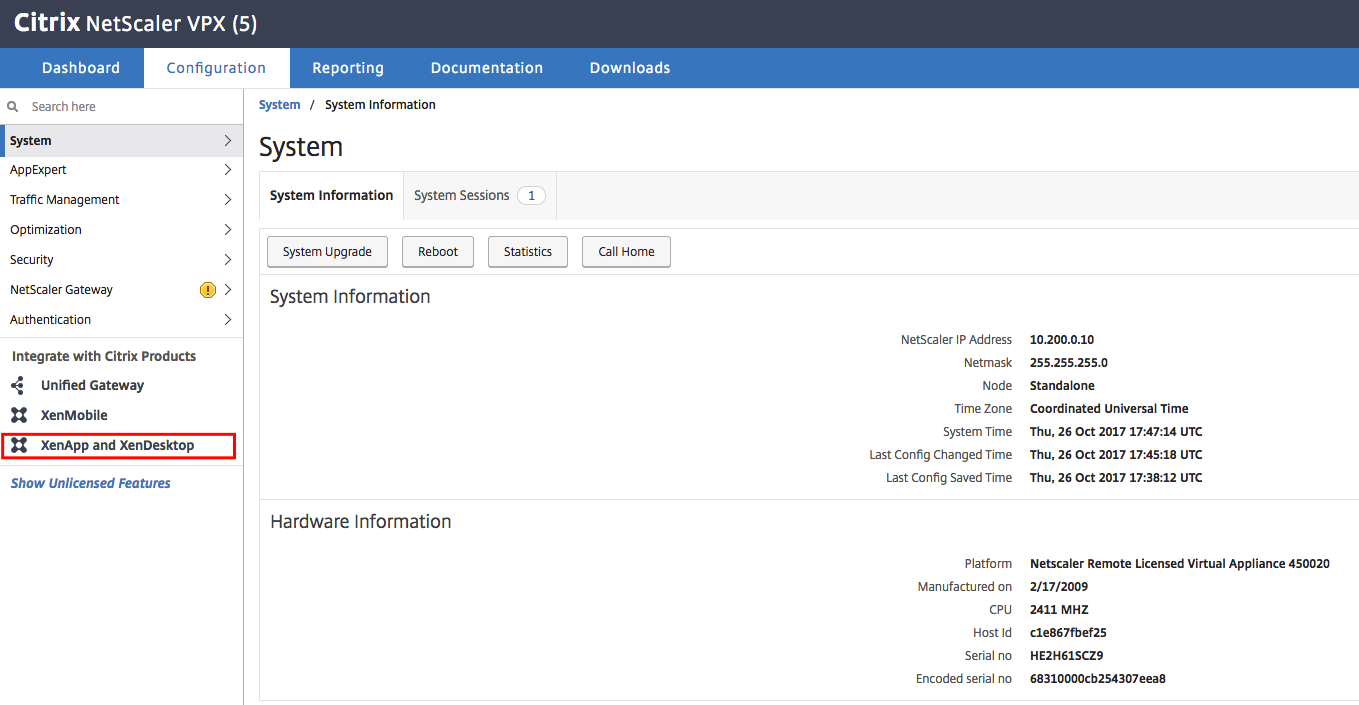
Open the XenApp and XenDesktop setup in the menu
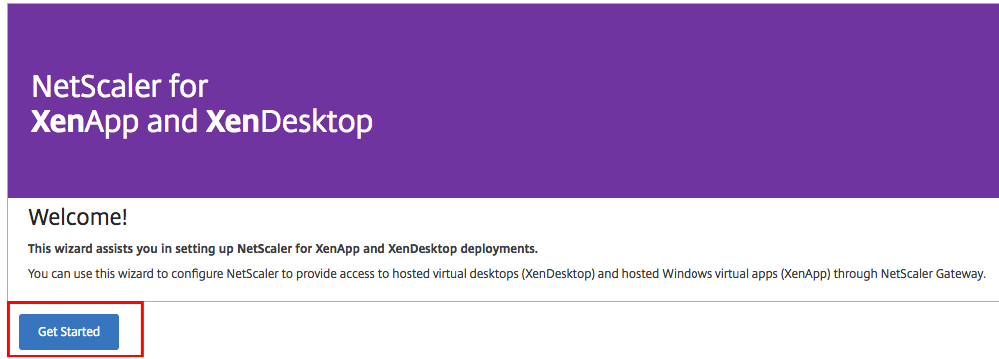
Click on Get Started
Select StoreFront and Click Continue
Enter in an external DNS name for the NetScaler Web Portal, enter in the VIP Address and click on Continue
Note: Select the option – Redirect request… – to create an 80 to 443 port redirection.
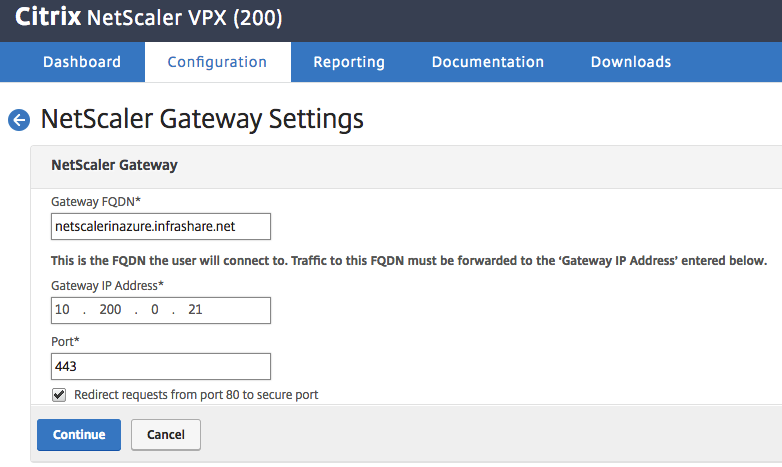
Click on Yes

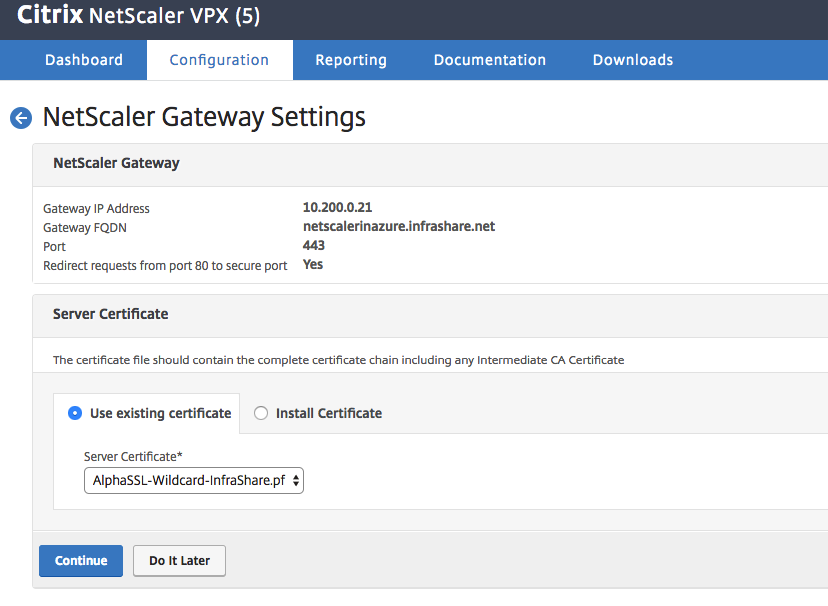
Upload a SSL certificate to the NetScaler
Note: Don’t know how to add a SSL certificate to NetScaler? Please check one of my previous blogs from step 18.
Enter in the internal StoreFront url and click on Retrieve store to check the connection.
Enter in the FQDN of the Citrix Cloud Connector(s) as STA service! Add more Citrix Cloud Connectors as STA by clicking on the + button
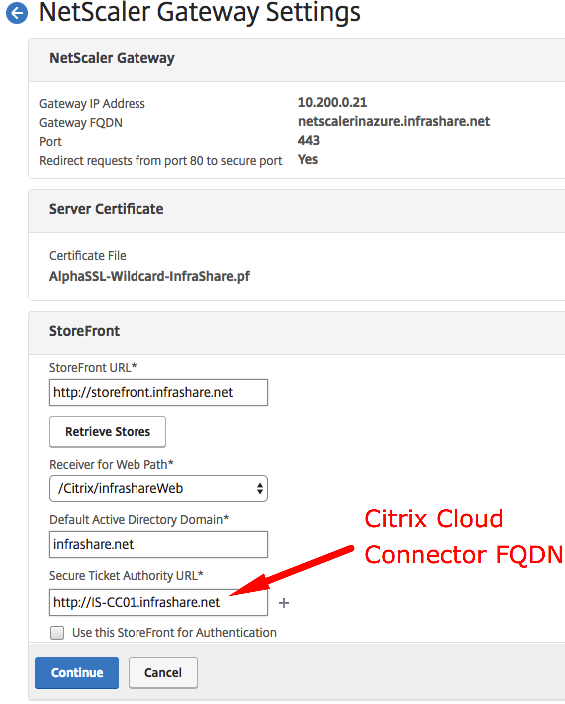
Provide Choose Authentication Type : Domain
IP Address : Active Directory Server IP
Base DN: cn=users,dc=infrashare,dc=net (example)
Service account = administrator@infrashare.net (example)
Click on Test Connection to check all the settings

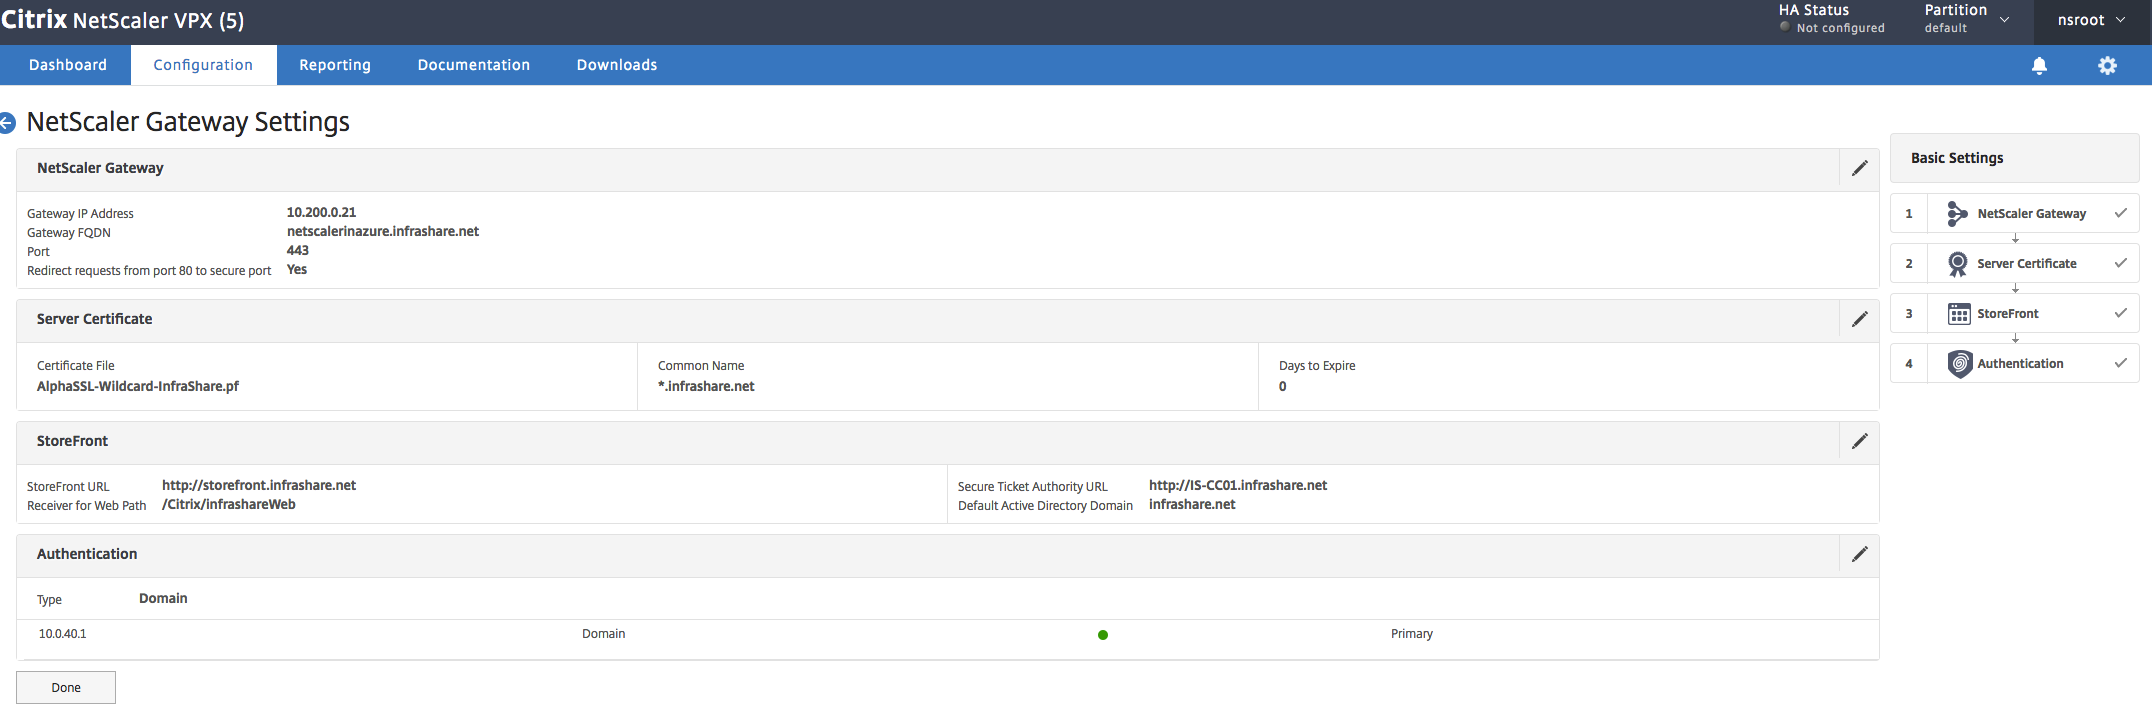
Please confirm all the settings in the summary screen, click Done
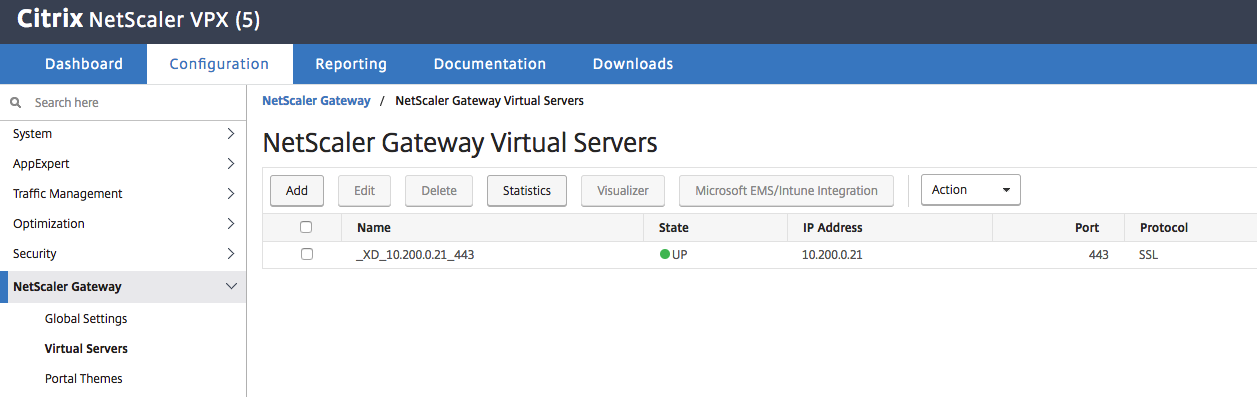
Check if the Virtual Server is UP!
Add the NetScaler Gateway configuration file in StoreFront
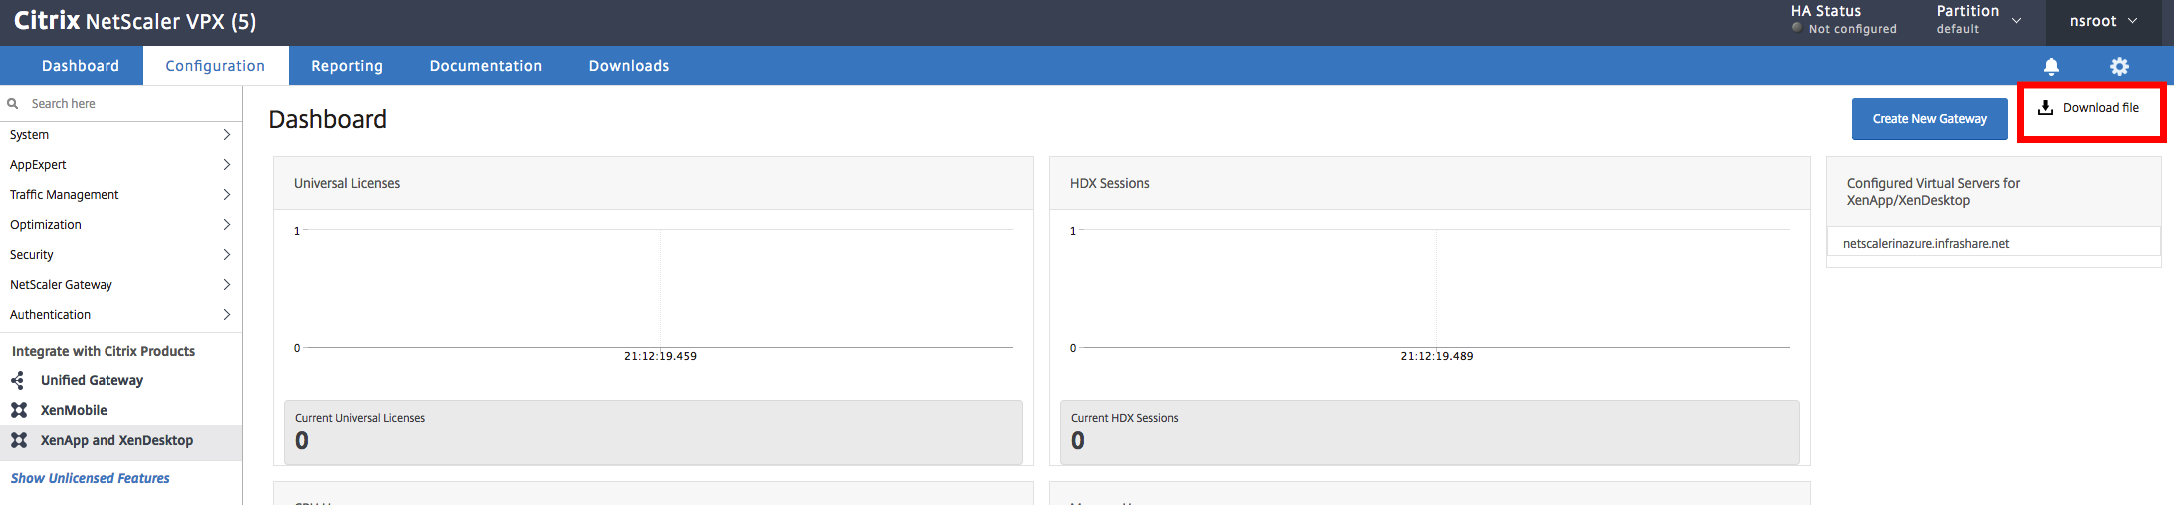
Download the NetScaler configuration file and upload the .zip file in the StoreFront
Select the correct Virtual Server, click Ok
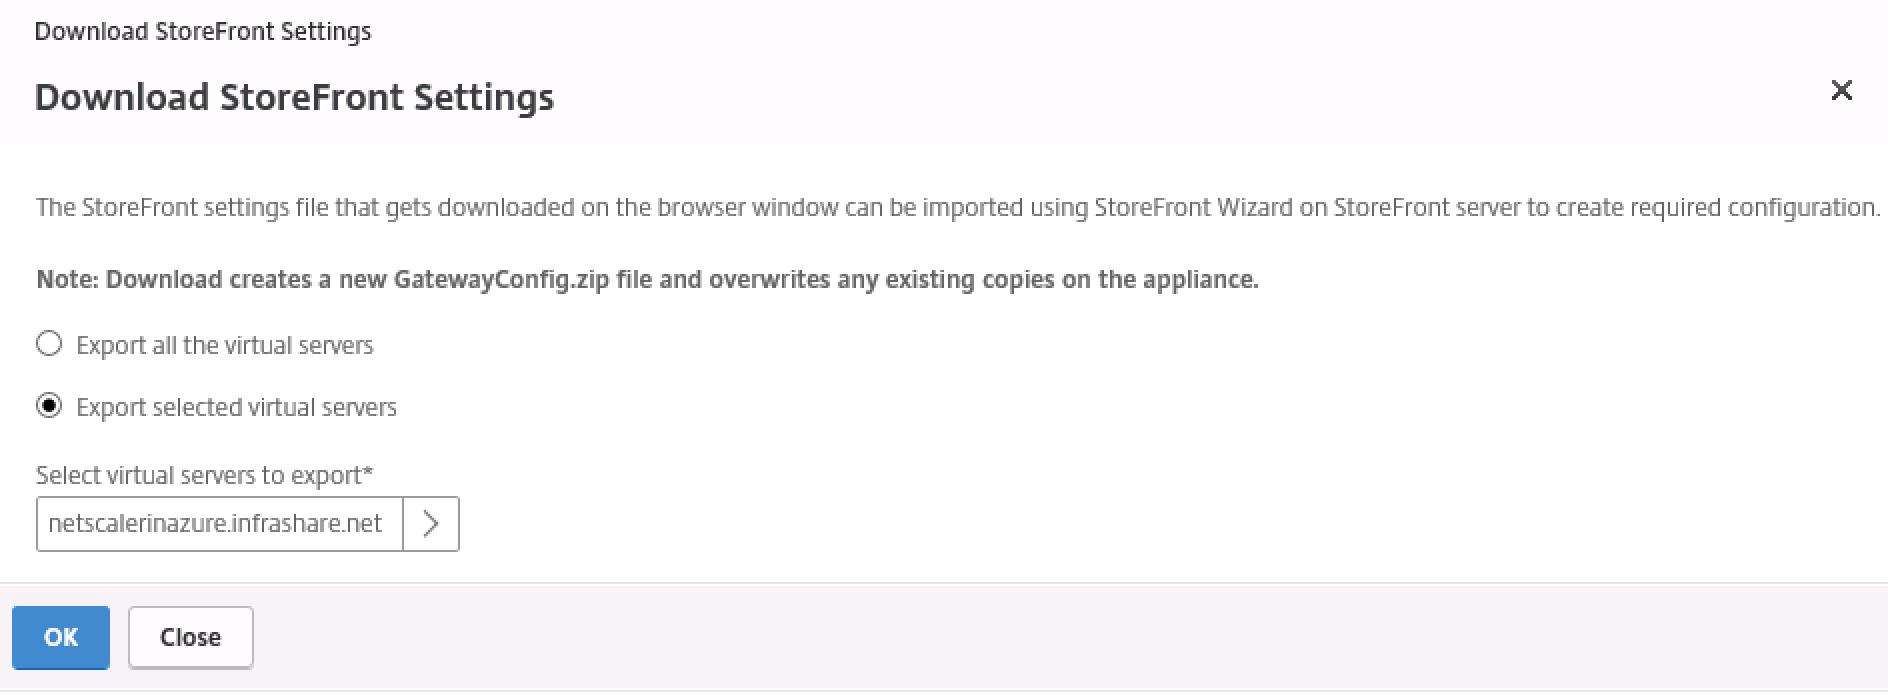
Save the config file
![]()
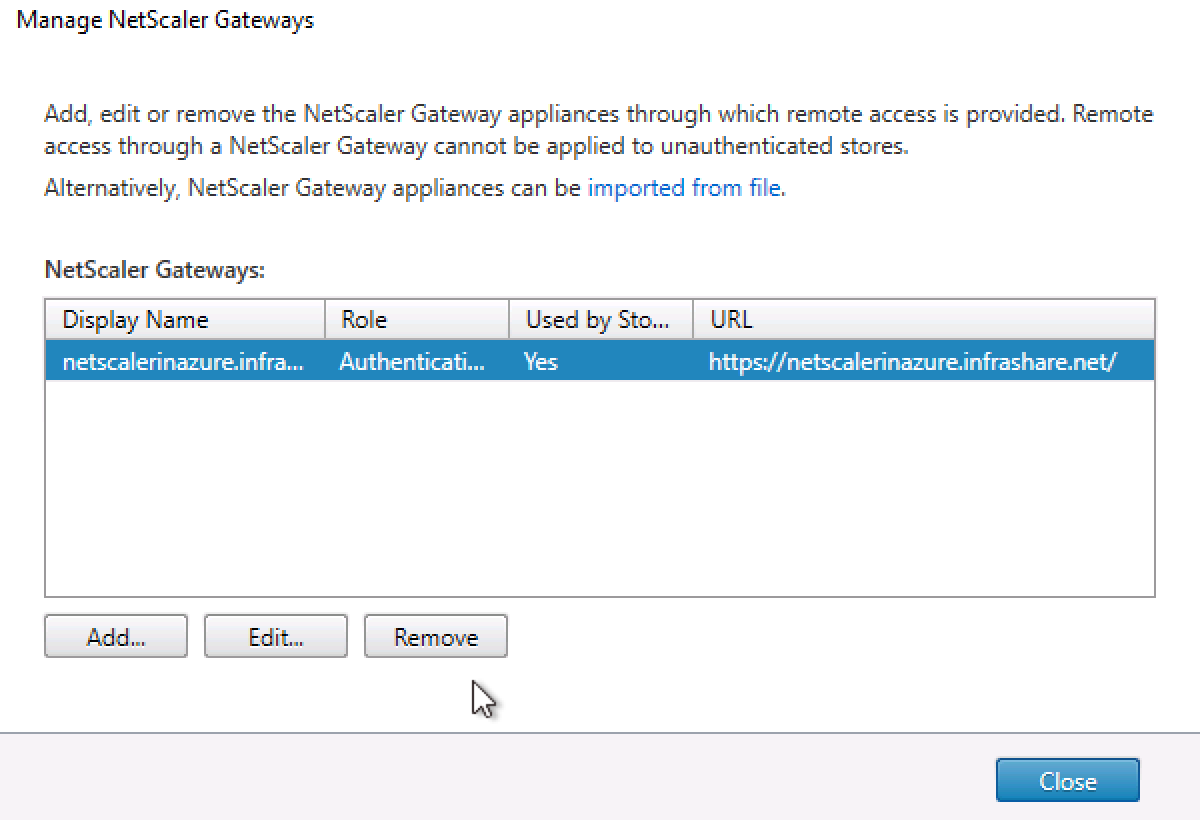
Switch to the StoreFront console, click on Manage NetScaler Gateways
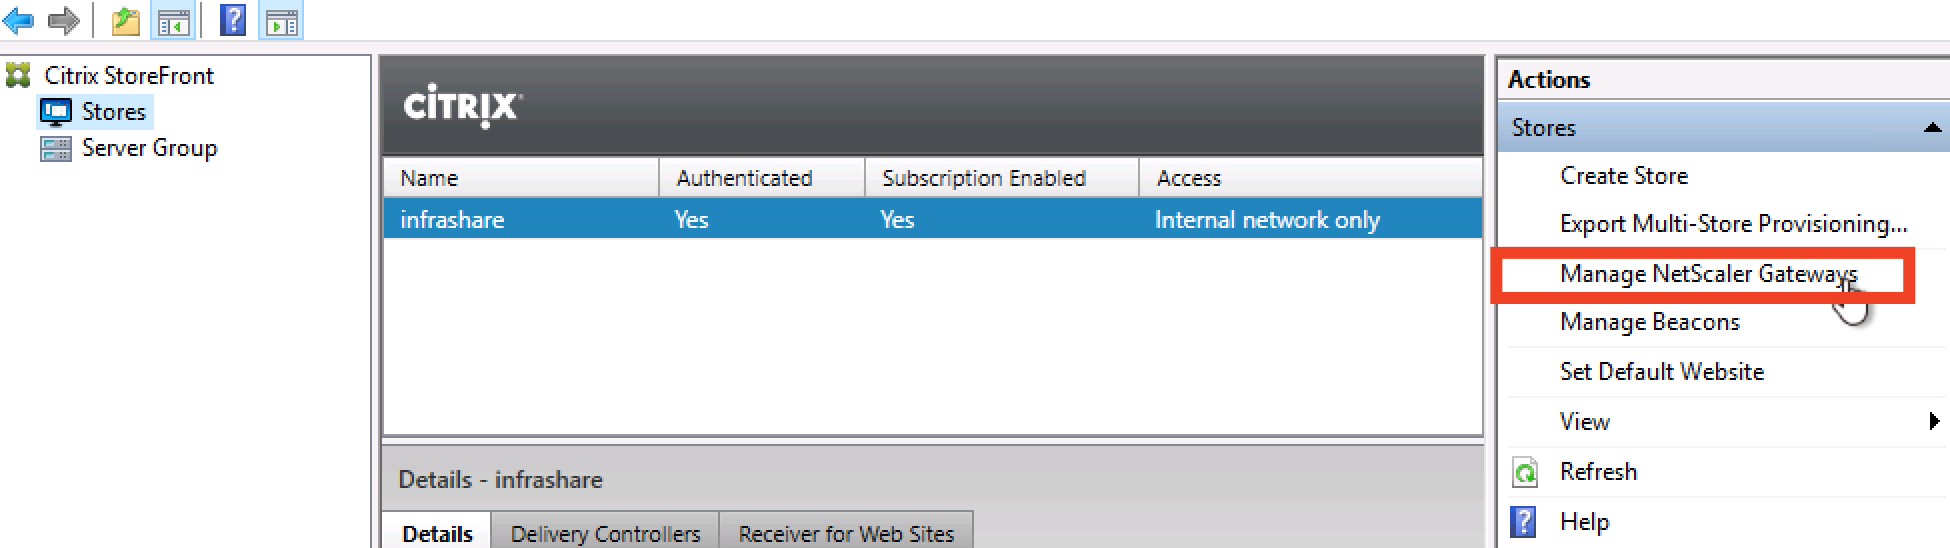
Click on Imported from file
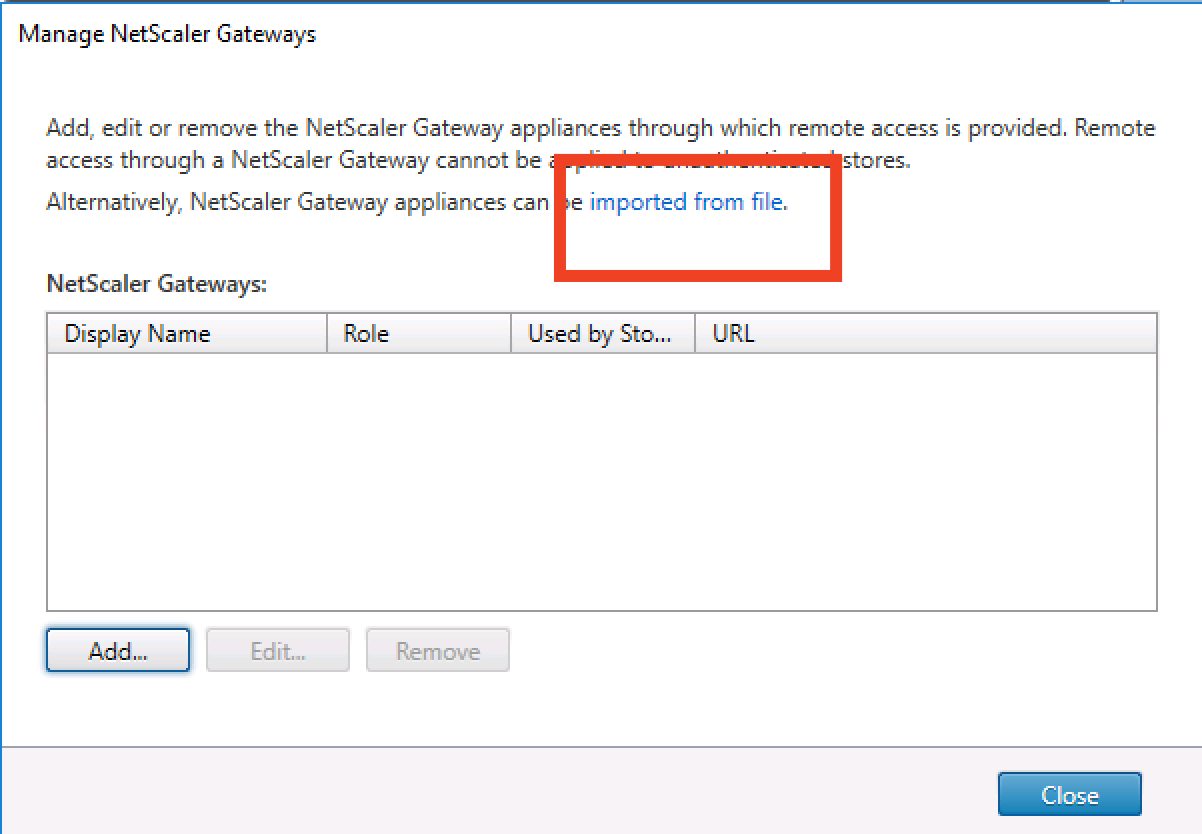
Browse for the ZIP file and import the vServer

Click on Next
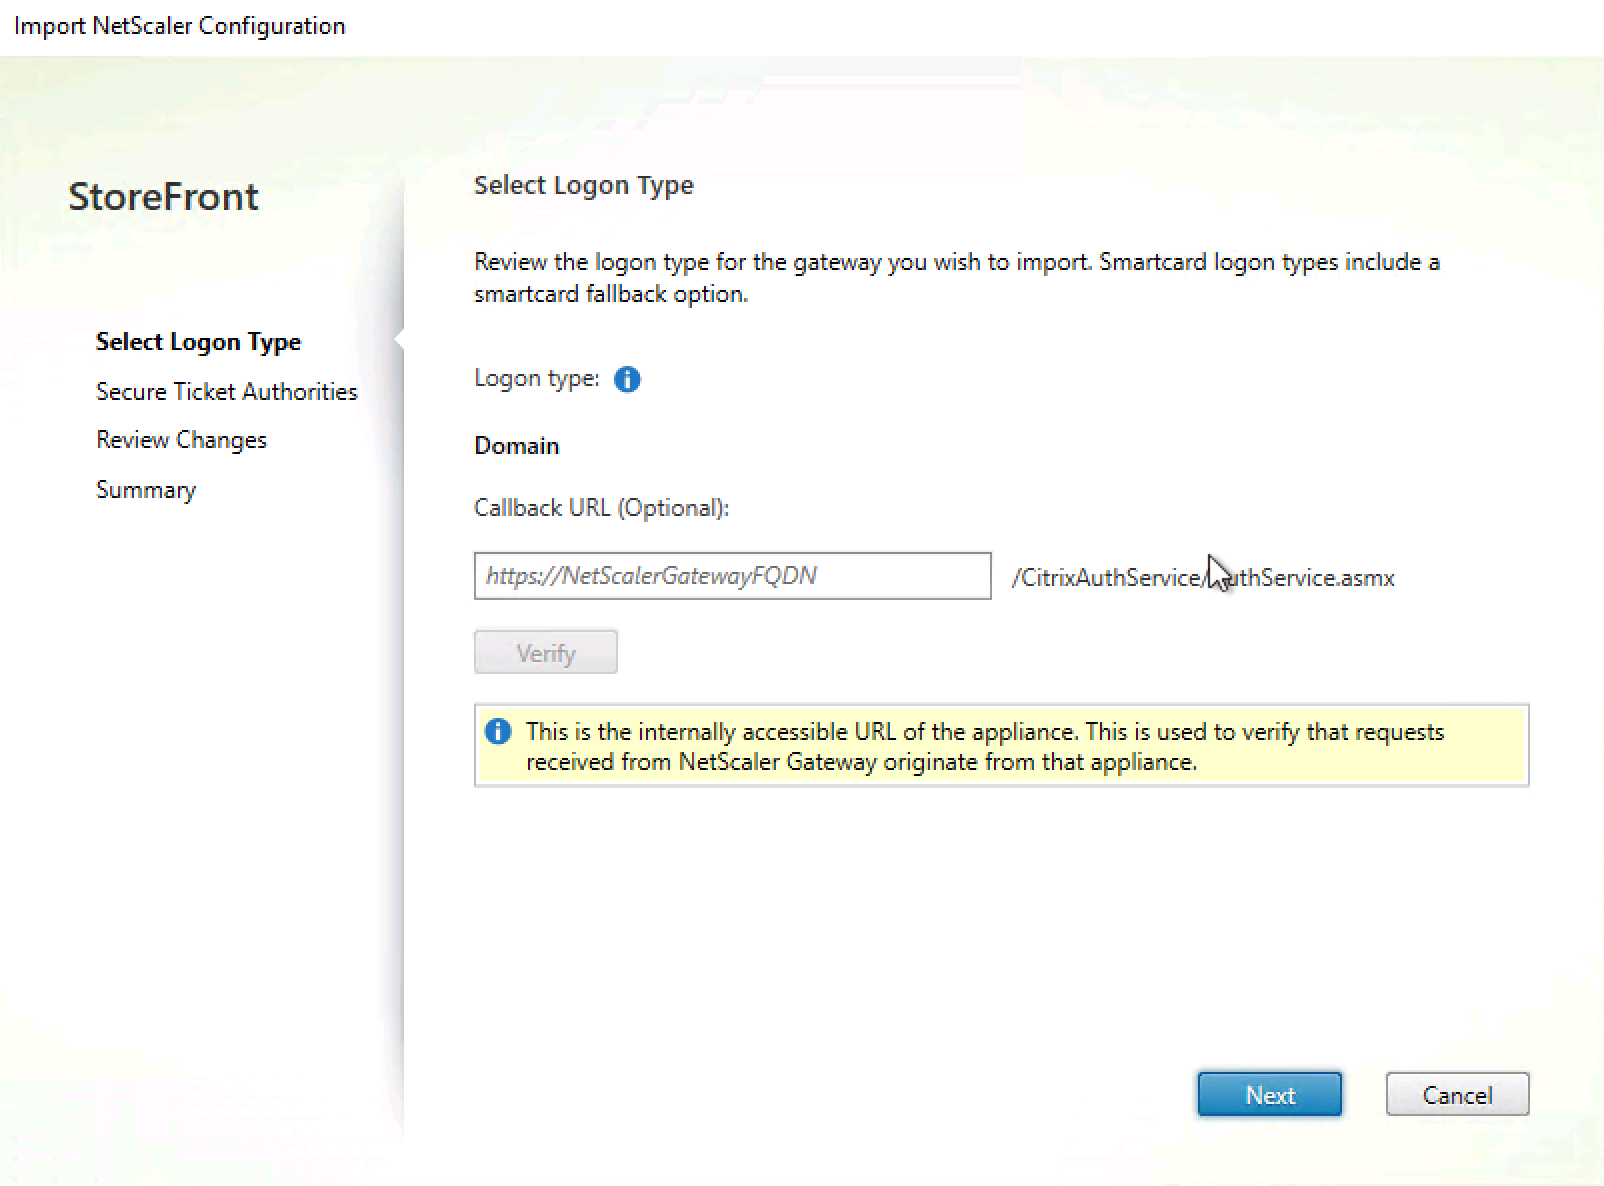
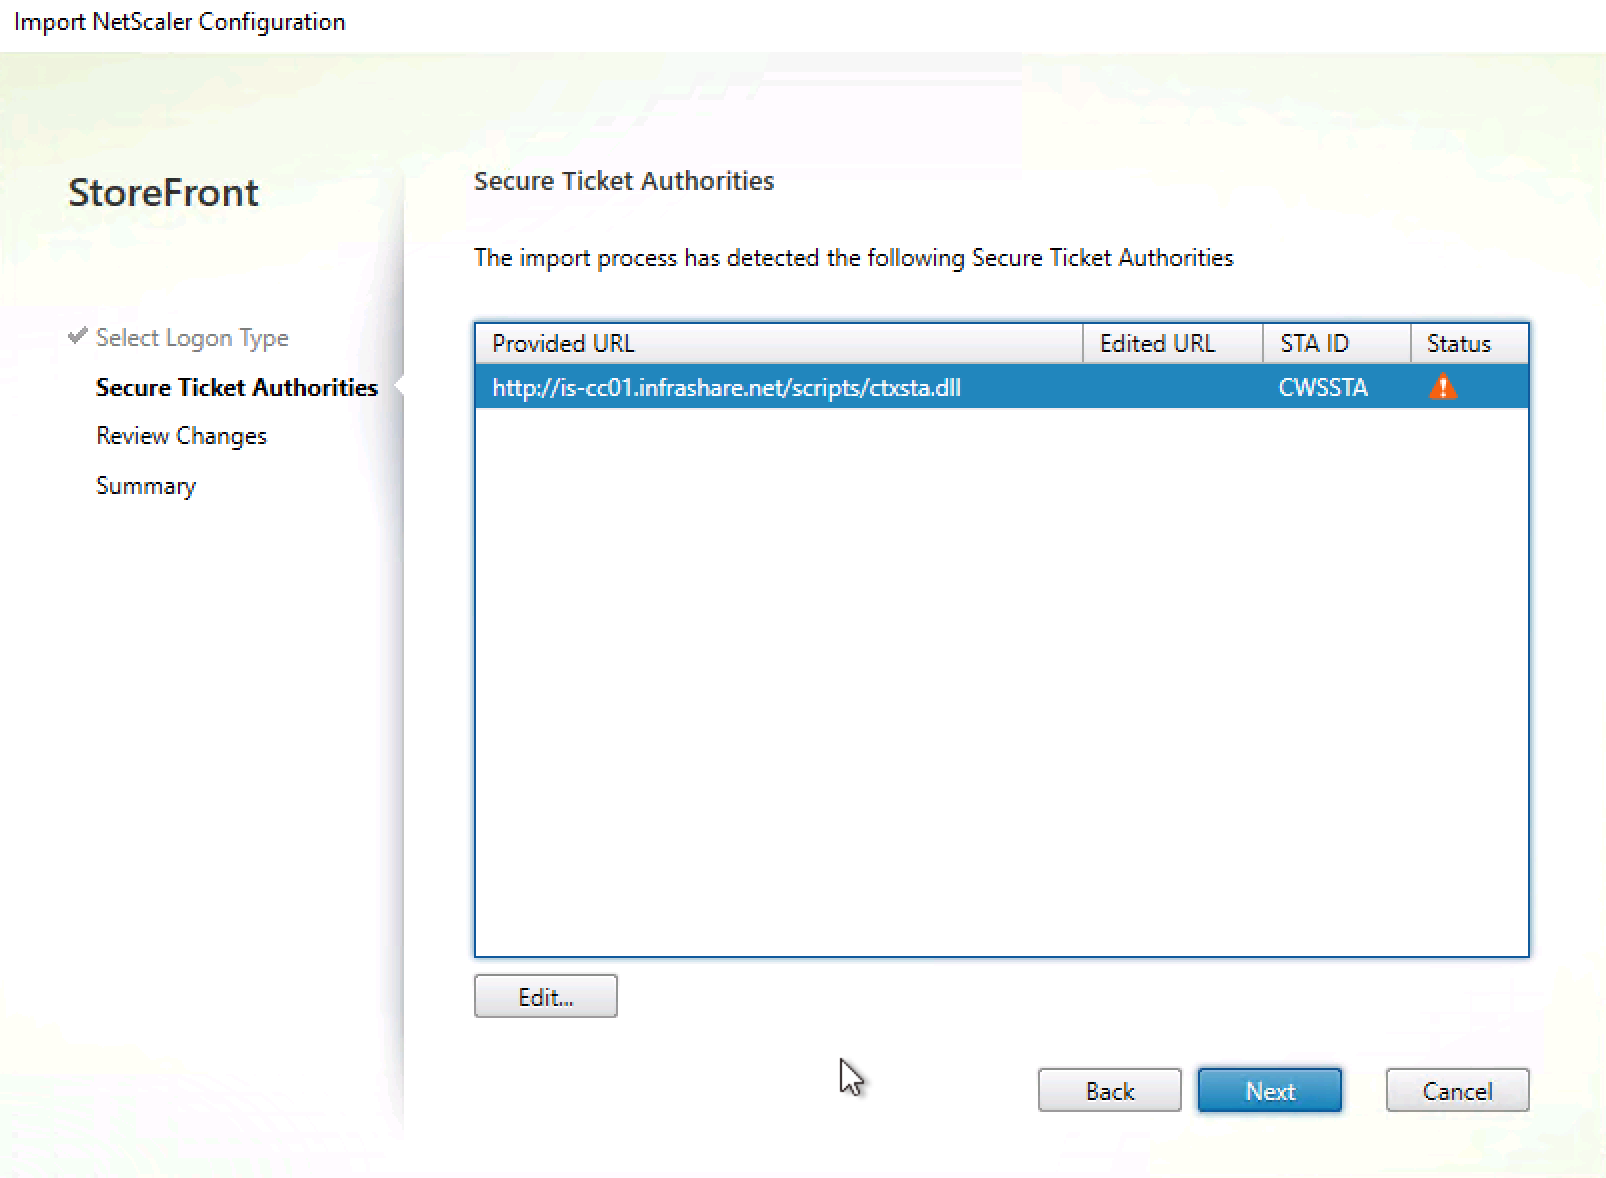
Ensure that the STA is responsible through the FQDN of the Citrix Cloud Connectors
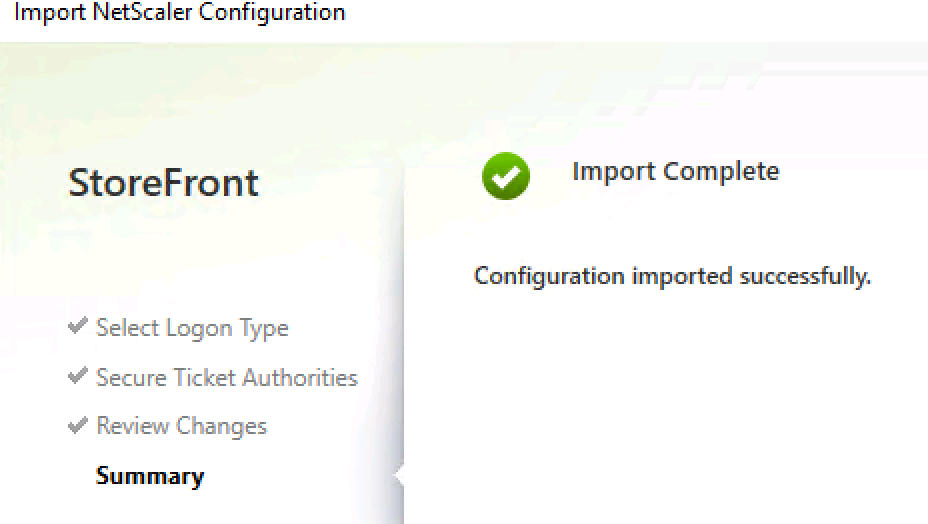
Review the changes, click on Import
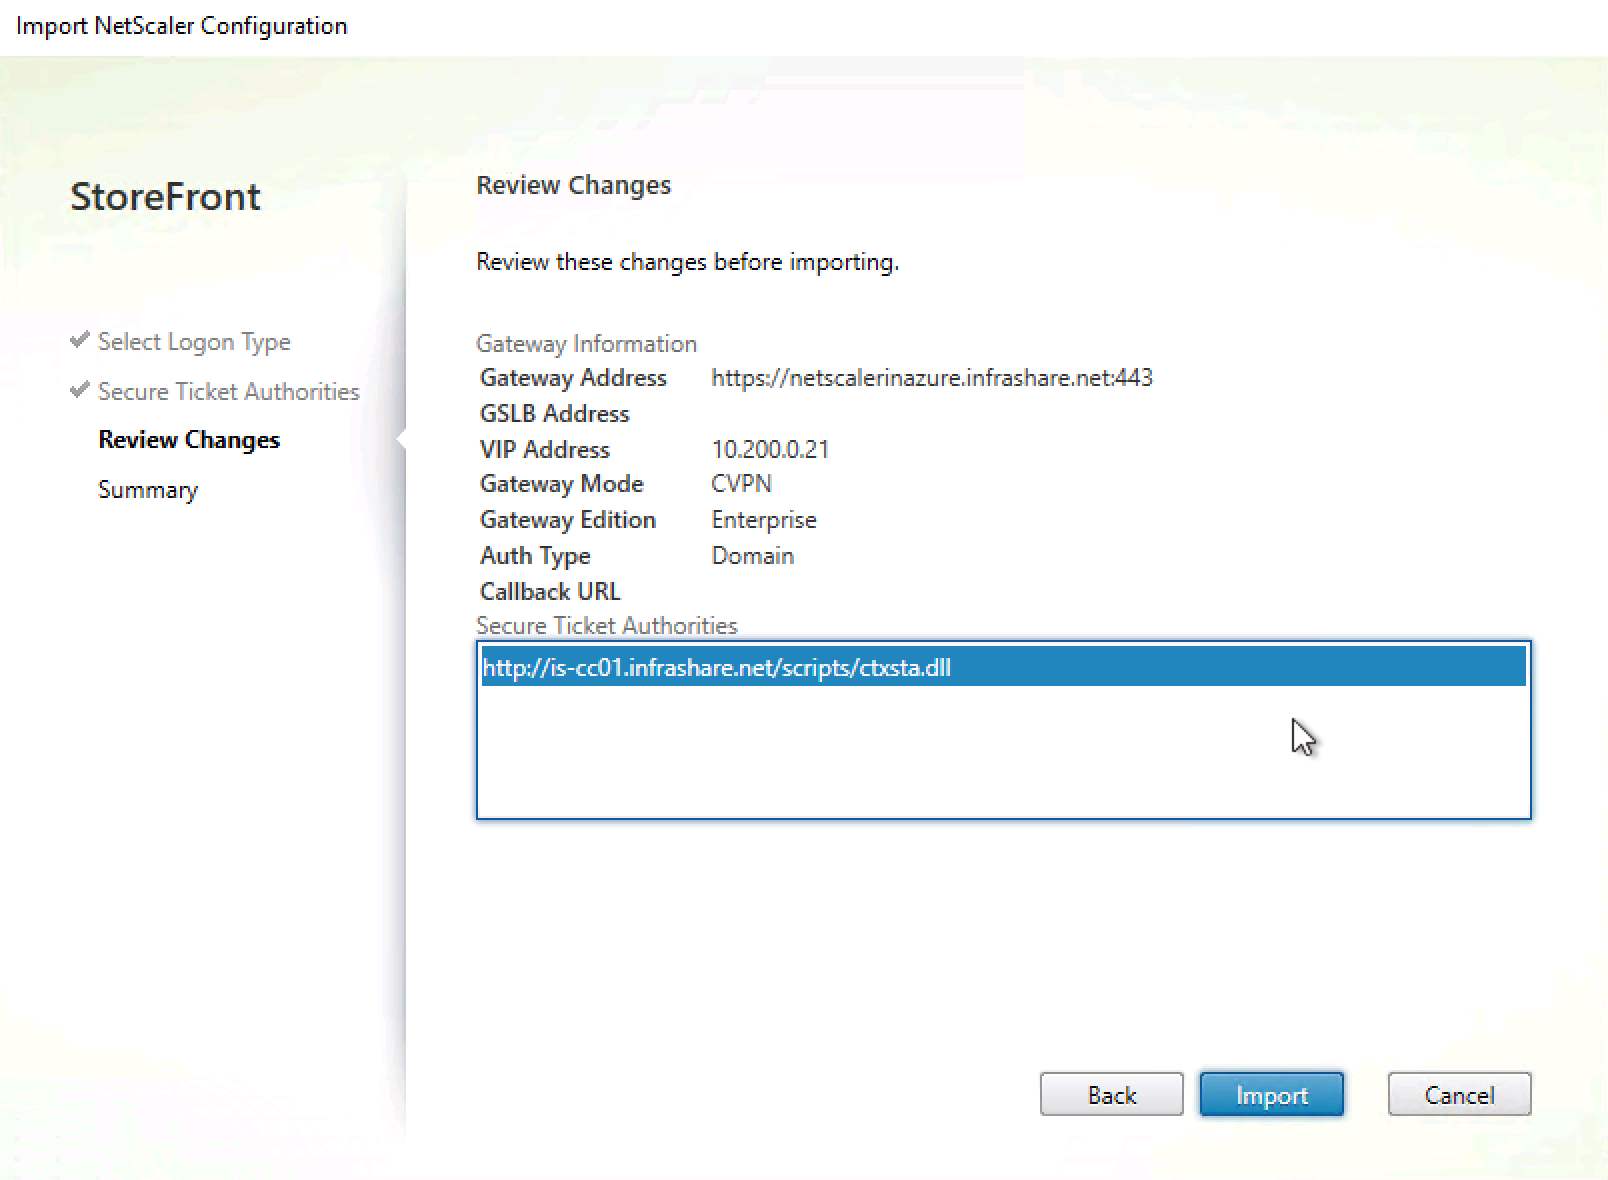
The NetScaler Gateway config is deployed to StoreFront
![]()
And automatically applied to the Store Settings…
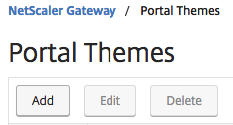
Create a custom Theme in NetScaler
Go in the Menu to NetScaler Gateway > Portal Themes
Click on Add
Enter a name and template
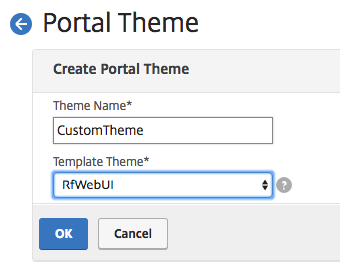
Change the settings as your own needs, for example the Center Logo. Click on Ok when finished editing

Now we must apply the theme to the vServer configuration
Go to NetScaler Gateway -> Virtual Servers and select the vServer, click on Edit
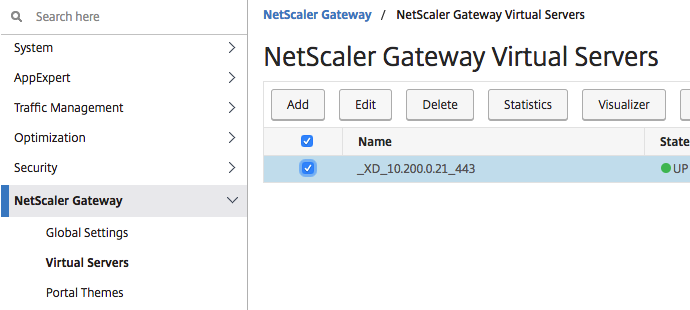
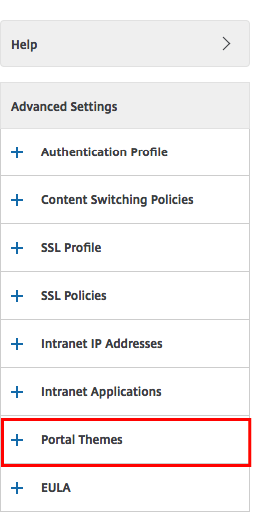
Select Portal Themes
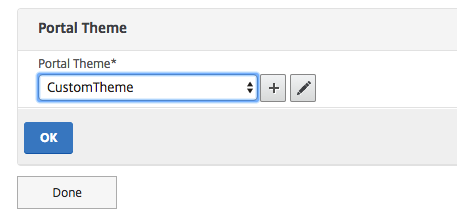
Select the theme we’d just created. Click on Ok and Done
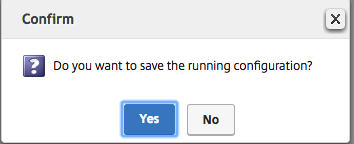
Make sure to save the config
Create a custom A record in your external DNS ISP portal, and point it to the Public IP Address which you’ll received during the Network Interface configuration process
![]()

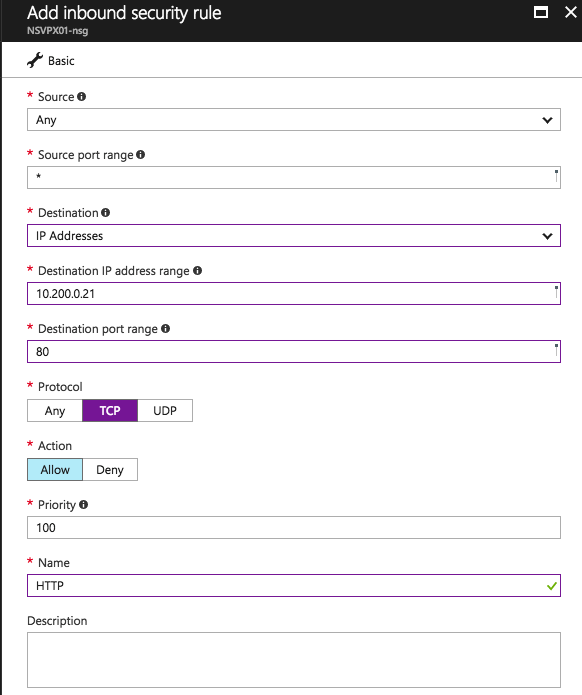
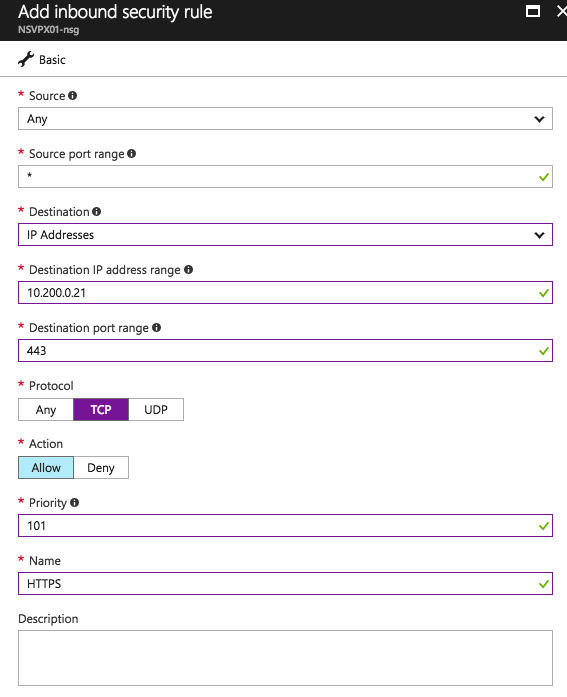
Add Network Security Groups inbound rules
Add the following 2 inbound Network Security rules to the NetScaler to provide access from the outside over HTTP and SSL to the Public IP VIP address.
HTTP-inbound
HTTPS-inbound
Test an internal Citrix Session to the Citrix Cloud
Open the internal StoreFront Url and enter in the credentials

And yes, the Desktop and Apps from my XenApp and XenDesktop Service in Citrix Cloud are working!


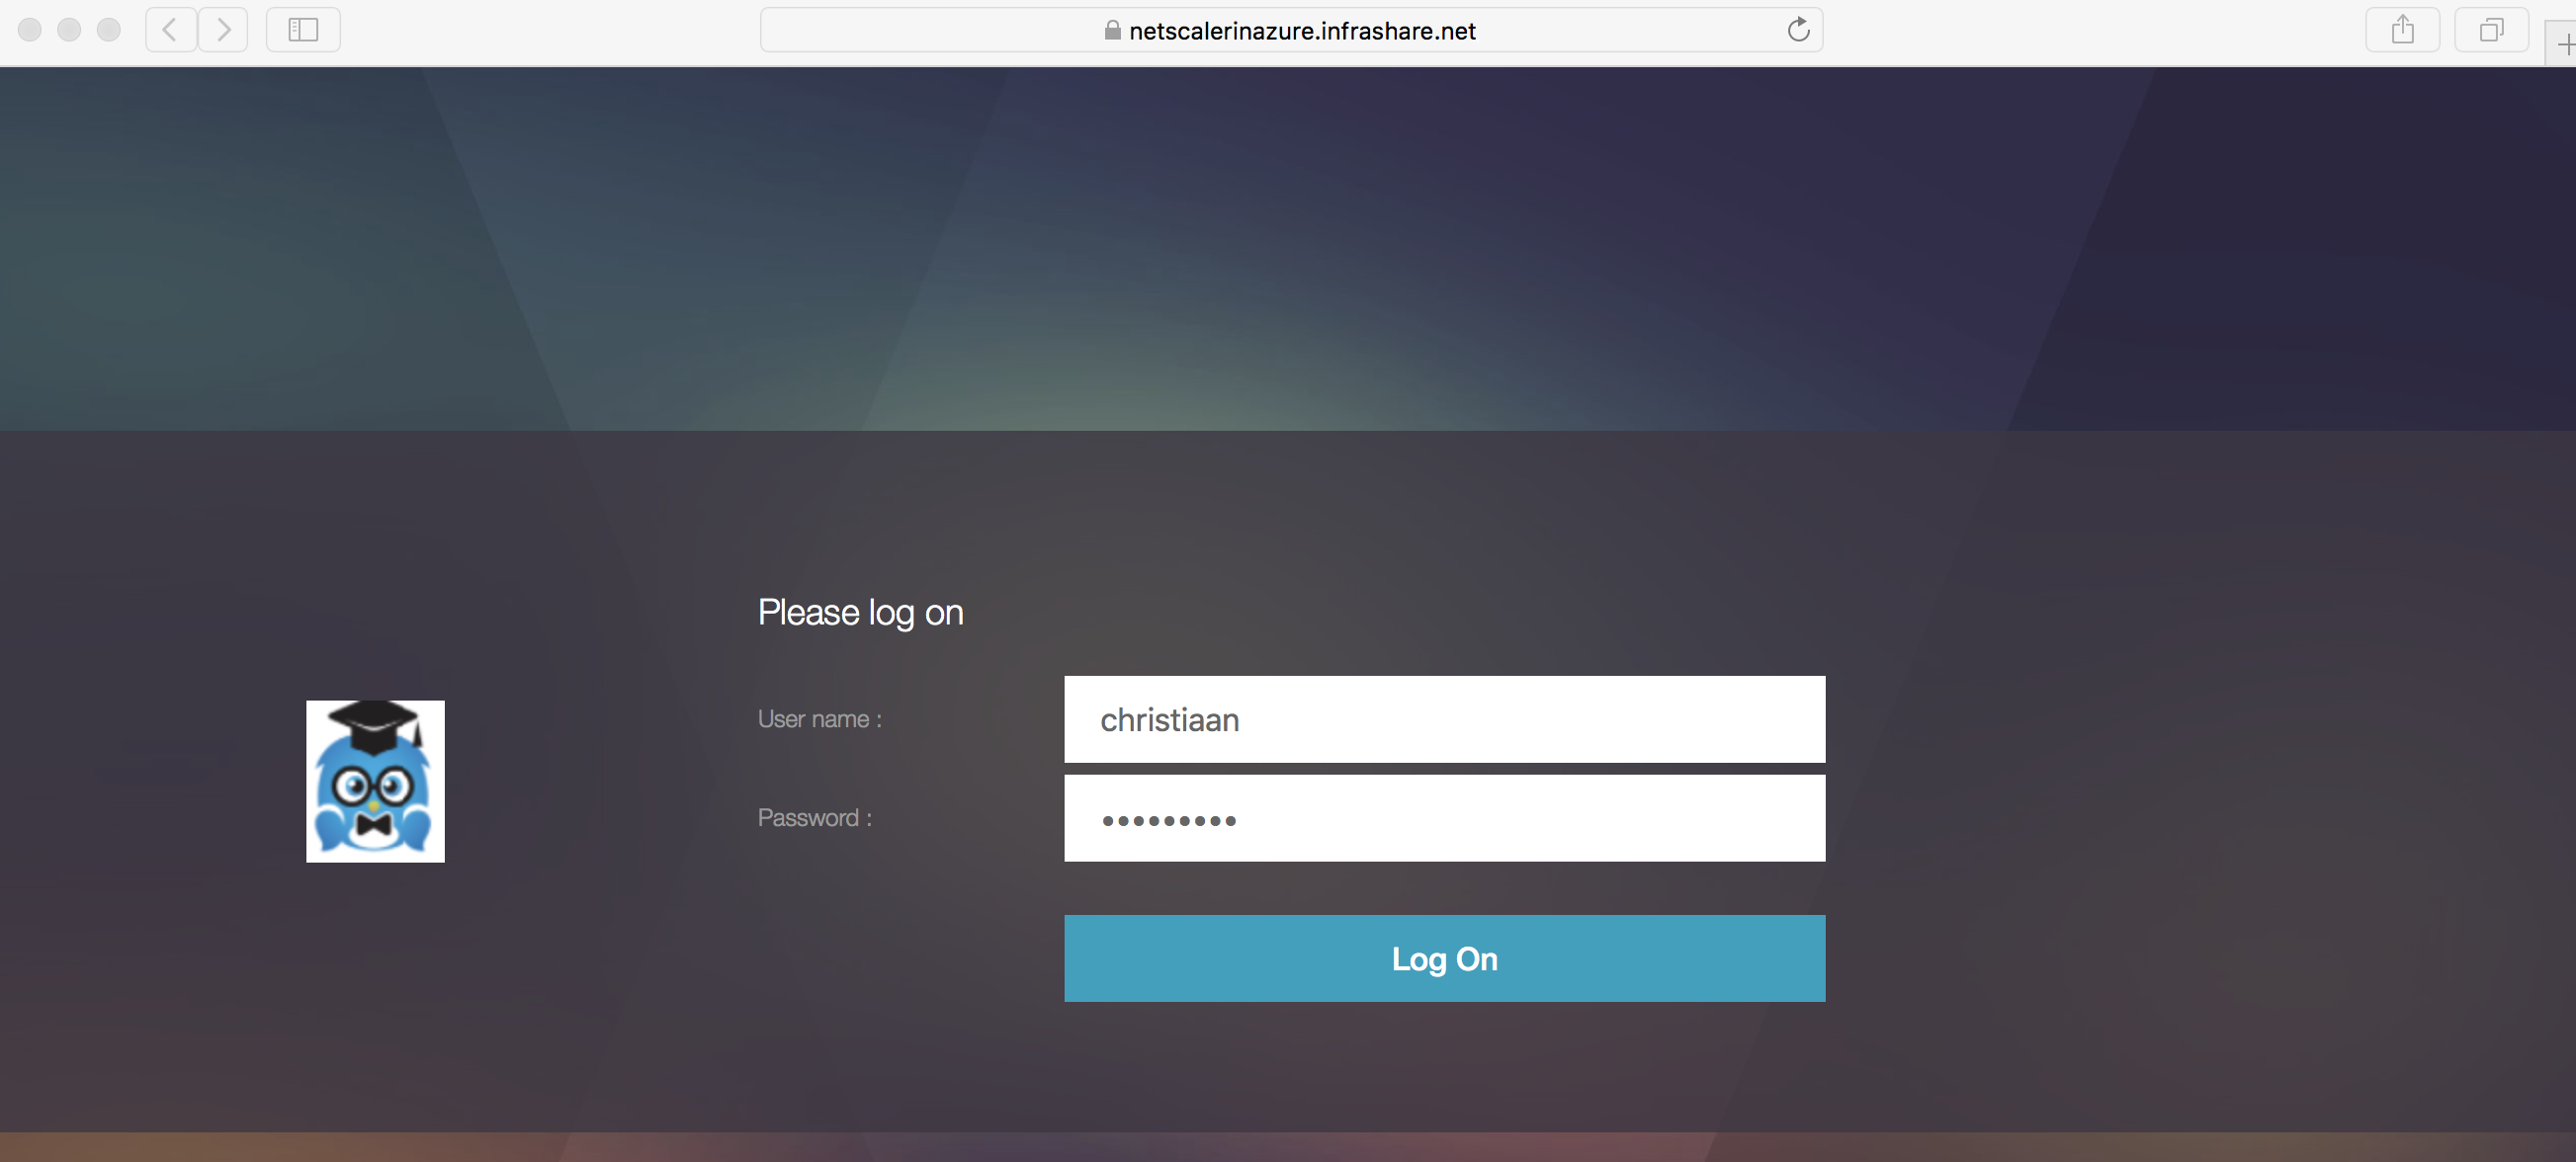
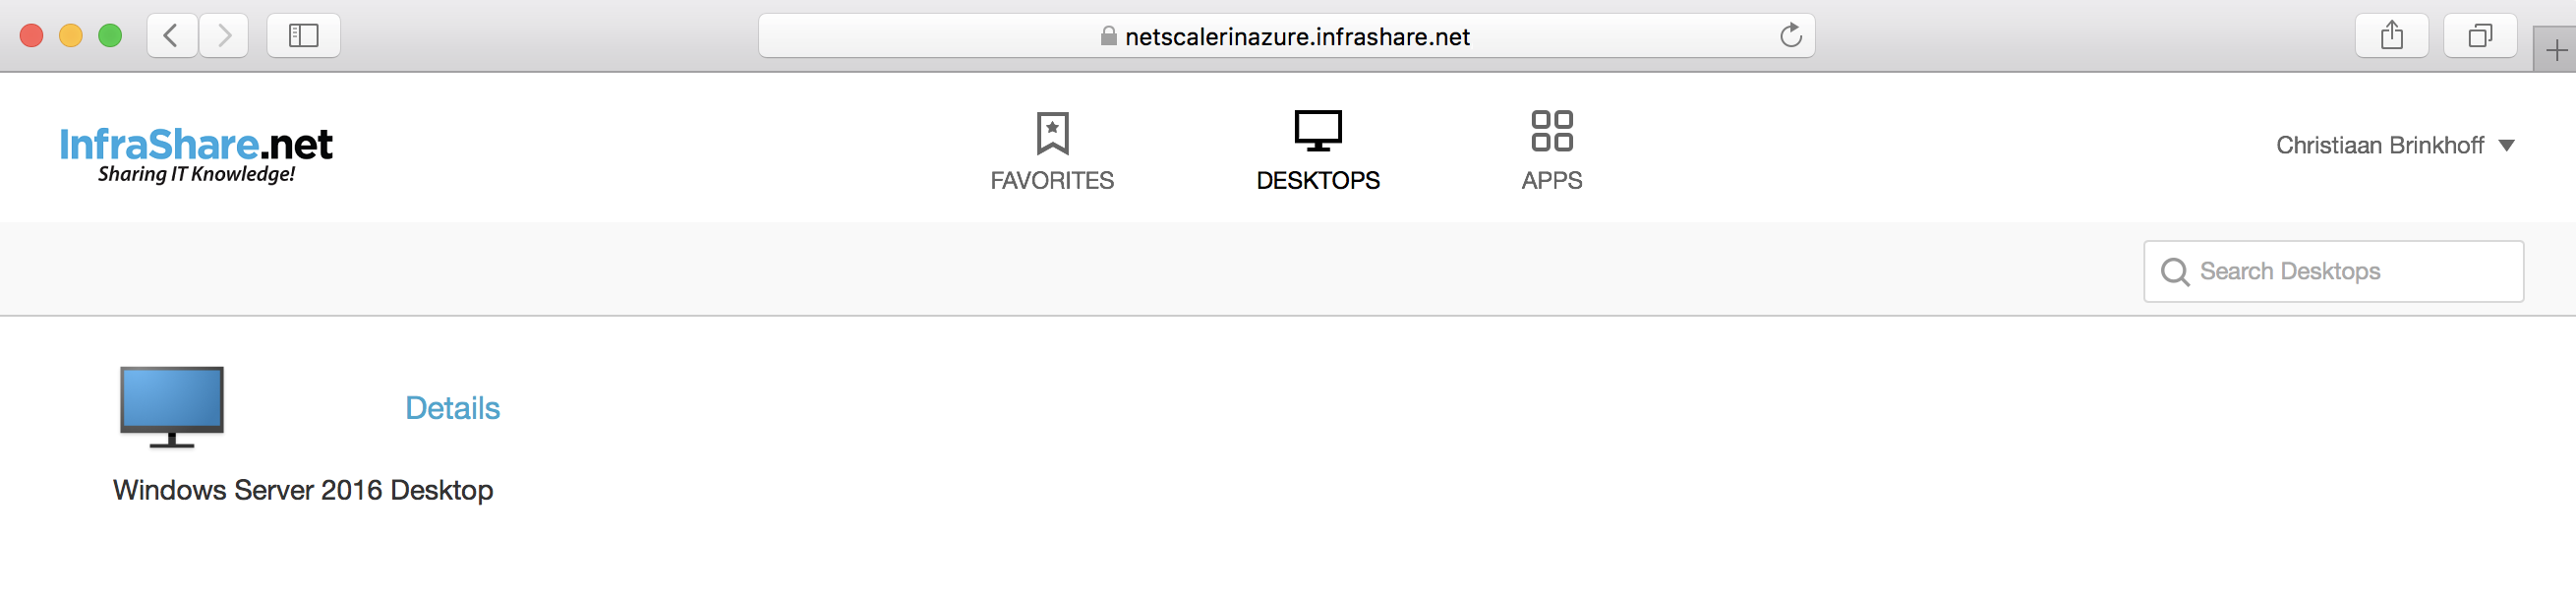
Test an external Citrix Session to the Citrix Cloud
Open the External NetScaler Url and enter in the credentials
(For me that will be https://netscalerinazure.infrashare.net/)
And the Remote NetScaler Gateway session also works!!

Adding Azure MFA Secondary Authentication
Extra Security layer: Another article you might find interesting is the one I wrote earlier on Azure MFA on NetScaler
How to Configure Azure MFA as Citrix NetScaler RADIUS using the new NPS Extension
That’s it for now. I’ll hope you’ll just one step closer in implementing the Citrix Digital Workspace!
Cheers,
Christiaan Brinkhoff