Install and configure NetScaler 11.1 Unified Gateway (VPX)


One of the great features that is available for the NetScaler since the release of version 11 / 11.1, is the built-in wizard to configure Unified Gateway trough a “simple” step-by-step wizard. The wizard is an easy way to configure all the “most frequently’’ used features that NetScaler can deliver in just several mouse clicks.
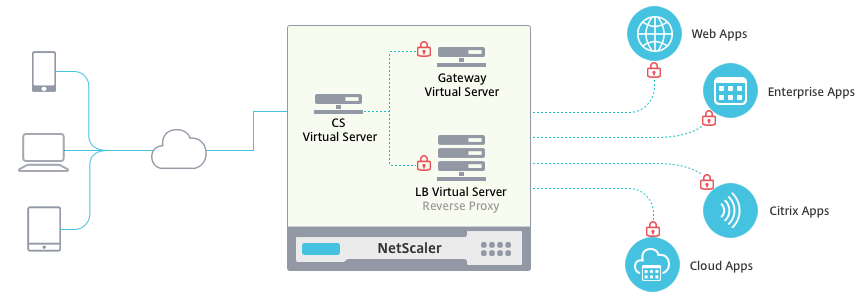
The Unified Gateway wizard activates the ICA Proxy (NetScaler Gateway) feature to logon remotely StoreFront to your XenApp or XenDesktop farm; it activates the possibility of accessing your local intranet pages through the logon portal without a VPN ‘’client’’ connection, by doing SSL Offloading and Reverse Proxy and; the automated configuration of the SSL VPN functionality. What will require the NetScaler Gateway plug-in and gives you the possibility to built up a secure VPN connection from a remote site to your internal network!
Al these options will be activated, based on the Content Switching technology, what results in 1 Public IP Address consumption. What also can be very useful for home labs!
Requirements
- NetScaler Platinum or Enterprise license (Request a Platinum trial license)
- XenDesktop/XenApp environment for ICA Proxy / StoreFront
- A pre-configured StoreFront server setup (see my other blog article to do this)
- A Public IP address for the Unified Gateway
- External DNS record/name pointed to the Unified Gateway Virtual(IP)
- Server certificate chain (.PFX or .PEM), with RootCA/intermediate certificate
- LDAP domain environment / based authentication
Deploy the NetScaler VMware template
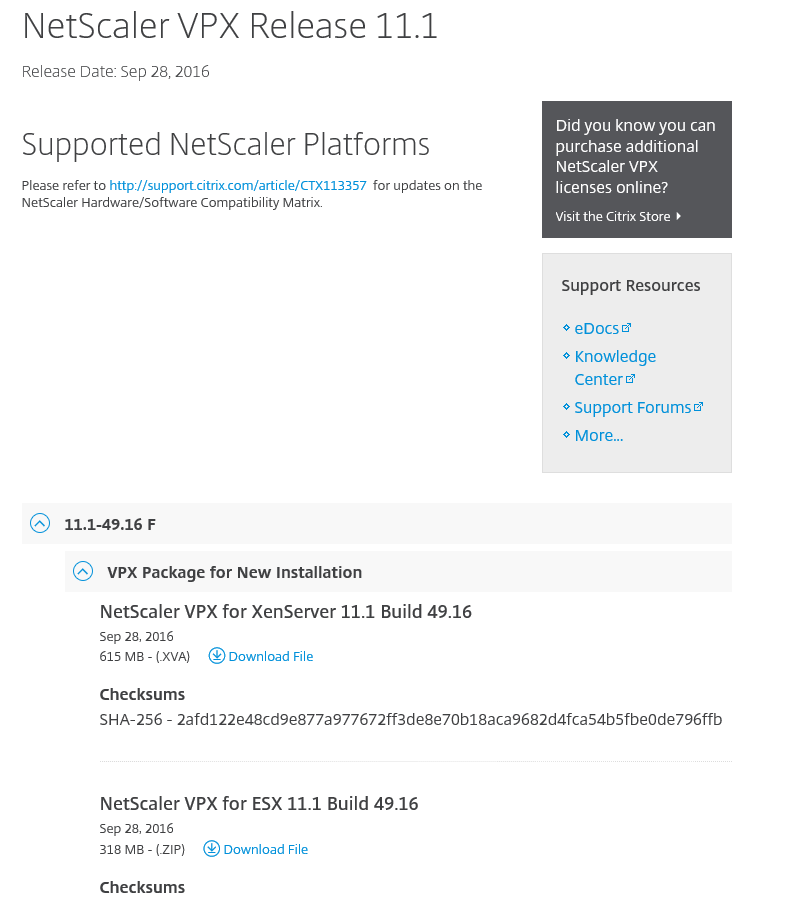
Step 1: First we need to download the NetScaler 11.1 software from the Citrix Portal, so let’s login to http://mycitrix.com/ and go to the NetScaler ADC downloads section. For this article I choose the VMware ESX version
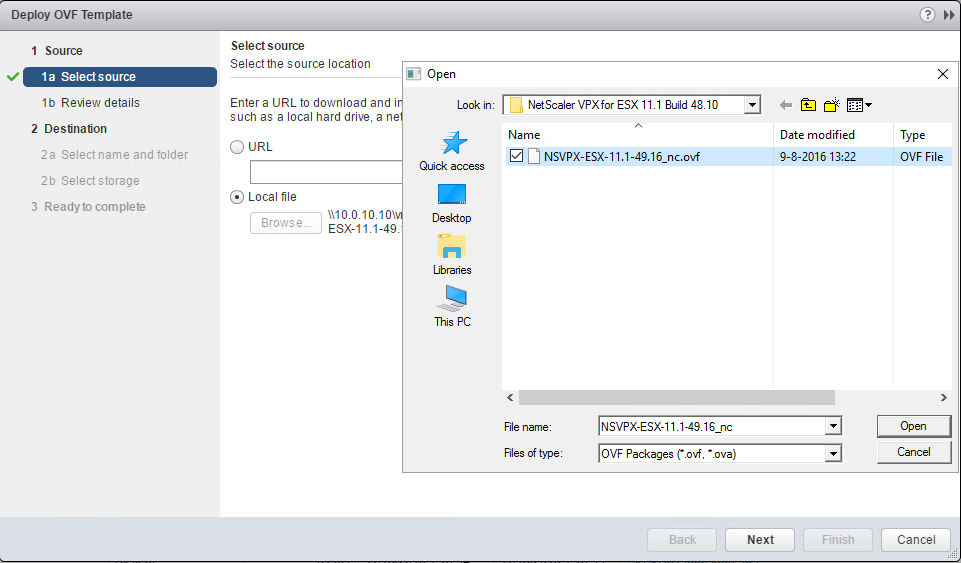
Step 2: Deploy the downloaded .OVF template trough the VMware Web Client, click on Open and Next
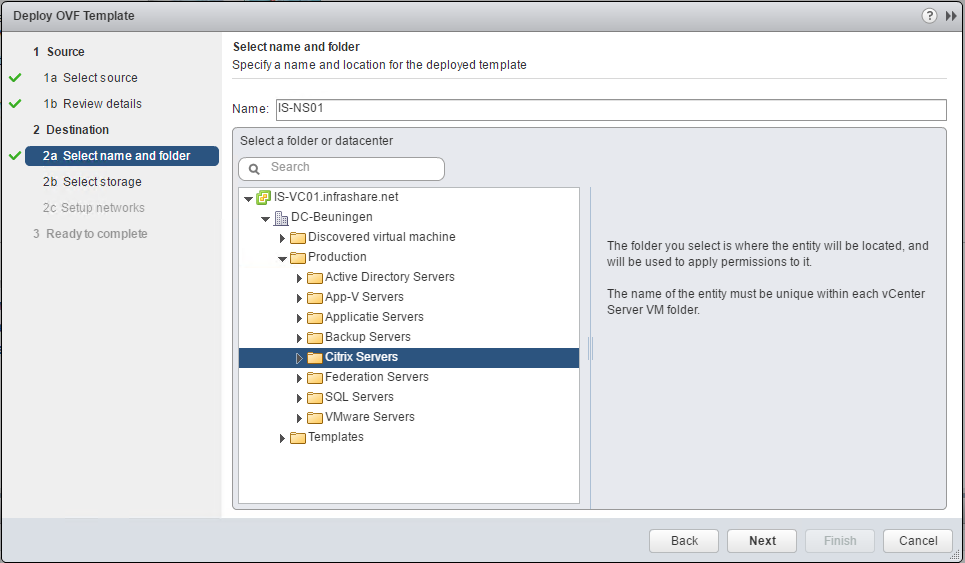
Step 3: Give in a Virtual Machine name and select a location, click Next
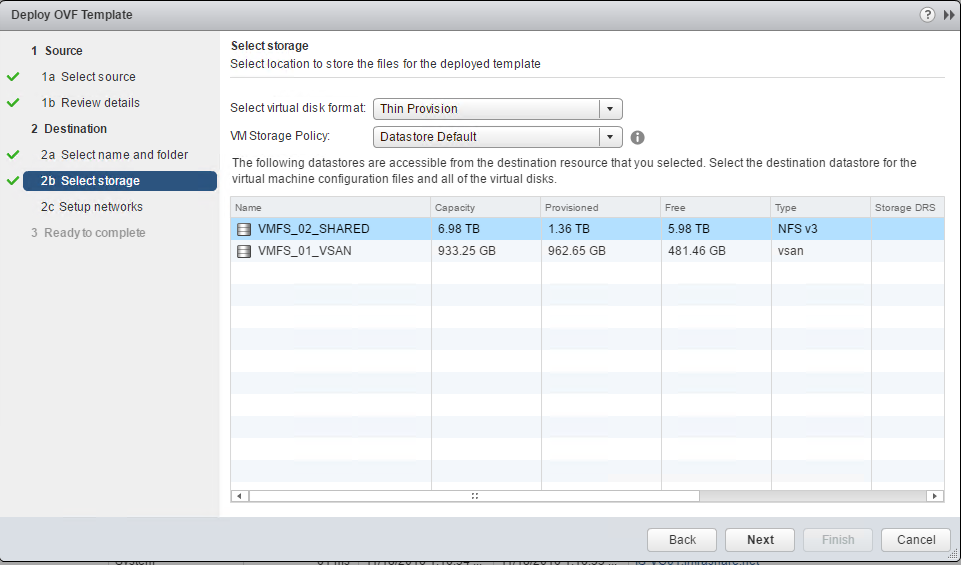
Step 4: Select your Datastore location, click on Next
Step 5: Select your vSwitch Network and click on Finish to complete the VM deployment

Configure NetScaler Unified Gateway
Note: If you have a separated DMZ VLAN next to your Management VLAN, you just need to add another NIC and place it to the right VLAN to make it available in the NetScaler
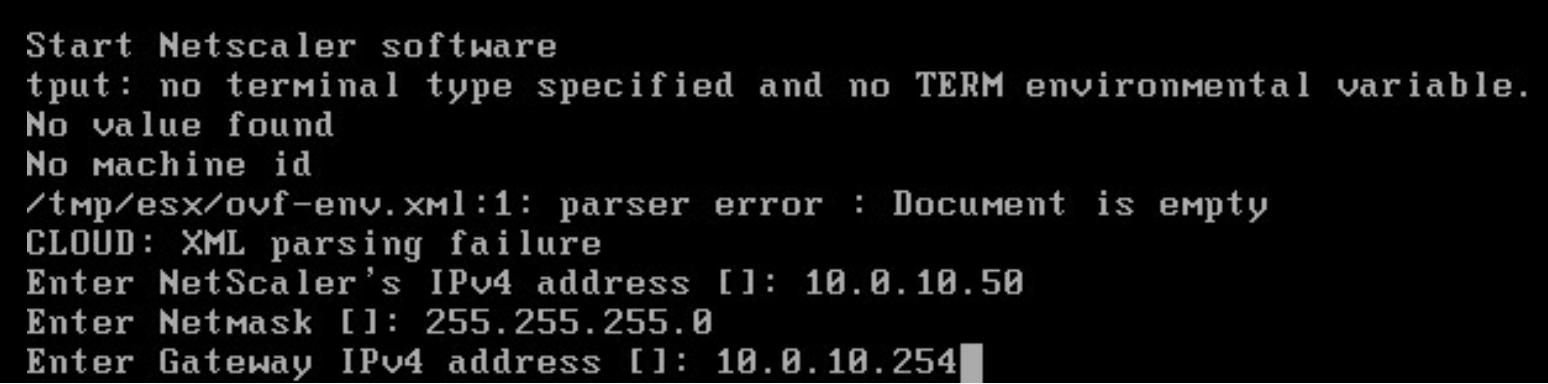
Step 6: Start the VM, Open the Remote Console pane of the NetScaler VM and proceed the configuration steps.
- Give in a NSIP (NetScaler IP) for management usage
- Enter the subnet mask of the network
- Enter the gateway
Step 7: Press 4 to save the network configuration
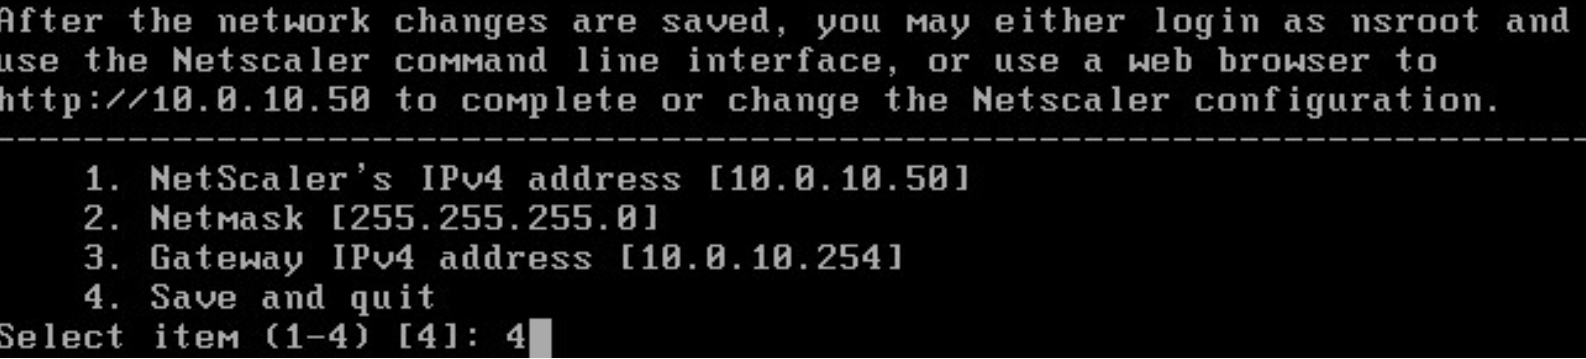
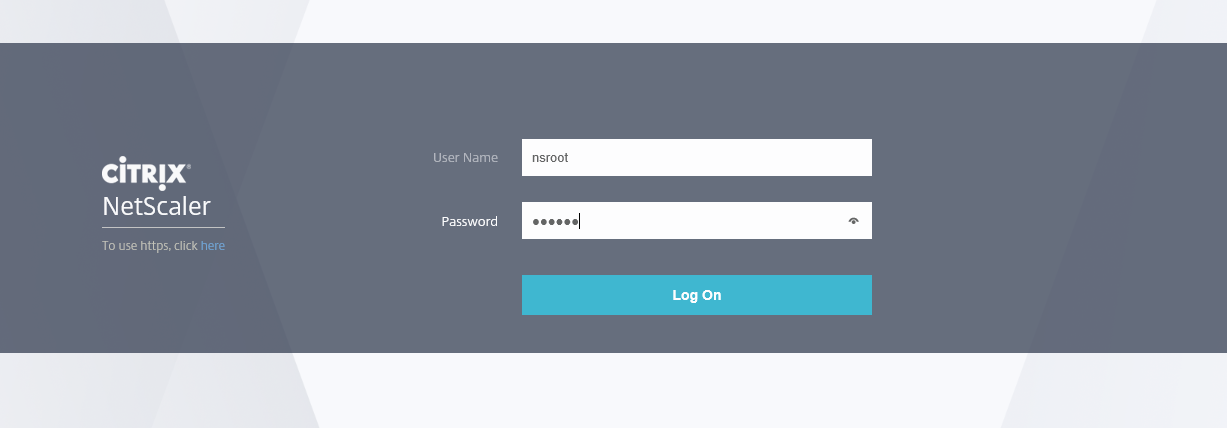
Step 8: Browse to your NetScalers (NSIP) management IP address, that you gave in at step 3, login with account nsroot and (default) password nsroot
Step 9: Skip the Citrix User Experience program and the welcome screen will follow
Note: If you want to change your nsroot password, then click on NetScaler IP Address and tick on the Change Administrator Password box to give in a custom password
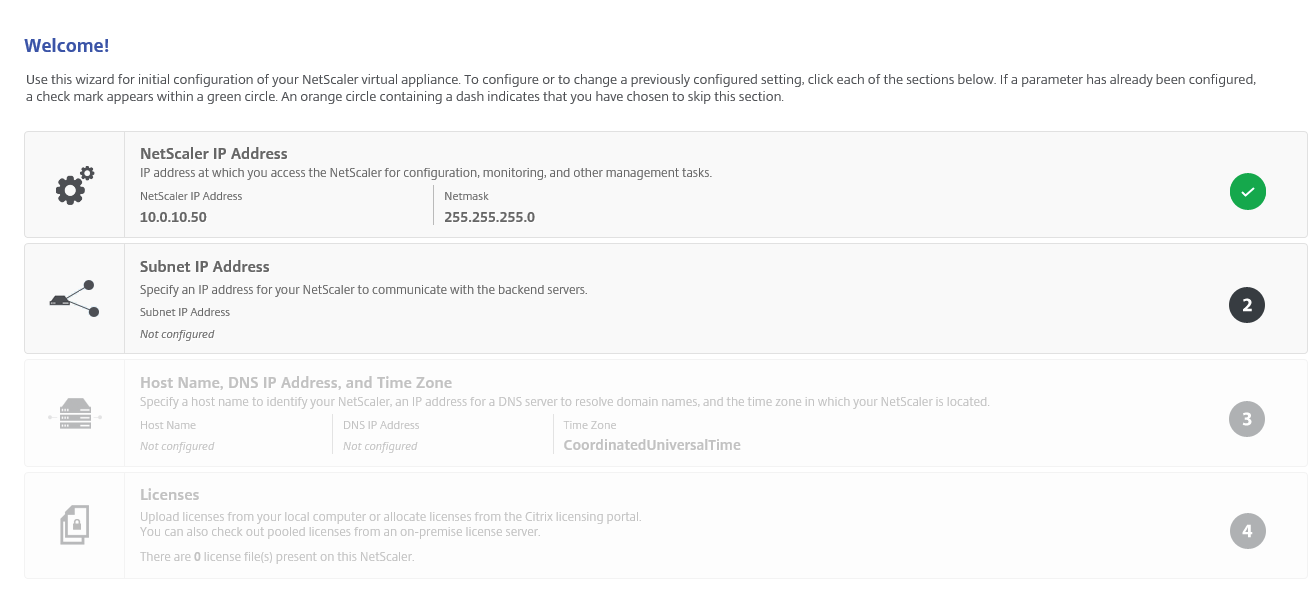
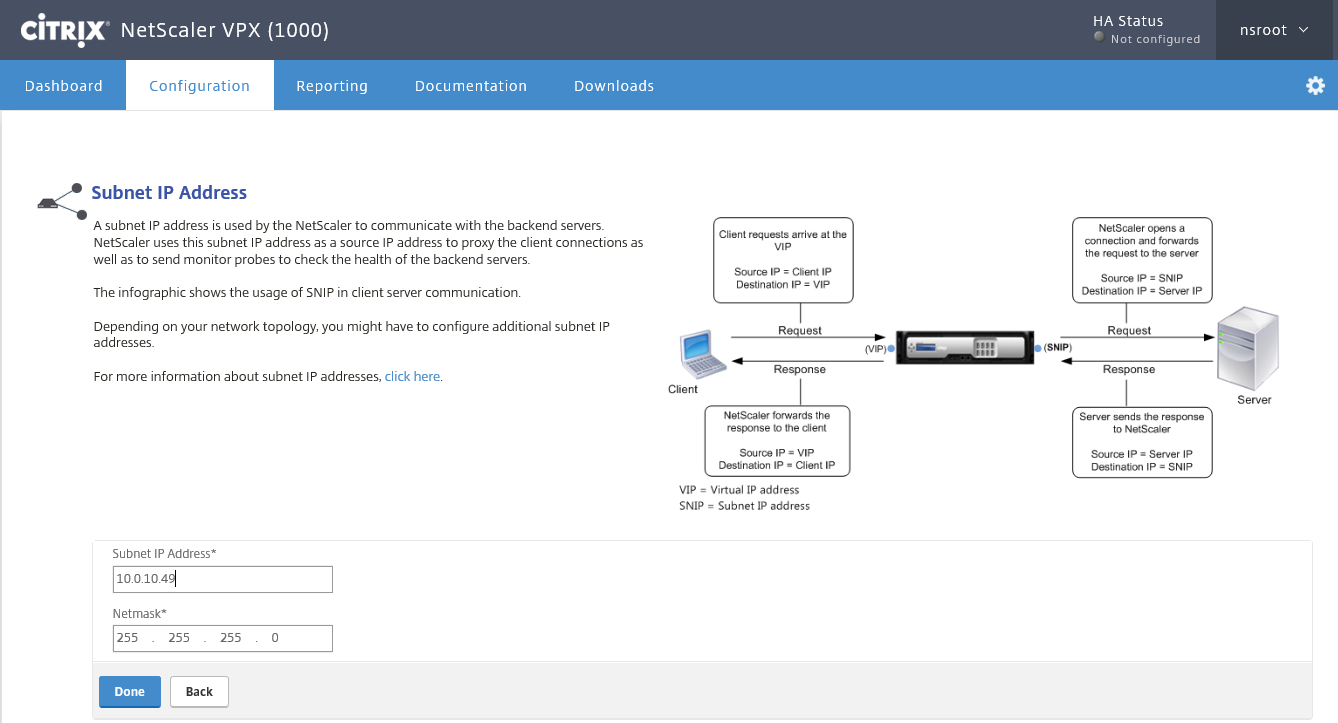
Step 10: Click on the Subnet IP Address option and give in a IP address in the same management vlan for me it will be 10.0.10.49 / subnetmask 255.255.255.0
Note: The subnet IP, also known as SNIP, is the routing IP to your backend servers. For this article it is technically not required to fill in.
Step 11: Config your hostname, DNS server settings and timezone, click on Done

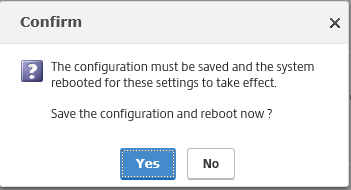
Step 12: A Reboot will be required, so click on Yes
Step 13: Wait till the VM is rebooted…

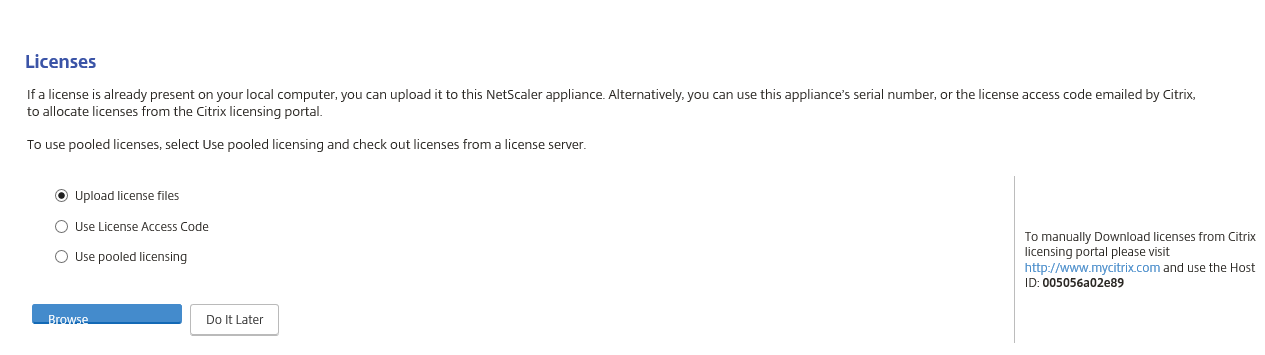
Step 14: Now we need to upload the Citrix NetScaler Enterprise/Platinum license, download the license file from the My Citrix portal and upload it to the NetScaler web portal
Note: If you signed for the trial license, you first need to activate the license in your My Citrix account, then you need to go to Activate and Allocate Licenses, select the 90 days trial and use the Host ID in the right corner, download the license fileand upload it to the NetScaler page to register the license key!
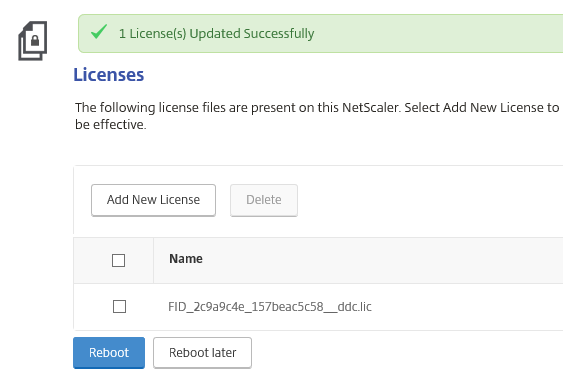
Step 15: Once the file is uploaded successfully, please reboot your server to apply the license file to the server, the ‘’warm’’ reboot will take 60 seconds
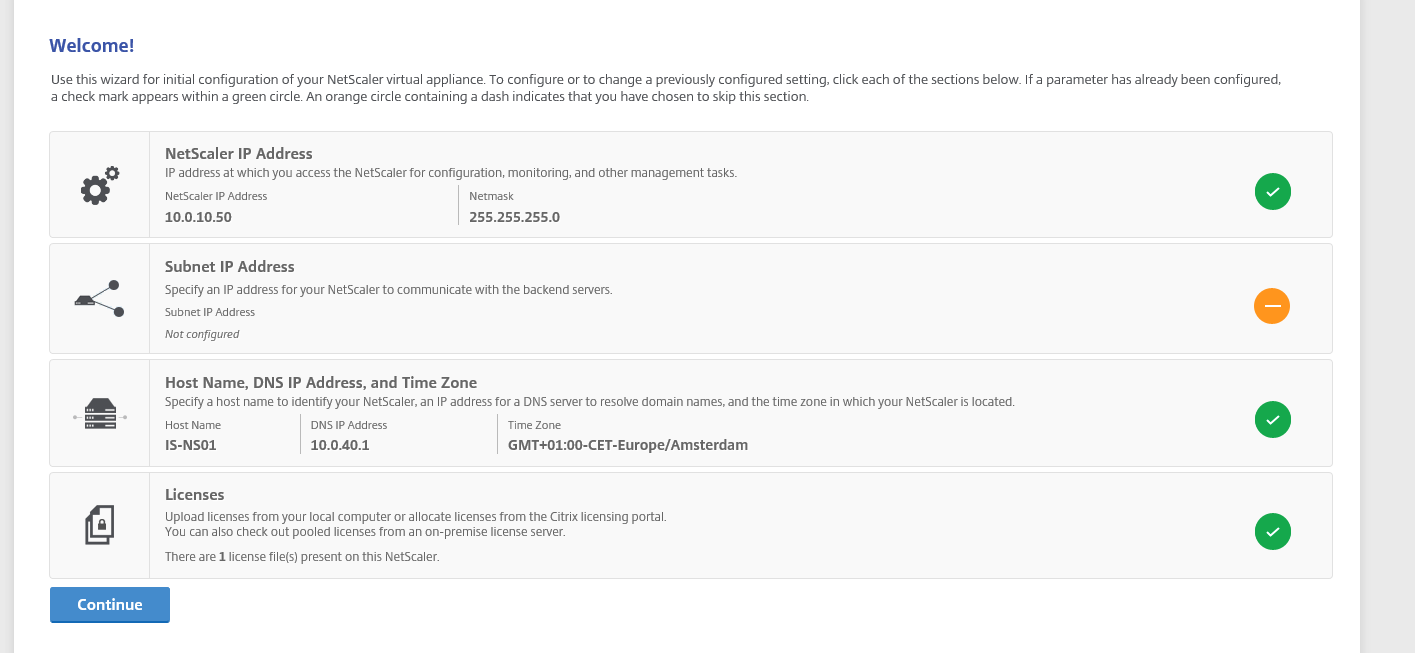
Step 16: After the reboot, press on the Continue button
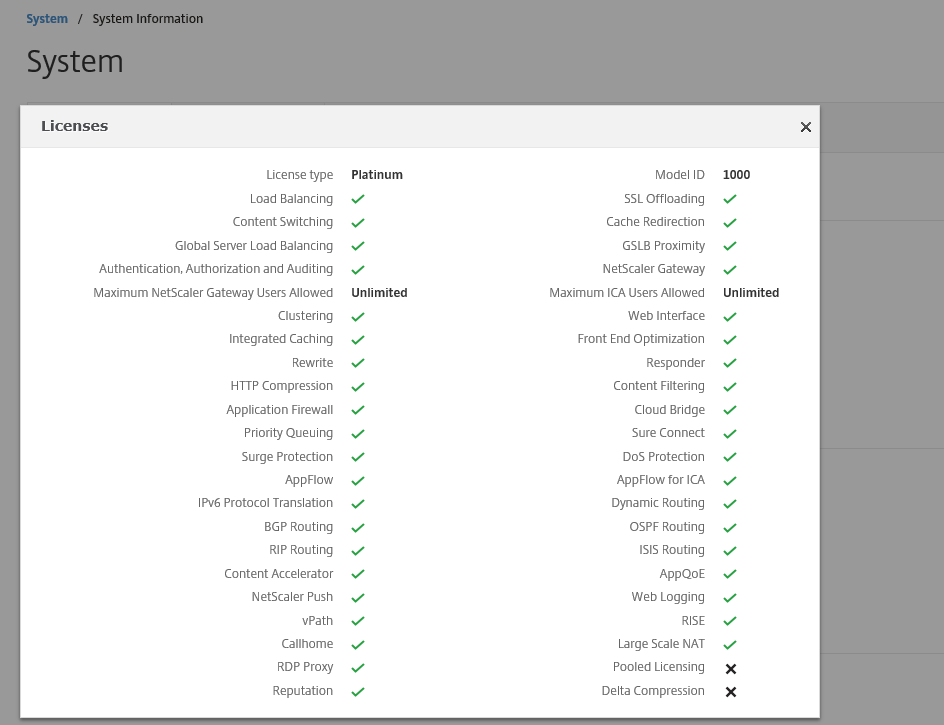
Step 17: If the license file is approved correct, the following screen must come around, click on the cross
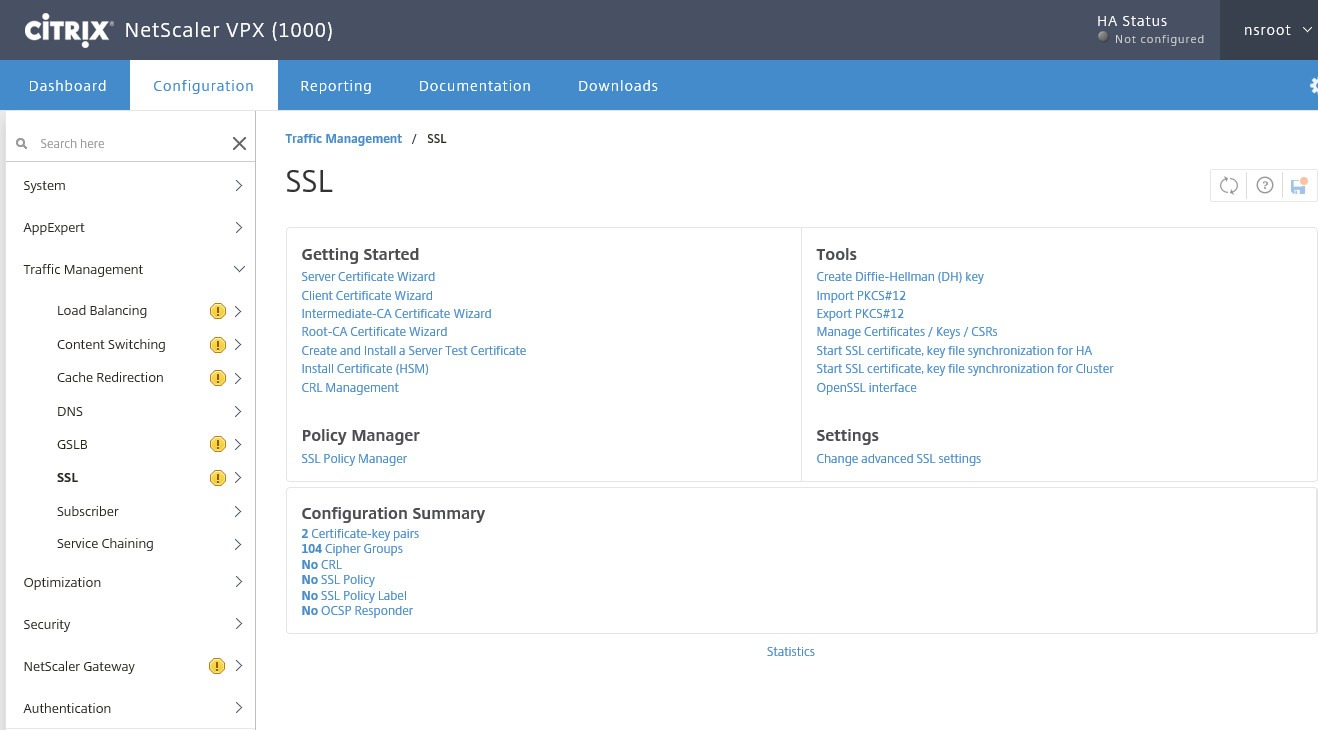
Step 18: Now we need to register first a SSL Certificate to our NetScaler, to do so, go to the SSL option under the Traffic Management Menu option and start the Server Certificate Wizard
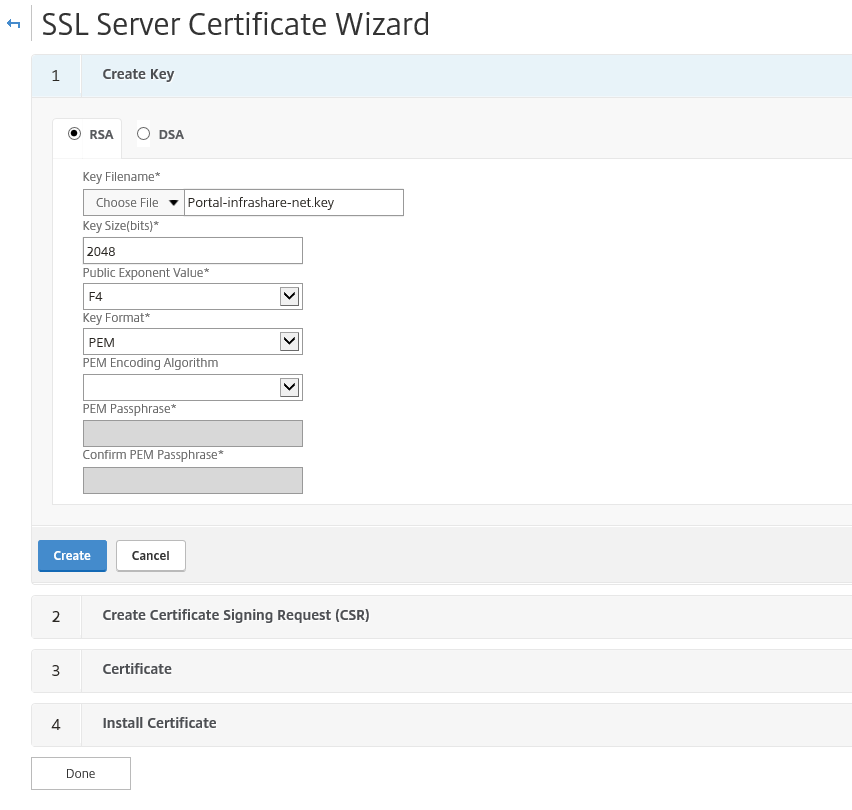
Step 19: First we need to request a .KEY file, I choose for a 2048 bits size, F4 Exponent Value and a PEM key format. For this article I will be using the free (3 years valid) StartSSL RootCA, but off course you can choose your own, like a GoDaddy or GlobalSign
Note: I found out that some Certificate authorities does not support the PEM Passphrase functionality, what results in a CSR that isn’t readable by the CA, for that reason I choose to setup a F4 | PEM format without encryption
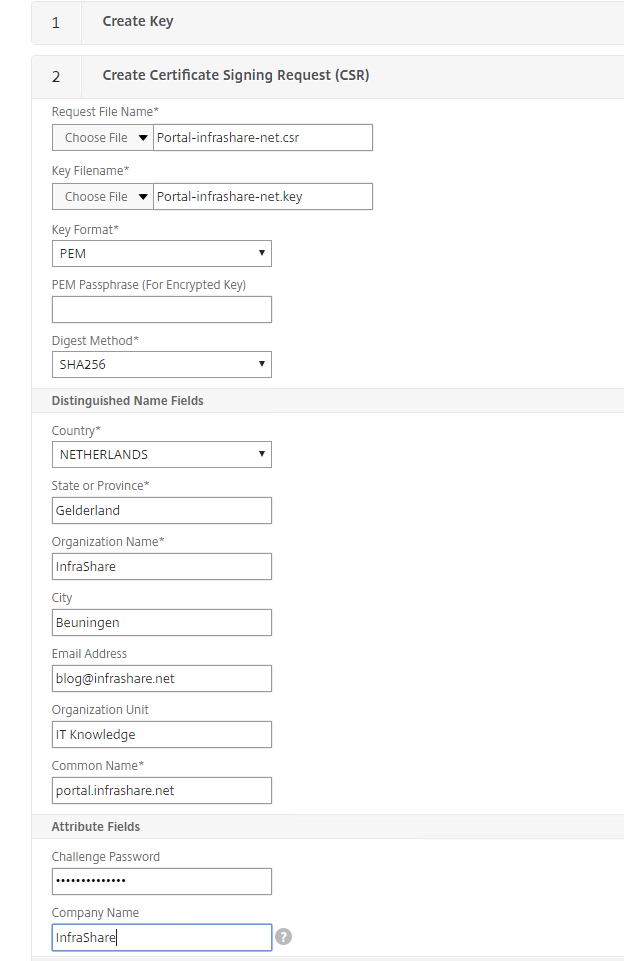
Step 20: Fill in a file name for the CSR (certificate request) file, and the other required information like in the picture below. If you want to use your ownexternal DNS name, you simply can change the Common Name field to make it your own and click on create
Note: For this article I use a single name certificate, but a wildcard certificate will fit as, if you want, please change the Common Name section to *.domain.com
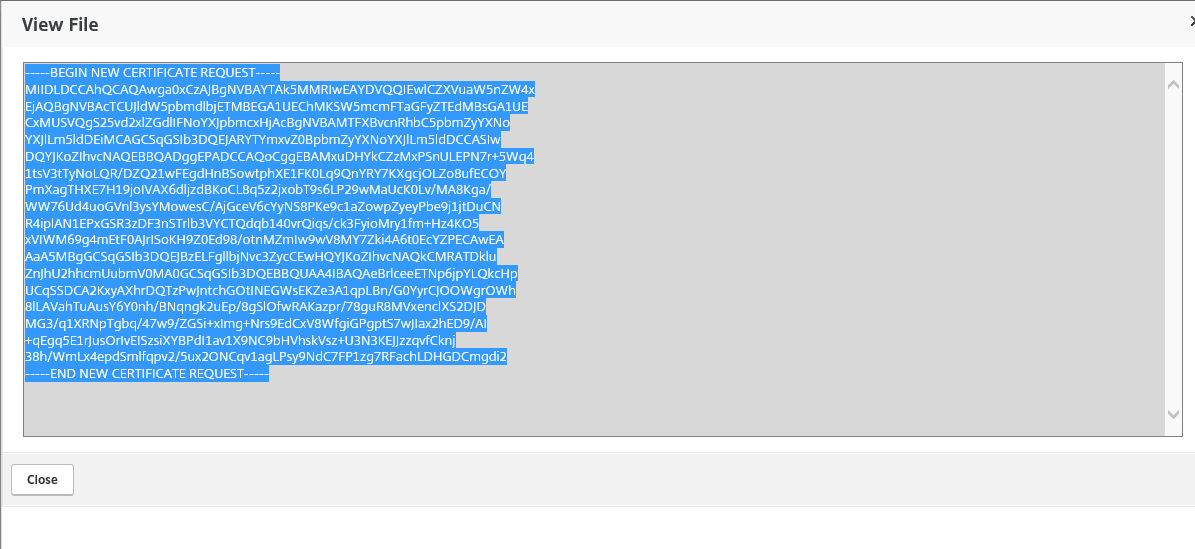
Step 21: Now we need to go back to the SSL page to read out the CSR file, so go to the SSL menu option followed by Manage Certificates / Keys / CSRs

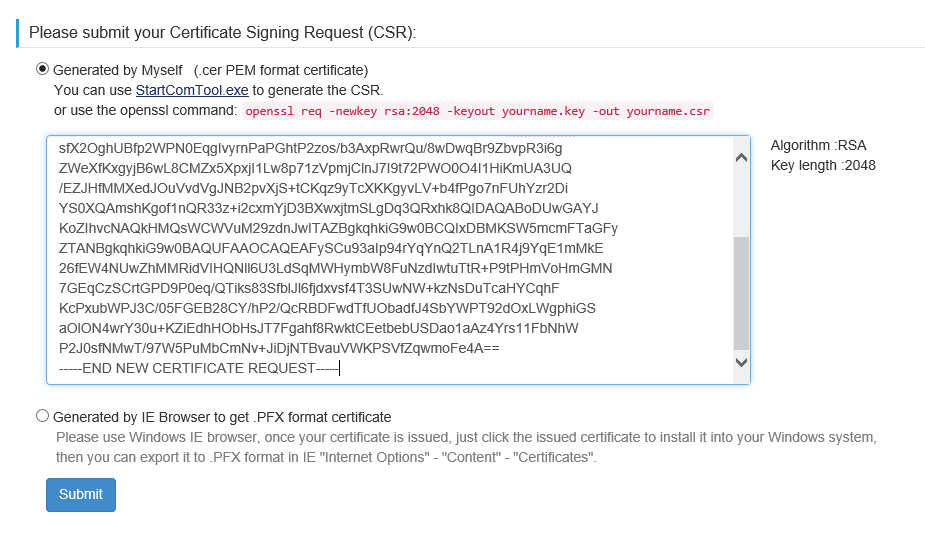
Step 22: View/open the just created Portal-Infrashare-net.CSR file and copy the text field to your clipboard
Step 23: Paste the CSR in the Certificate Request field of your RootCA and submit it
Step 24: After the validation process, download the certificate file as .CRT format to your computer, and add it to your NetScalers SSL store in the Manage Certificates / Keys / CSRs section of the SSL menu, do the same for the intermediate and RootCA certificate.
Step 25: Now we need to finalize the SSL request process by going back to the same wizard of Step 16, but now we only need to fill in the number 4 (install) part.
Step 23: First give in a name and select the just uploaded .CRT certificate file.
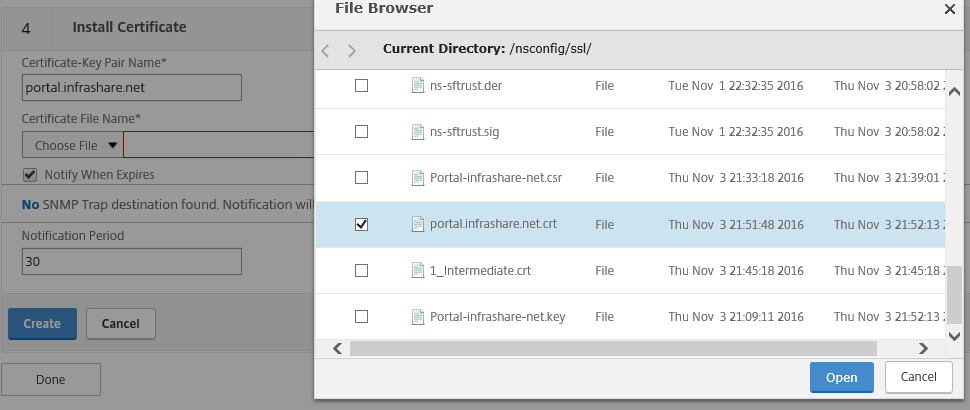
Step 24: Give in the KEY file, and click on Open

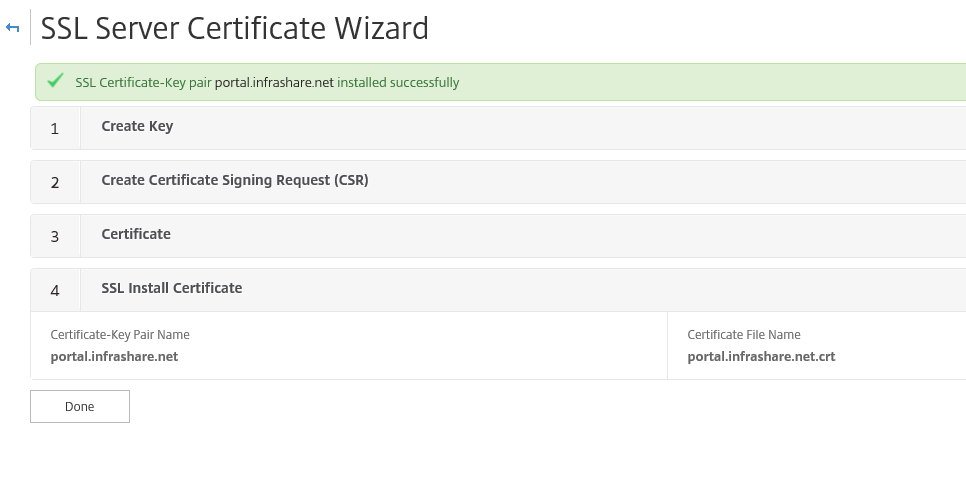
Step 25: Now everything is filled in, click on create to add the certificate to the NetScaler Certificate Store

Step 26: When everything was done correctly the following confirmation screen will pop–up, click on done and the certificate is ‘’almost’’ ready to use
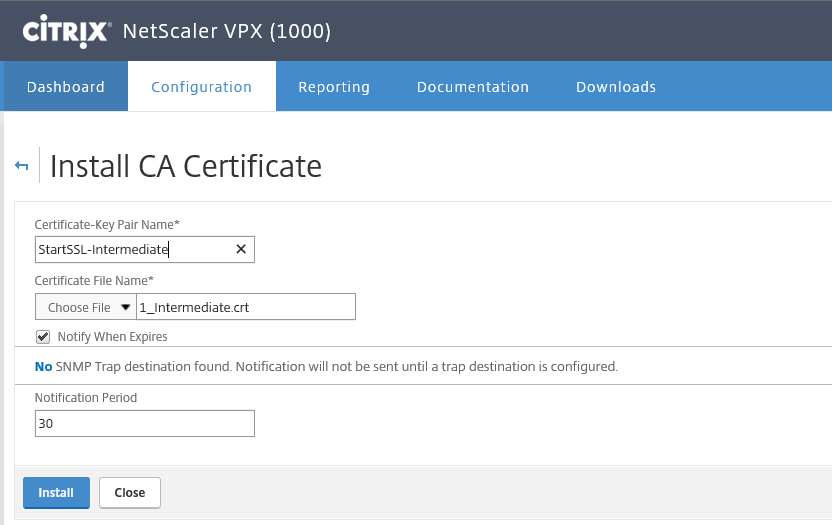
Step 27: If the steps done right, the next screen must be showed. If you’re RootCA is a subordinate one, and needs an intermediate to succeed the Certificate Key Chain, then you also need to link your certificate, otherwise you will get some validation errors by accessing resources trough the Unified Gateway Portal. To do so, go to SSL->Certificates->CA Certificates and click on install
Step 28: Give in a name and search for the earlier RootCA and/or intermediate file in the Appliance store and press install
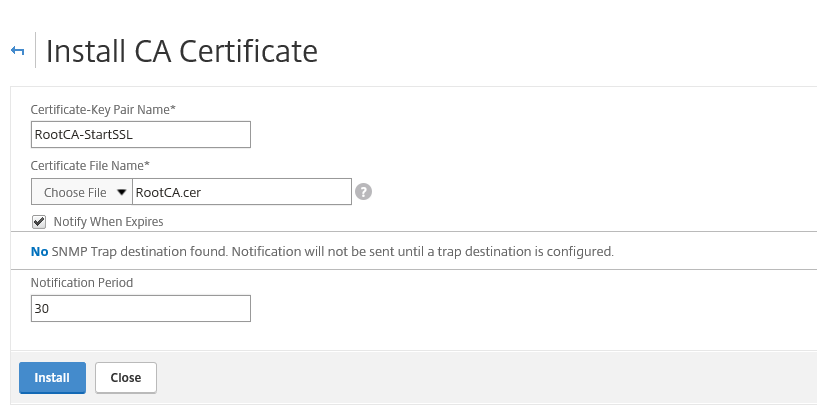
Step 29: Do the same for the RootCA certificate…
Step 30: Now you can link the Root CA certificate to your intermediate certificate by doing a right mouse click on your intermediate certificate, and click on Link
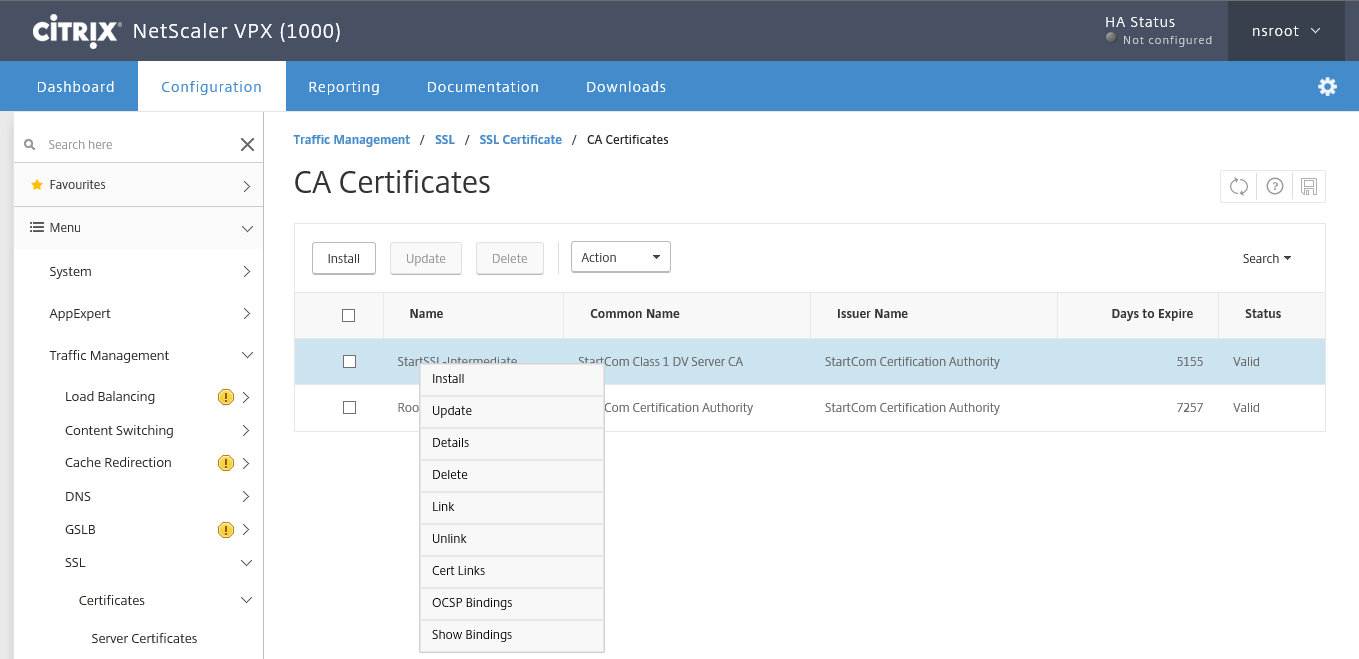
Step 31: The RootCA pops-up, click on Ok…

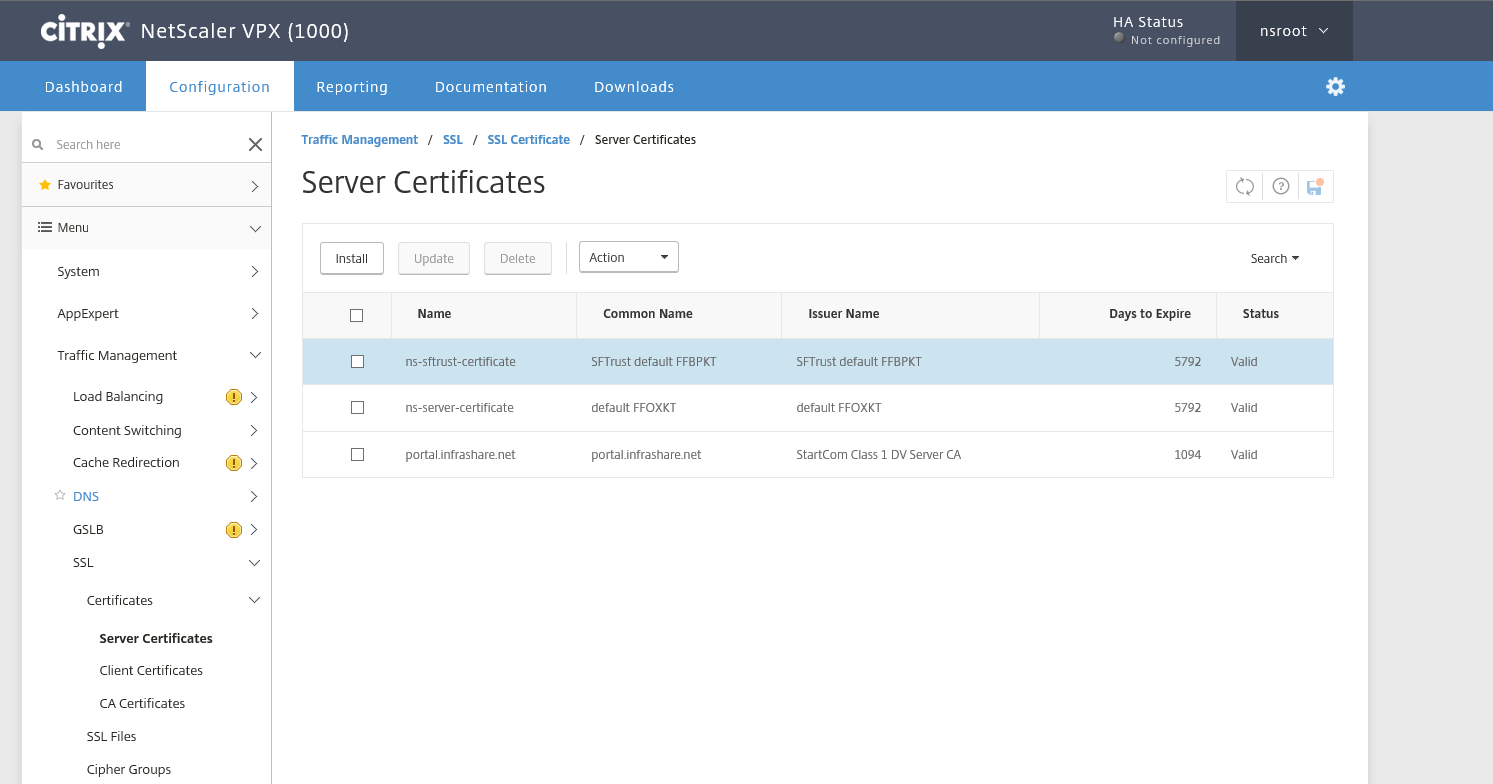
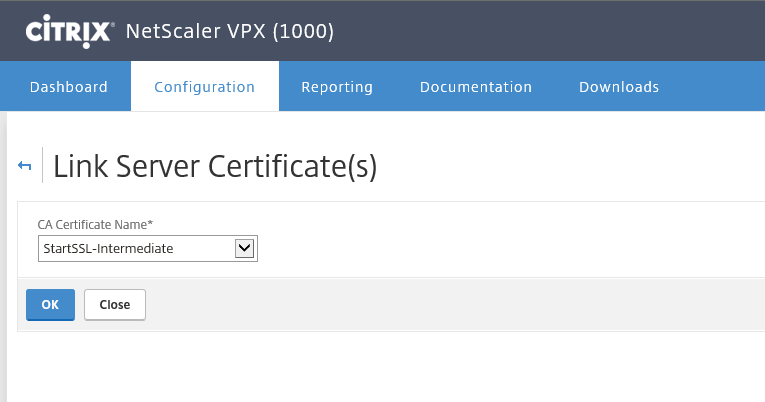
Step 32: Now we need to do the same for the intermediate, but this one needs to set on the just created Server Certificate. So go to SSL->Server Certificate and do a right mouse on the Certificate (portal.infrashare.net) and press Link

Step 33: Search for the intermediate certificate and press Ok
Step 34: Now the Certificate Keychain is all set and we now need to continue the configuration part, so let start the NetScaler Unified Gateway Wizard at the end of the left menu
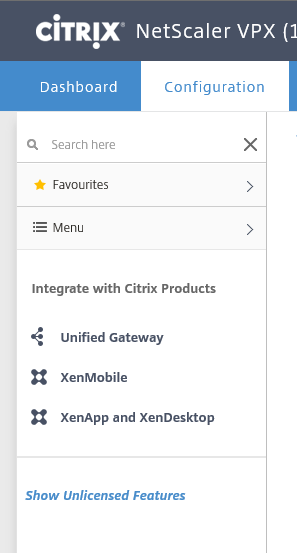
Step 35: Press the Get Started button!
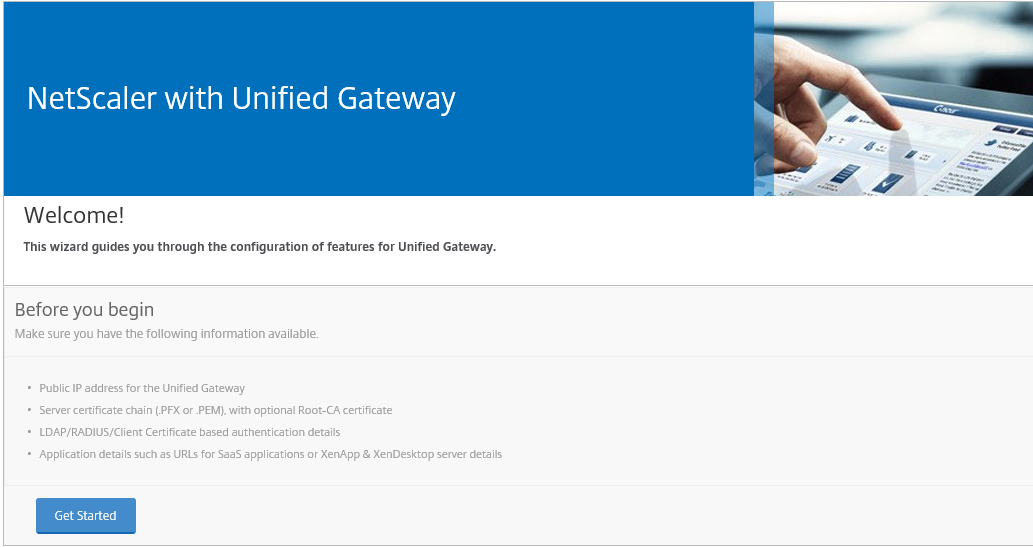
Step 36: A summary of how the Unified Gateway works… Press the continue button to start the setup

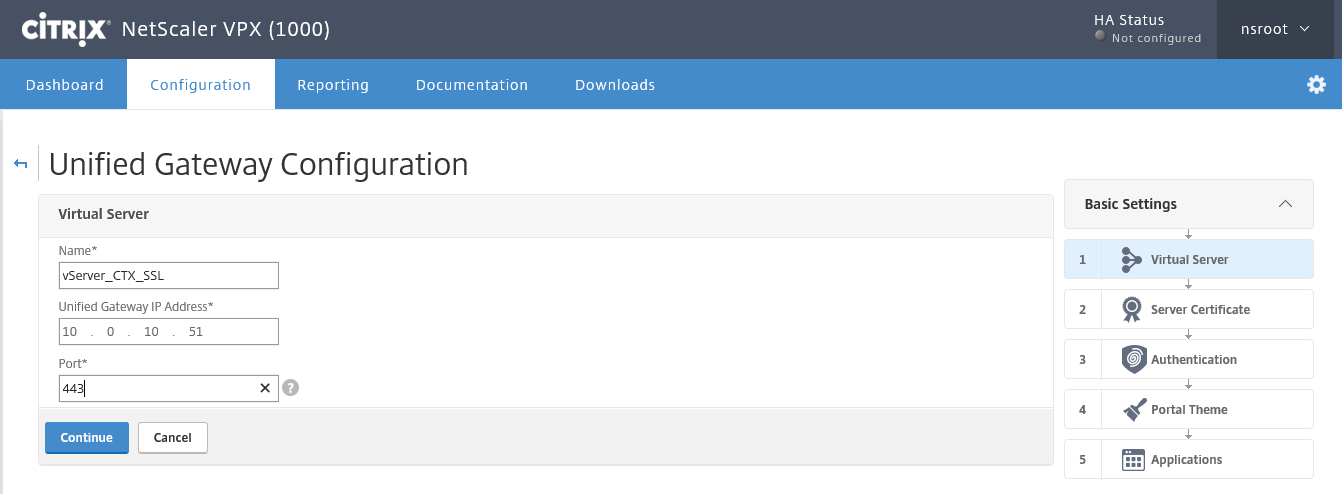
Step 37: Give in a name for your virtual server, like; vServer_CTX_SSL, enter a new (V)IP address where your Unified Gateway Portal will be responsive to and where your DNS / NAT rule must be pointed to afterwards. Let the 443 be default and click on Continue
Note: The name will be copied to the other configuration parts that will be deployed automated, so choose a name that is universal for all components
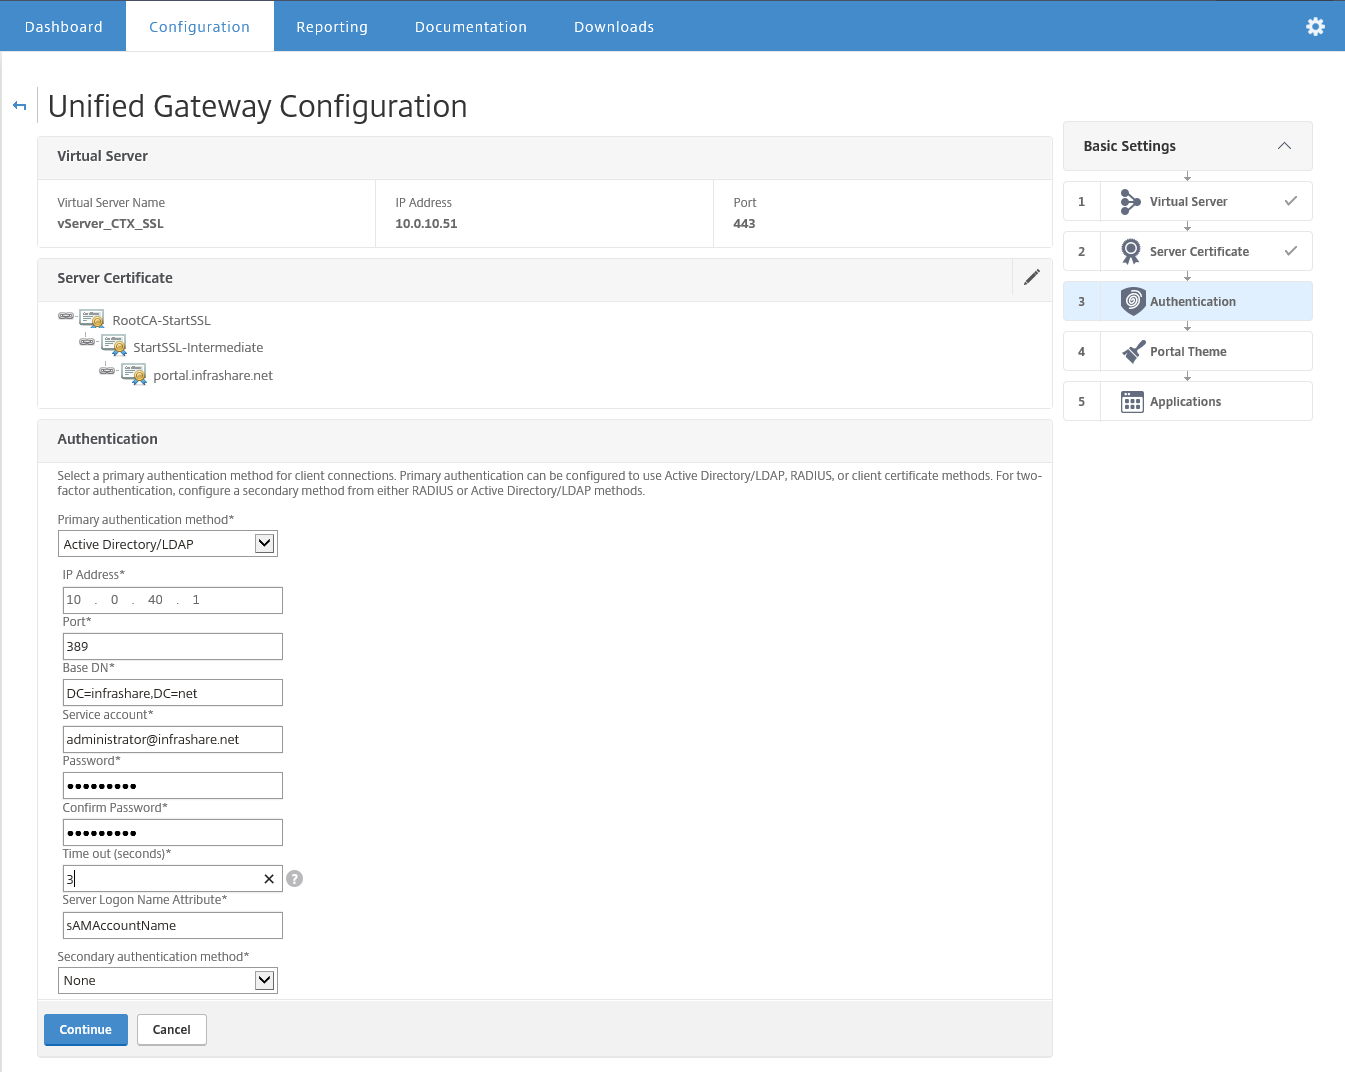
Step 38: Select the SSL Server Certificate and click Continue

Step 49: If the keychain was setup correct, the SSL process will be like this

Step 50: Now we need to setup a LDAP authentication policy, so fill the IP address of your domain controller, the DN name of your domain, where the NetScaler needs to search for authentication and gave in a serviceaccount with at least the rights to read out all the proper domain account information and press continue
Step 51: Choose the theme you like, I found the rfWebUI the clearest one, click Continue
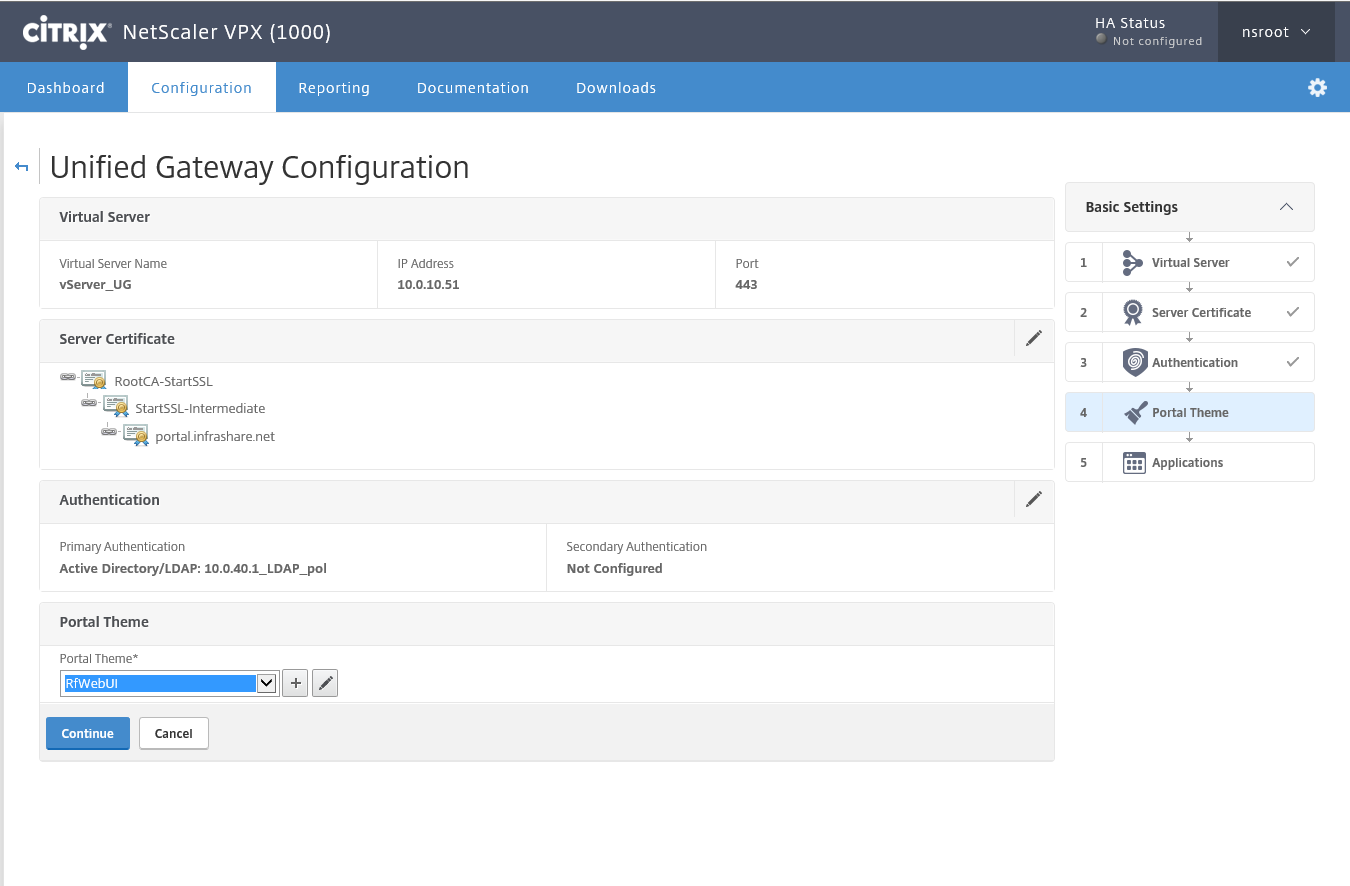
Step 52: Tick on the plus sign next to Applications

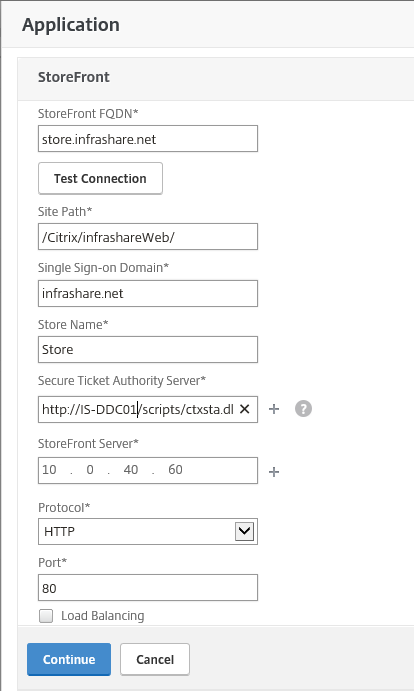
Step 53: Select the StoreFront option

Step 54: Fill in all the information, and if finished, click on Continue
Site Path: /Citrix/StorenameWeb/ (where Storename if your StoreFront store name)
SSO: Your AD Domain
Store name: The StoreFront store name (otherwise the NS monitor won’t work)
STA: HTTP://Name of your Desktop Controller/scripts/ctxsta.dll
Protocol: HTTP if you’re Citrix farm setup is default
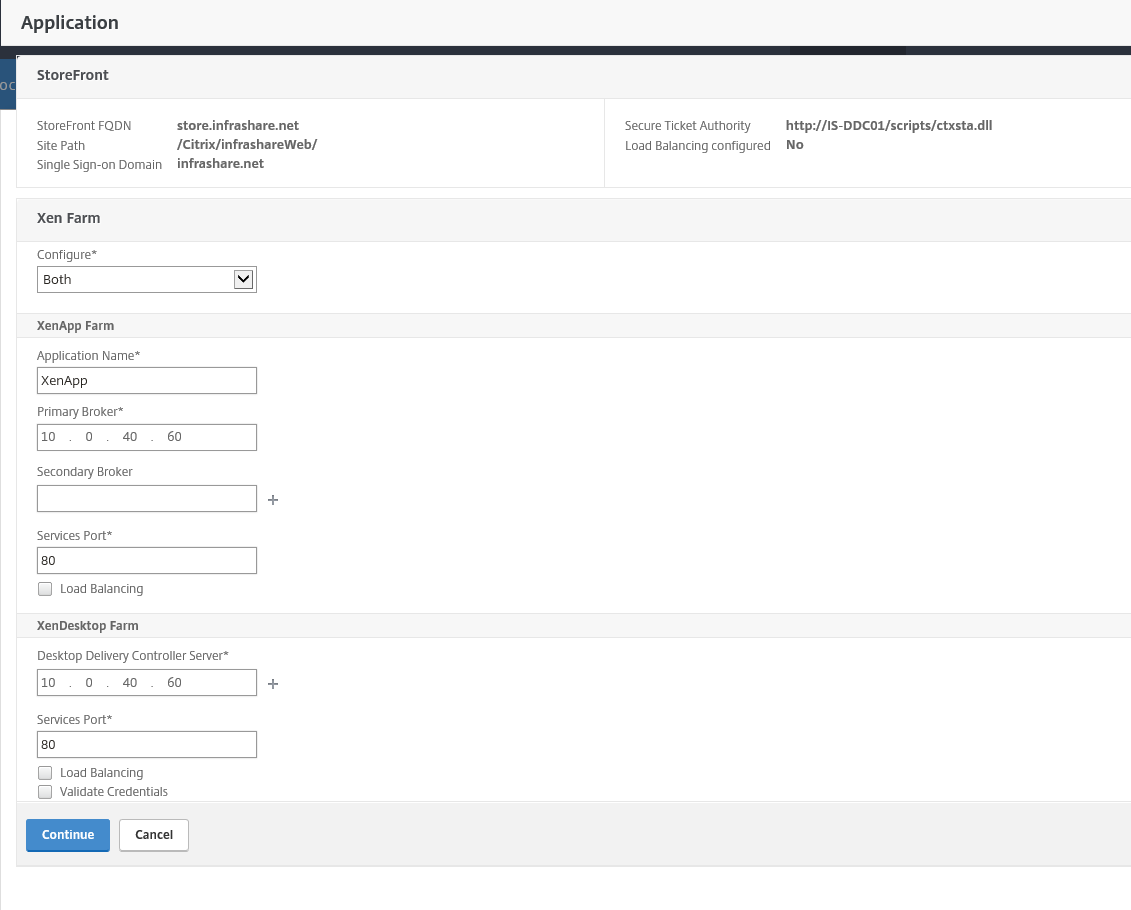
Step 55: Now you need to choose your type of Xen Farm, for this article I choose both, so you can choose with fits your needs best, if you have, click on the Continue button
XenApp Farm Settings
Application name: XenApp
Primary Broker: Your Desktop Controller IP Address
Secondary Broker (Optional): Your second Desktop Controller IP Address
Services Port: Communication port to Desktop Broker (80 is default)
XenDesktop Settings
Destop Delivery Controller Server: Name of your Desktop Controller
Services Port: Communication port to Desktop Broker (80 is default)
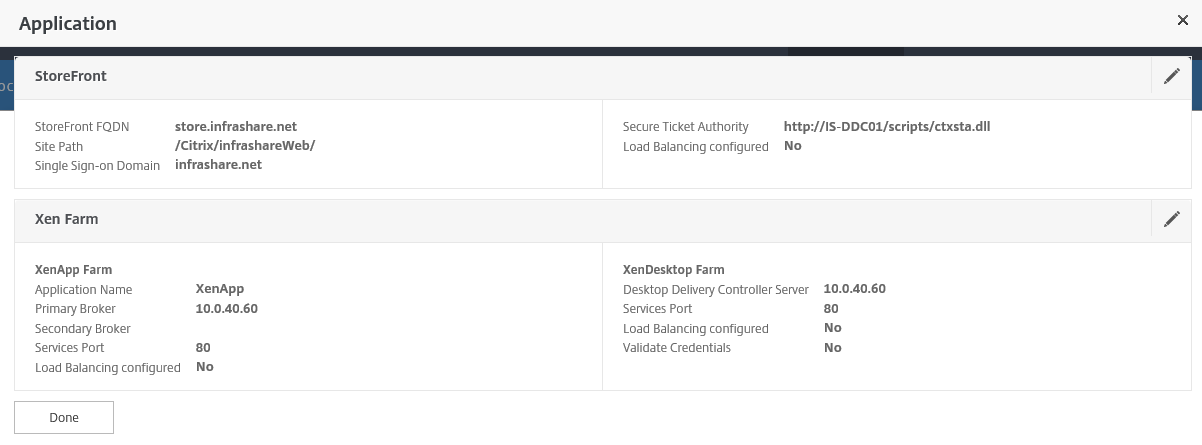
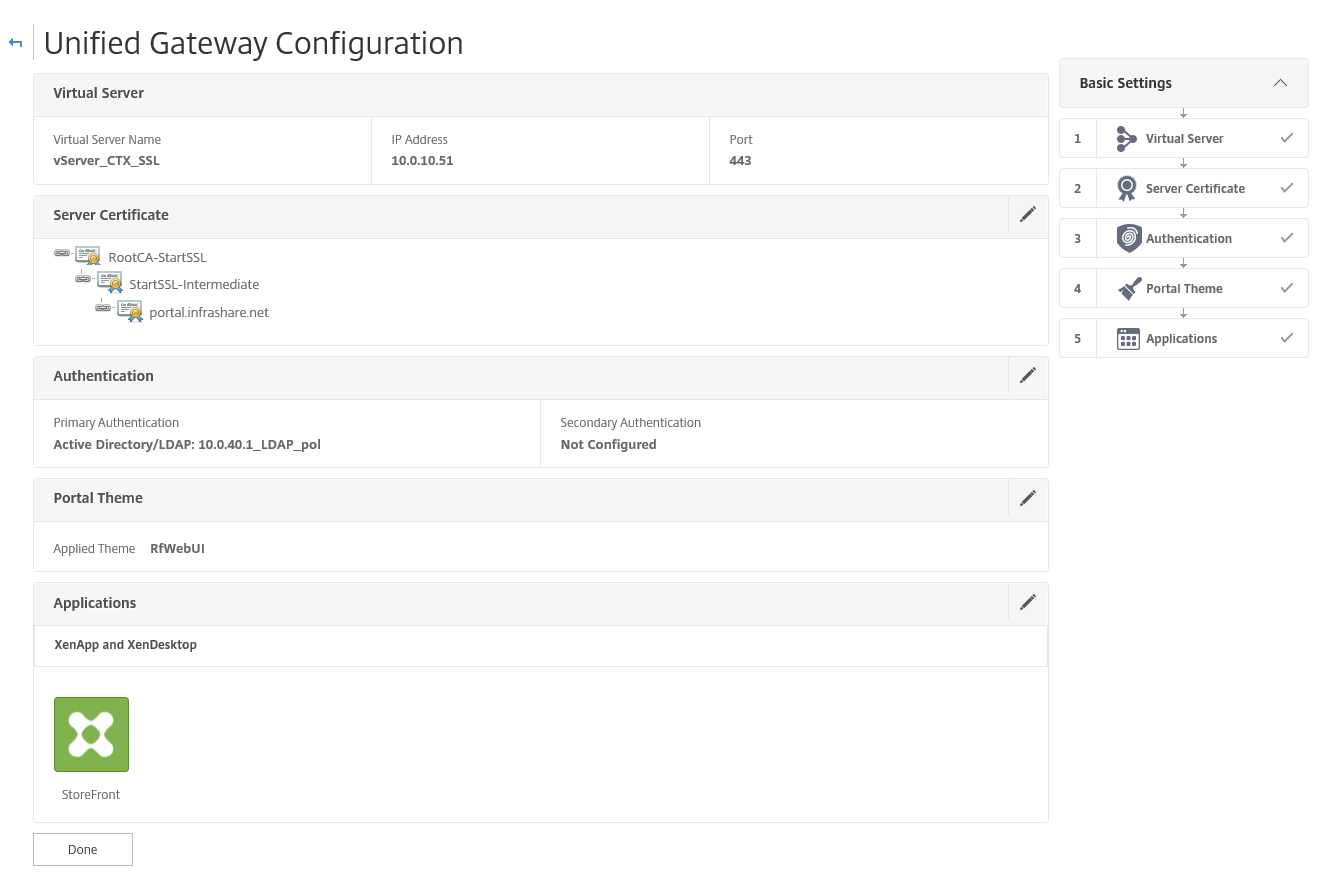
Step 56: A configuration summary will follow, please check all your settings and click on Done
Step 57: All the steps for StoreFront are now done, so let now add some internal webpages to the portal that can be accessible from the NetScaler Portal
Step 58: click on the pencil button next to Application

Step 59: A plus button shows up, click on the plus

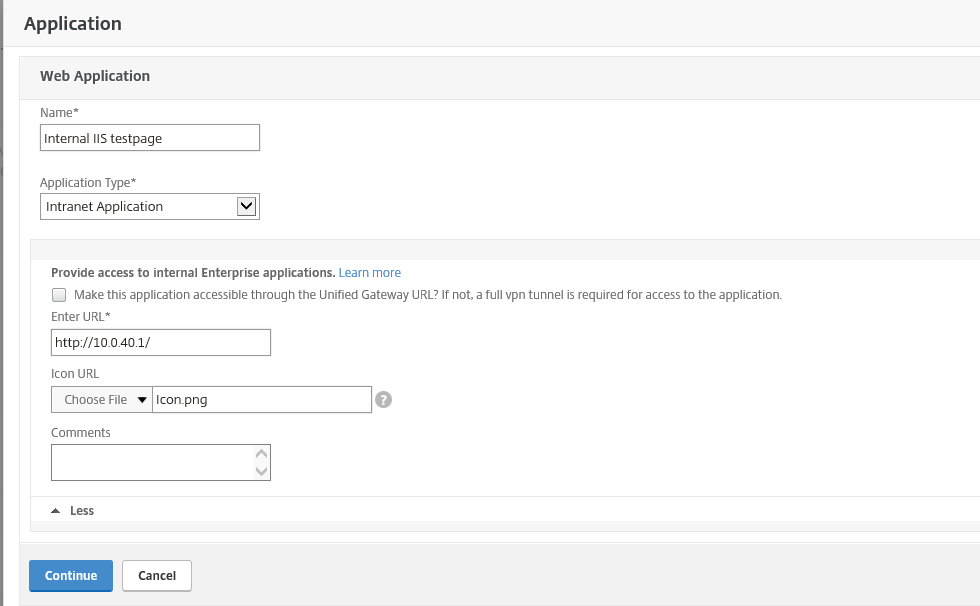
Step 60: The page where you can add different kinds of internal web pages shows up, like an intranet page, Exchange OWA or a Web Based Application used as SaaS application.
The Application Types that you can choose from are:
Intranet Application (Provide access to internal Enterprise applications)
Clientless Access (Configure clientless access URLs such as Outlook Web Access or SharePoint)
SaaS (Configure Enterprise or SaaS applications URL such as ShareFile)
For this article sample, I will choose a normal IIS page and setup my blog logo as icon, and click on Continue
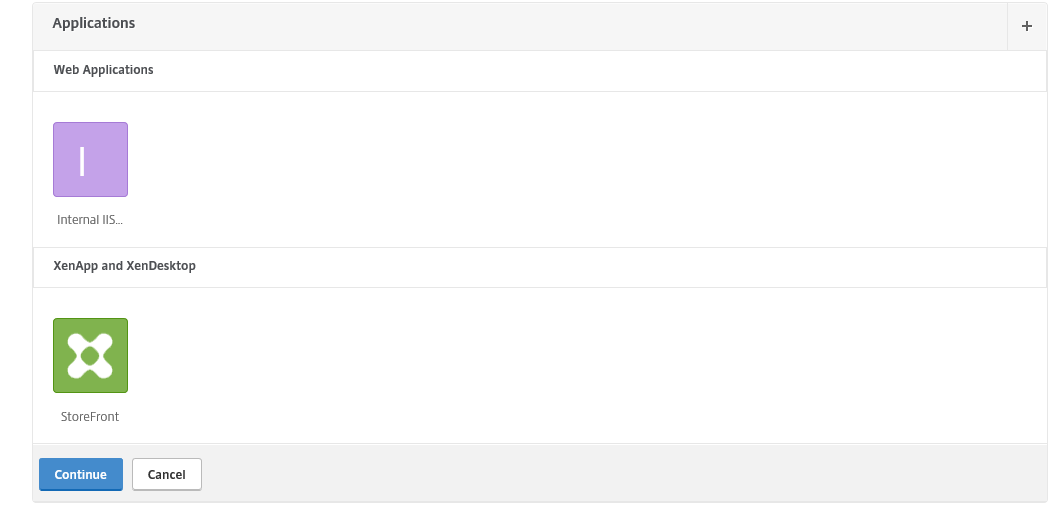
Step 61: You can now see 2 Applications are added at the Unified Gateway Configuration Screen, click on Continue and Done to confirm the settings
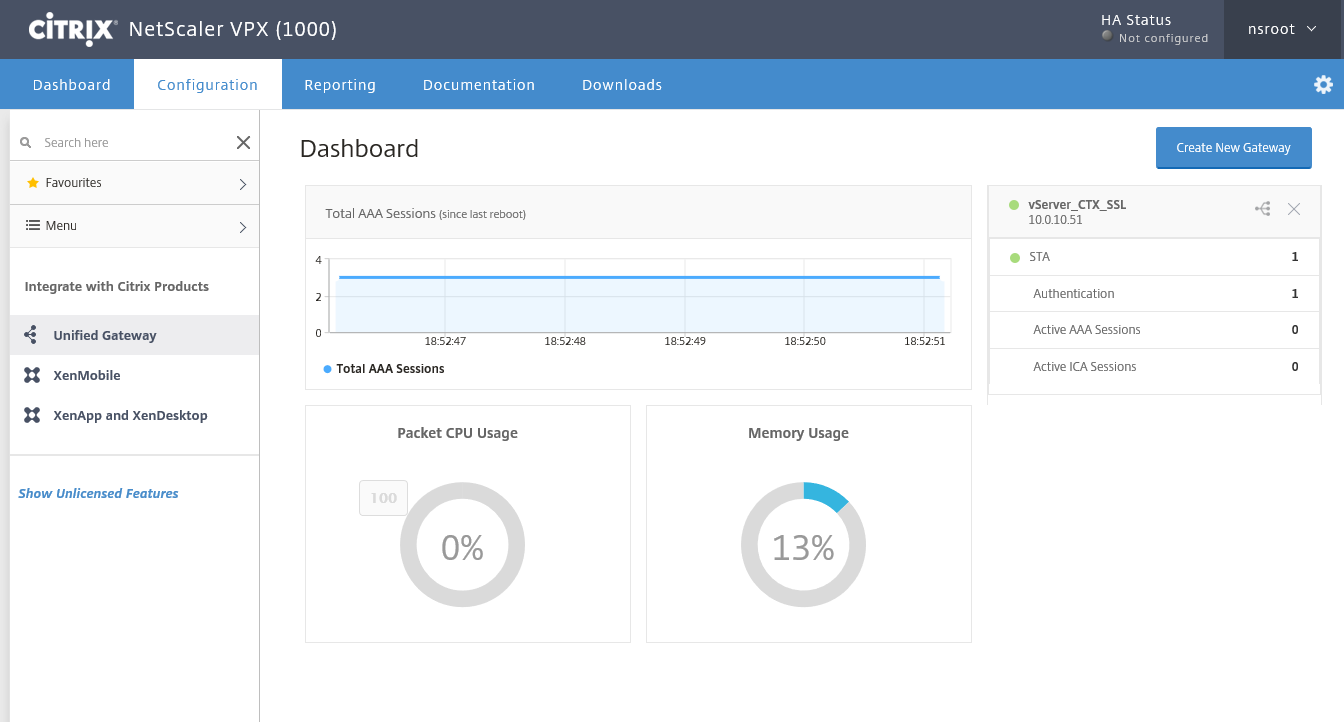
Step 62: The configuration steps are now done and the Dashboard screen shows up
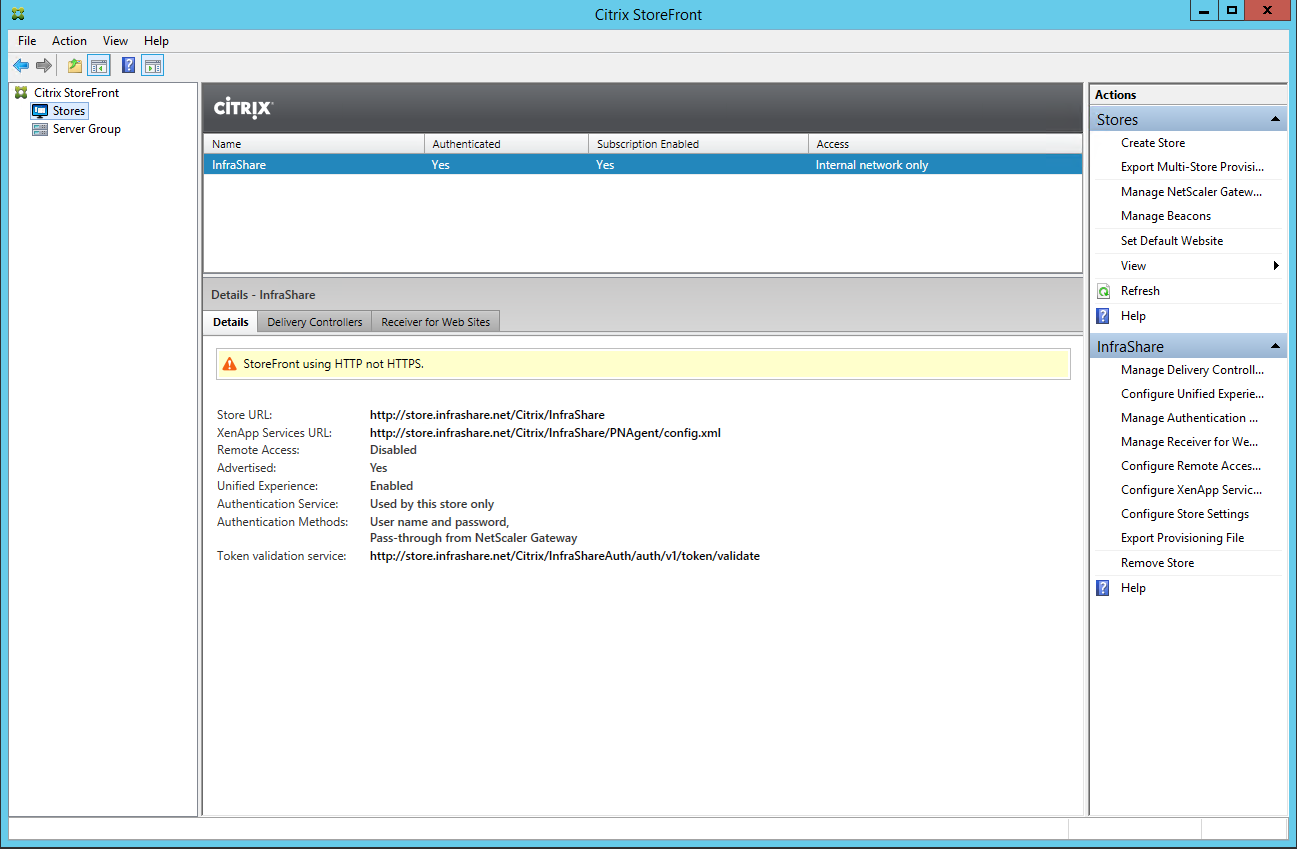
Step 63: Now we need to configure the StoreFront part to make the Callback URL work, so logon to your StoreFront server and start the Stores option in the StoreFront MMC Console
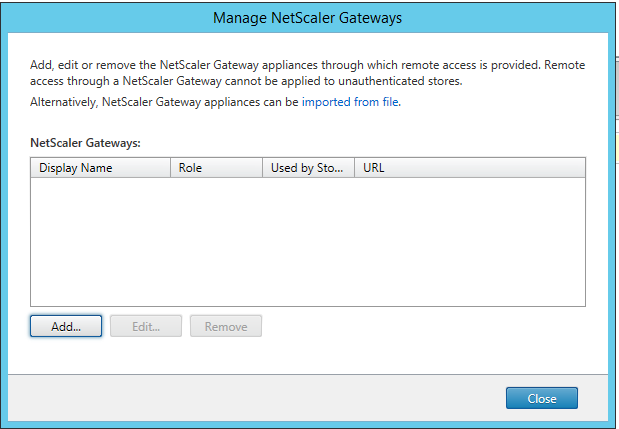
Step 64: Click on the Manage NetScaler Gateway option
Step 65: Click on the Add button
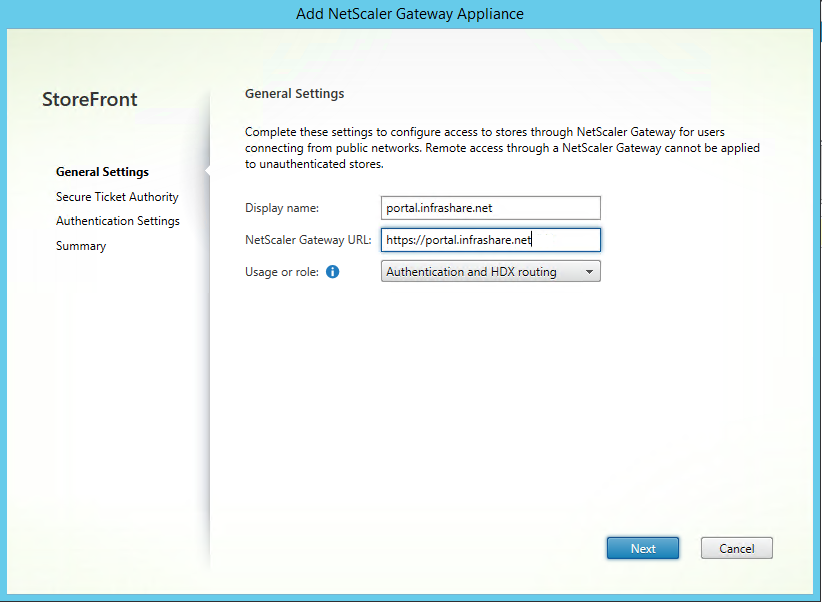
Step 67: Fill in your Display name, external URL, set the Usage or Role to Authentication / HDXand click Next
Step 68: Add your STA (Secure Ticket Autority) location, this one needs to point to your Desktop Brokers DNS name or IP. Choose for HTTP if your setup is default, if you have a 443 binding on your desktop broker, then use https, click on Ok and on Next

Step 69: fill in your Unified Gateway Virtual IP in the VServers IP Address field, keep the Logon type on Domain and fill in the external HTTPS URL as callback and click on Create
Note: The Callback URL is optional, only when you use SmartAccess this option is required.

Step 70: A confirmation screen will return with, added successfully, click Finish and close the Manage NetScaler Gateway screen

Step 71: Click in the Store screen on Configure Remote Access Settings
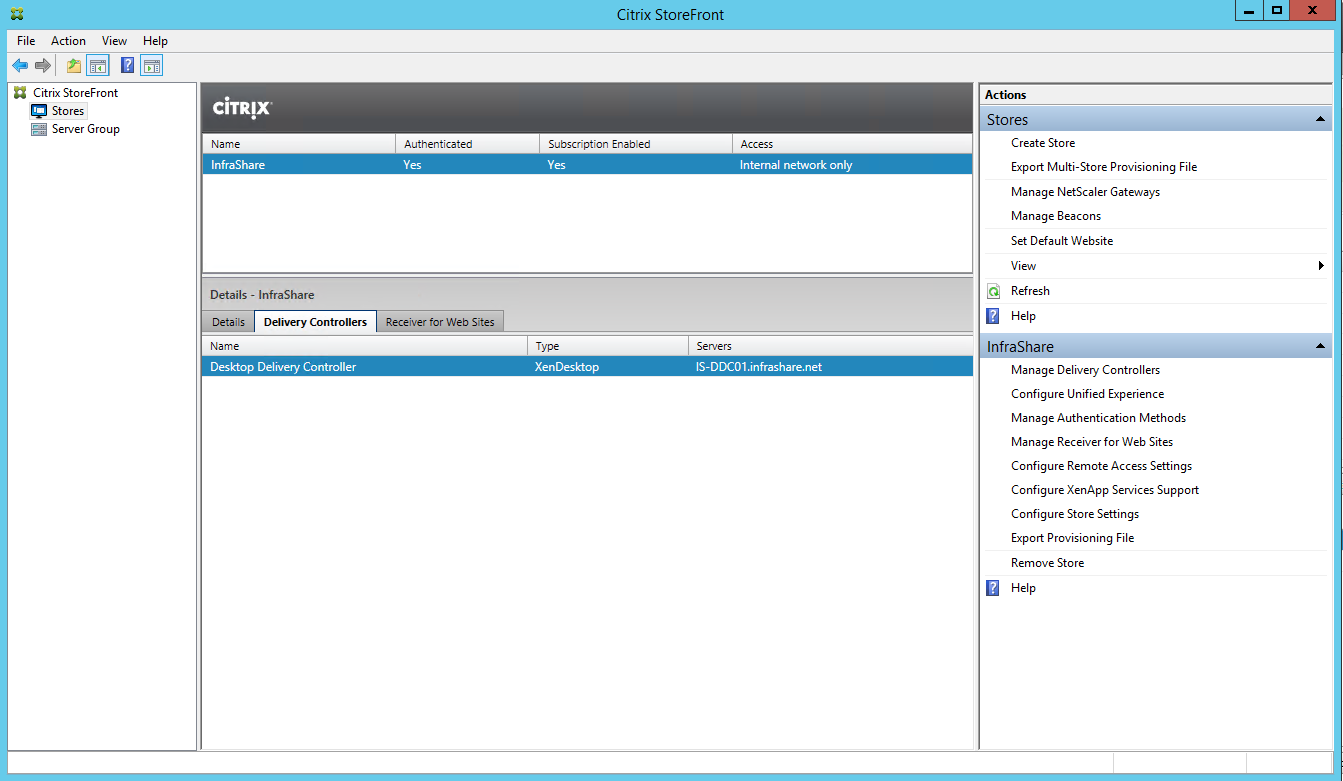
Step 72: Enable the Enable Remote Accessoption and on the box next to your Display Name and click on Ok

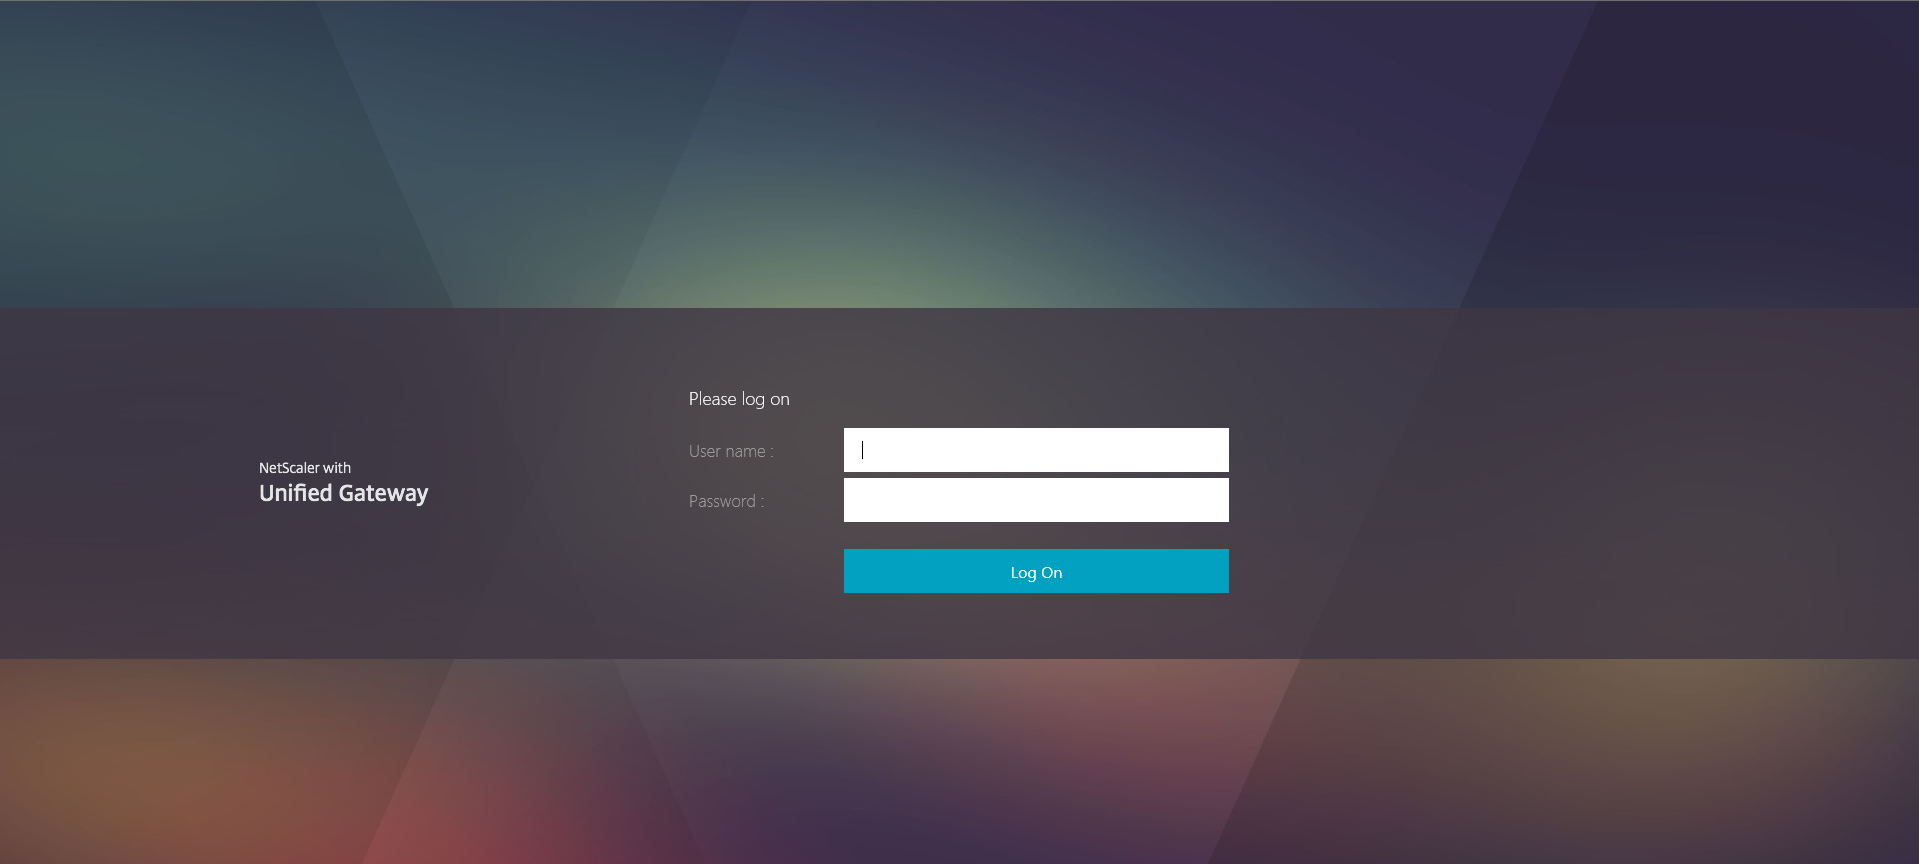
Step 73: Now are all the configuration parts done, lets open an internet browser and browse to your NetScaler URL, like https://portal.infrashare.net/ and fill in your domain credentials.
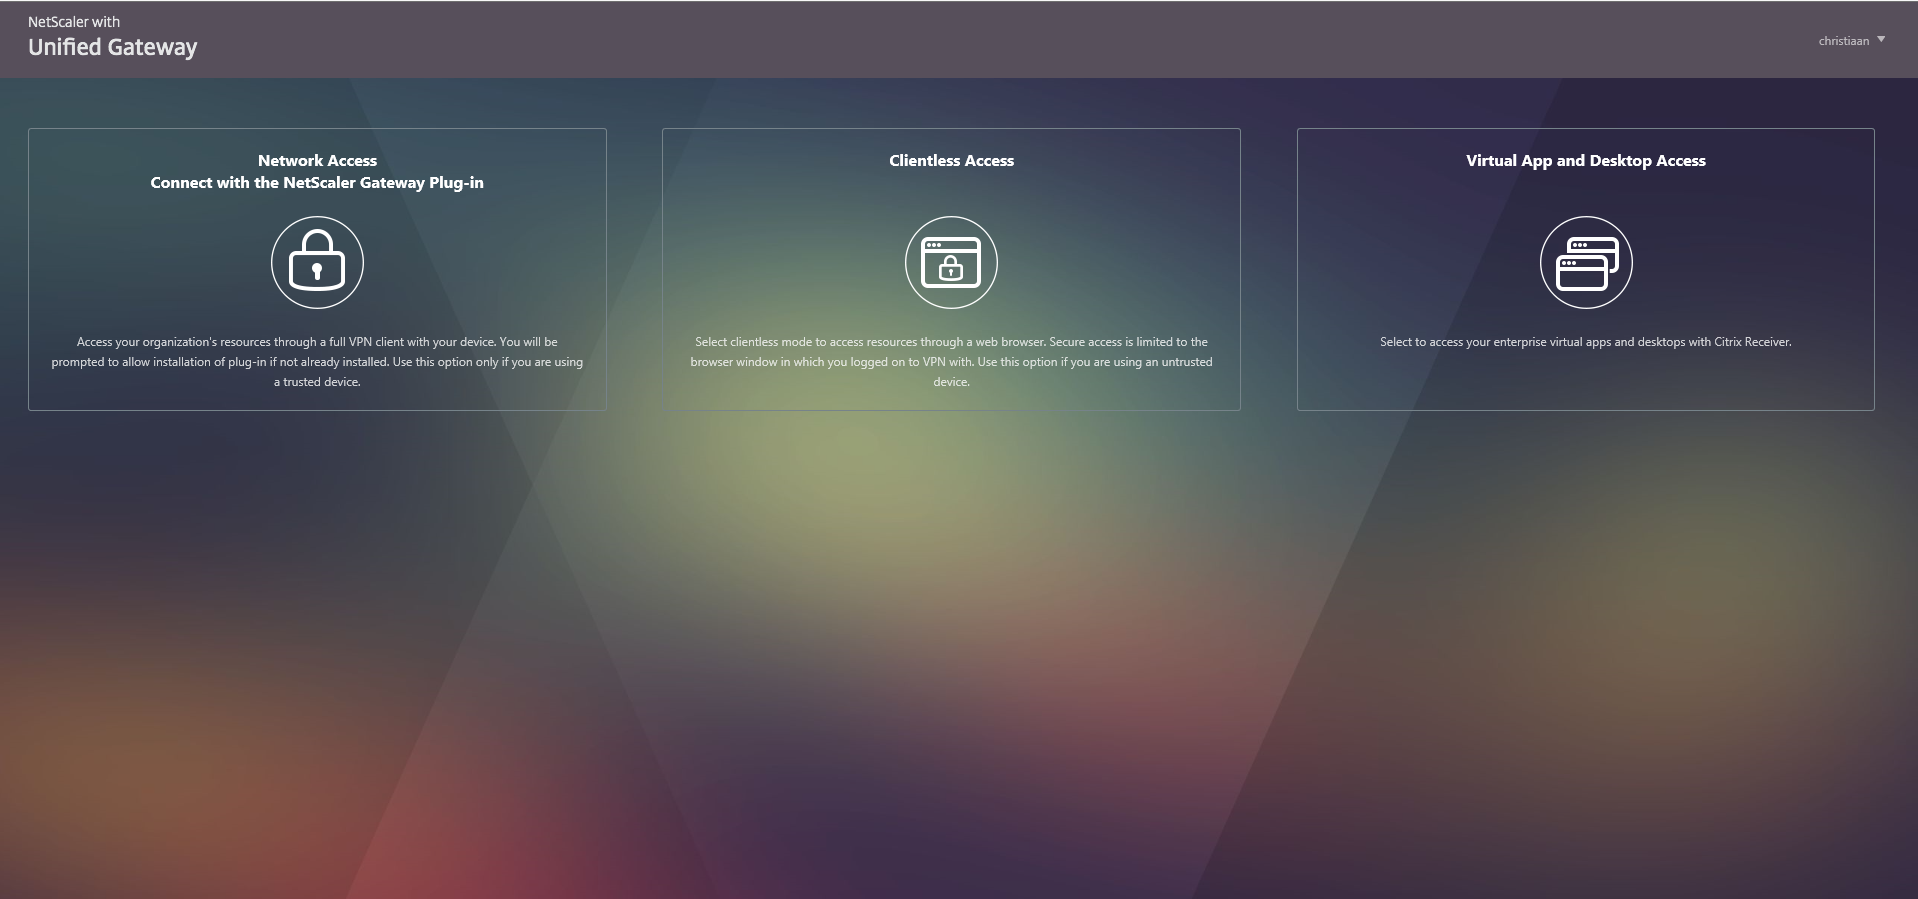
Step 74: Now the Unified Gateway “home” screen pumps up; here can you choose what direction you want to take:
Option 1: SSL VPN with plug-in | Option 2: Open intranet page without plug-in | Option 3: ICA Proxy / Storefront
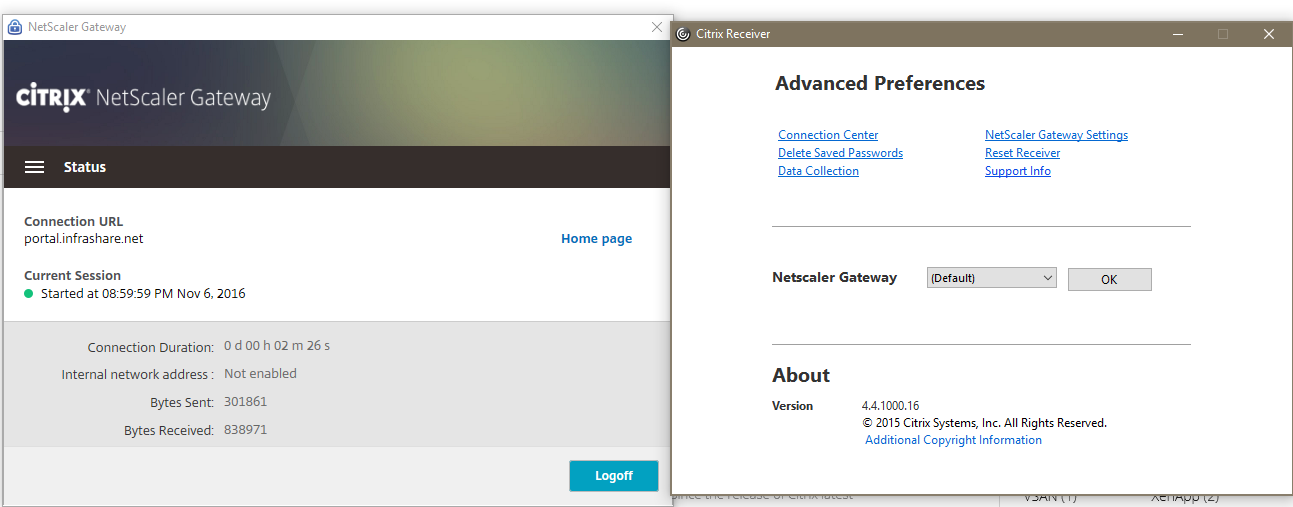
Step 75: Choose for Option 1 if you want to make use of the IP VPN functionality, first of all the NetScaler Gateway Plug-in must be installed, if you haven’t already, you will get a download prompt, after the installation and connection establishment you will be able connect directly to your internal LAN servers!

Step 76: You can check your connection status in the Receiver Advanced Preferences menu, then choose for NetScaler Gateway Settings followed by Open.
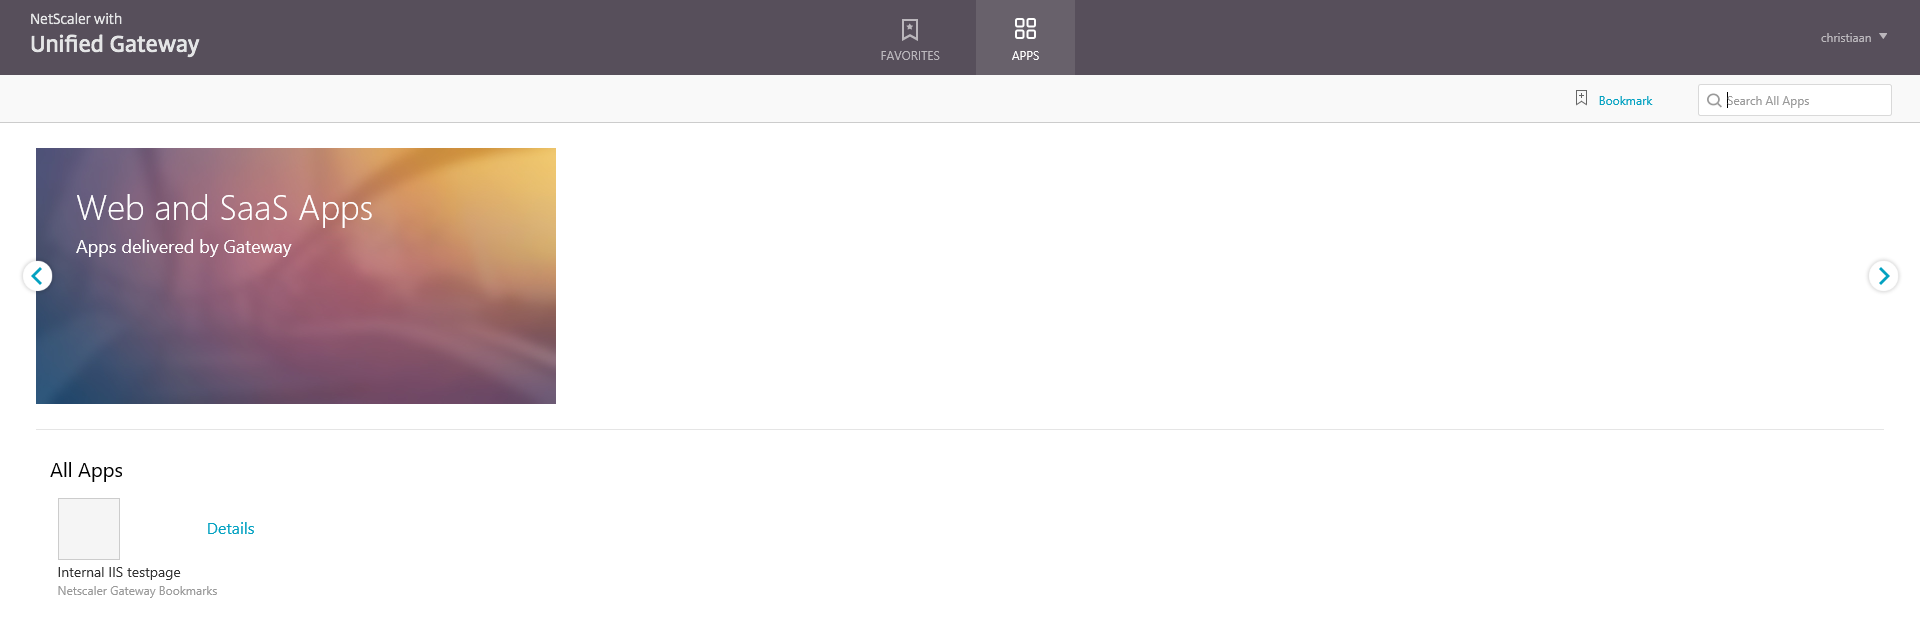
Step 77: If you choose for Option 2, then you see next screen, you get the possibly to connect directly to your intranet website without a VPN client!
Step 78: The last option 3 is the most common features that is used by Citrix Professionals, the ICA proxy also knows as the NetScaler Gateway functionality. This option directs you to your internal StoreFront page and let you be able to logon to your XenApp or XenDesktop farm!

Under the hood
Some of the configuration parts that the wizard did for you…
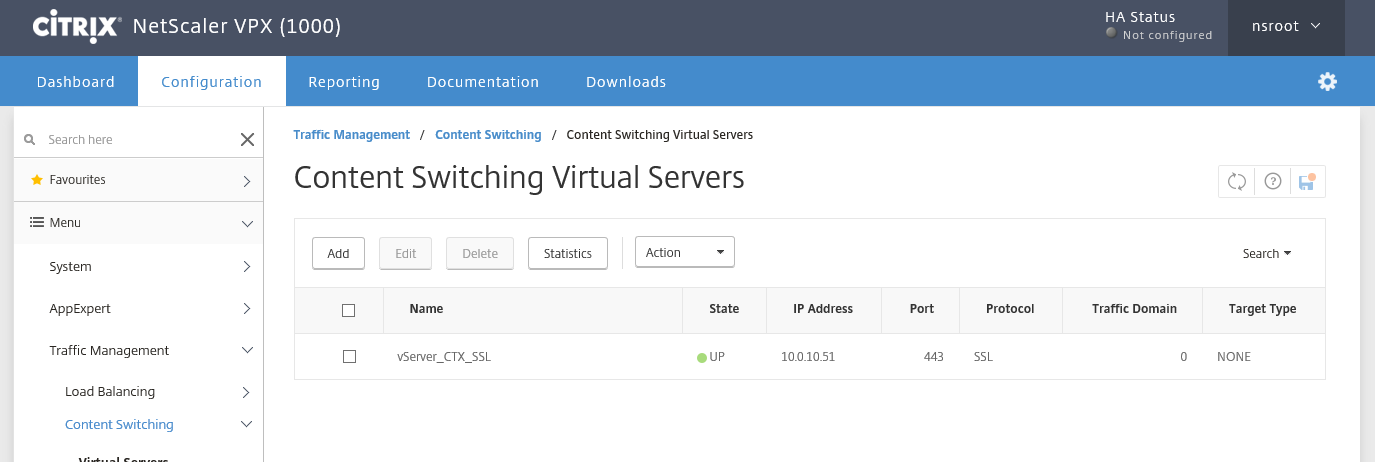
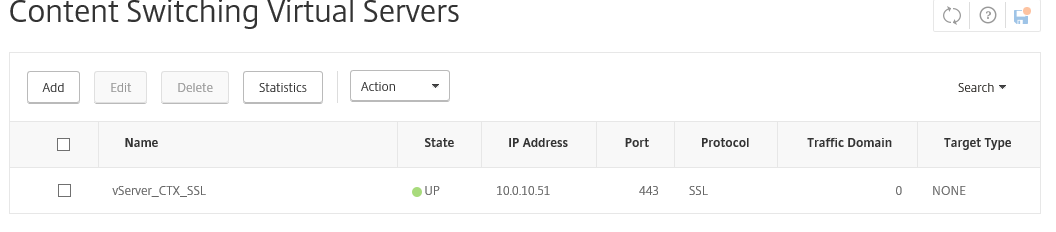
- The wizard has created a Content Switch (CSW) for you!
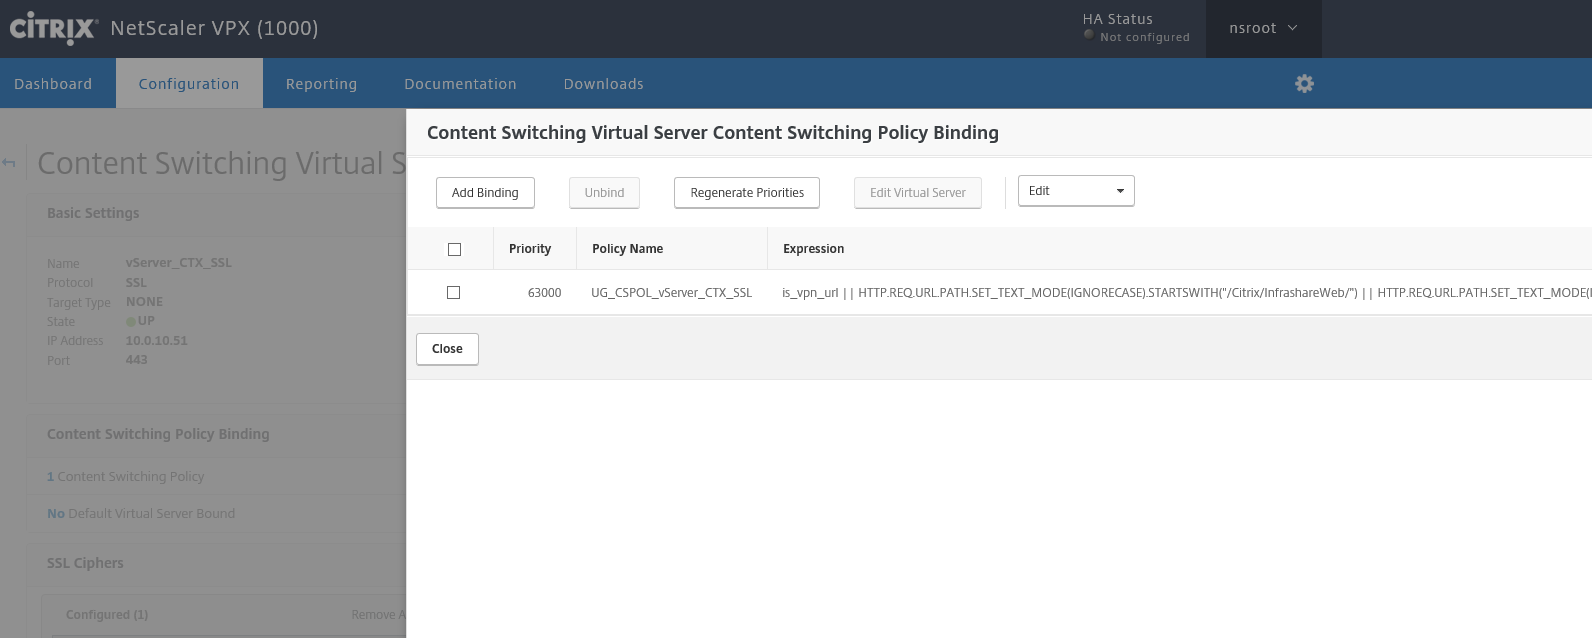
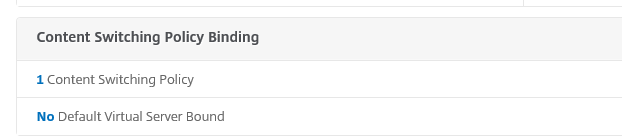
- And create a policy binding, that’s connects the StoreFront | ICA Proxy functionality
Troubleshooting
If the Virtual Apps and Desktops option redirects you to the next HTTP/1.1 Service Unavailable error like the picture below, you must change the Content Switching Expression, to do so:
![]()
Change the Content Switch binding for the NetScaler Gateway, go to Traffic Management, open the Content Switching menu and edit your Virtual Server
Click on the Content Switching Policy
Tick on the box next to the policy name and click Edit Policy
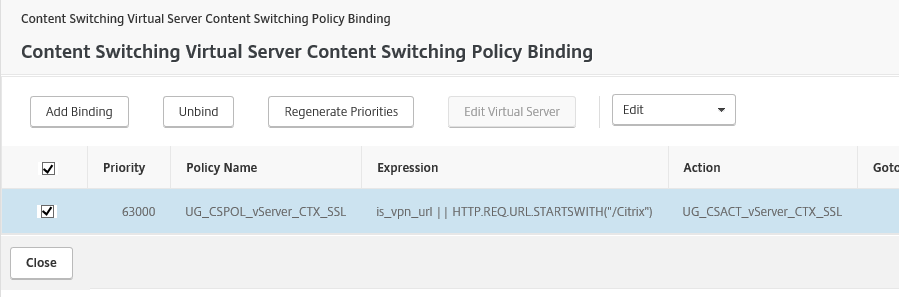
Replace the default Expression and your StoreFront is responsive again!
is_vpn_url || HTTP.REQ.URL.STARTSWITH(“/Citrix”)
